How to Repaint a Ukulele
I found a tatty old ukulele on the beach last summer and rescued it, with a plan to refurbish it. It was missing a string and was a bit dirty but otherwise it was in good condition. I knew it would make an excellent present!
I did some research on what paint to use and what the dangers are of repainting an instrument and decided to use thin layers of acrylic paint and turn the ukulele into a painting of the universe with a giant moon in the middle. Read on to find out how this project turned out!
Materials Needed:
- sandpaper for removing the varnish
- gesso for priming the wood
- cleaning products
- craft knife, scissors
- brushes for priming, painting and dusting
- a palette to mix paint on
- acrylic paint
- glitter/metallic pigments (optional)
- spray varnish (Gloss)
- New set of strings
- binbags or other protection for your surfaces

Step 1. Cleaning the Ukulele
First of all I removed the strings, the saddle (plastic part on the bridge) and the tuning pegs, anything external that didn't need painting. Then I cleaned the ukulele and all the removed bits with a surface disinfectant and damp cloth.
Tip: here's a useful diagram of ukulele bodyparts if you need a reference.

Step 2. Sanding off the Varnish
The next step was sanding. I grabbed a sheet of fine sandpaper and tore it into small pieces which made it easier to get into smaller areas. I lightly sanded off the original layer of varnish, making sure not to damage the wood underneath. Then I dusted off the ukulele with a brush and wiped it with a damp cloth.

Step 3. Priming the Wood
Once the ukulele was completely dry and dust-free, I grabbed the gesso and applied two thin layers of it. I use Pebeo Gesso because it is good value for money but any acrylic primer will do. I find gessoing really enjoyable as it makes everything look brand new! When I was finished the instrument looked like a blank canvas, just how I wanted it!


Step 4. Painting the First Layers
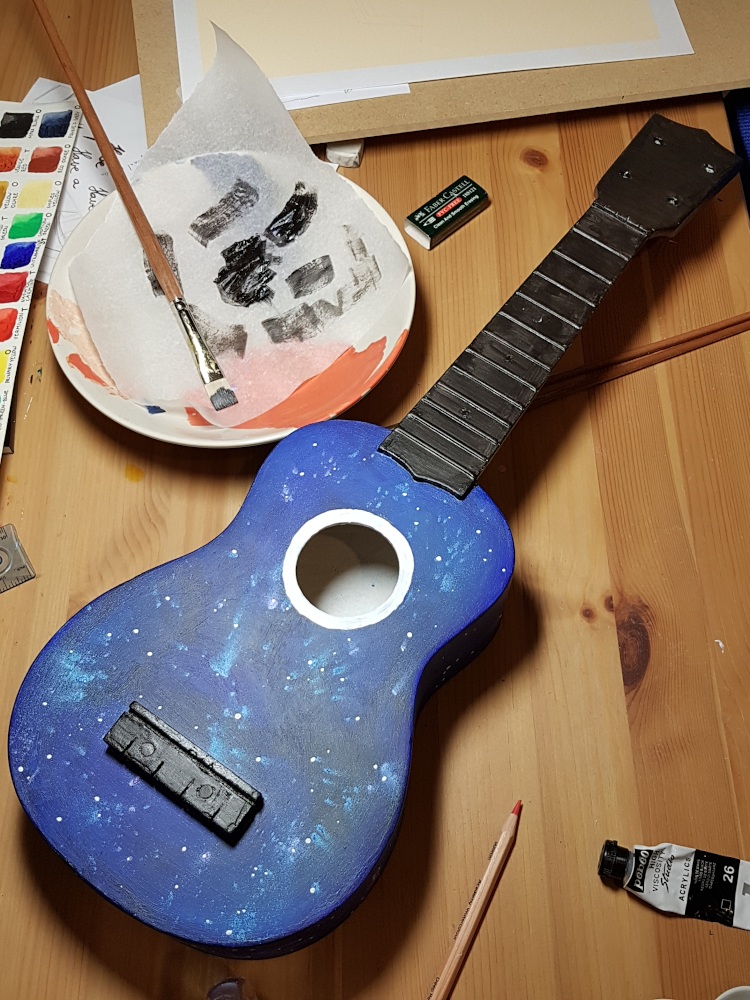
Once the gesso was dry I could start the painting process. I squeezed out all my different blues on the palette and blended them on the ukulele as I went. I didn't worry much about the placement of colour as I just wanted the instrument to have a nice variety of blues. I used my Pebeo Acrylics, a 40 colour set that has served me well on craft projects like this. They dry pretty quickly which meant that I could paint sections of the ukulele's body (front, sides and back) and it was ready for the next layer when I came full circle. I left the bridge, the neck and head of the ukulele white as those would later be painted black.

I also painted the inside of the instrument white to give a nice contrast and also to create a backdrop for the moon. According to my research all painting has to be done in thin layers and not more than 2 or 3 of them in order not to change the sound of the ukulele. Too many layers of thick acrylic paint can make it sound boxy, especially when it's inside.
Step 5. Adding Details
I used the white acrylic to paint a thick circle around the soundhole, then I started adding the stars and other planets with the tip of a detail brush. I also added metallic pigments by sprinkling them with my fingers then blowing on them, this created the effect of distant star systems which I really liked. In hindsight I should have done this as a last step before varnishing as the glitter was a bit hard to contain while still handling the ukulele.

Step 6. Painting the Black Areas

I painted the neck, head and the bridge black in two layers, making sure that I don't clog up the holes where the tuning pegs, the saddle and the strings are fitted. These areas are hard to avoid no matter how careful you are so be prepared to remove some of the dry paint later with a craft knife. Once the neck was dry I got some more sandpaper and removed the paint from the frets, dusted them off and painted them with Daler Rowney FW Galactic Blue in two layers. I finished off the neck with another layer of black between the frets to correct what the sandpaper removed. I also used the ink for accenting the screws.

Step 7. Painting the Moon
Then I mixed up different hues of greys and painted the moon. This was a bit tricky as it was hard to get inside the soundhole and paint accurate circles.
I made sure that I painted a large section of the inside so no matter what angle you looked at the ukulele it would still give you the impression that it is the moon.
Once the moon and all other details were done I went around the ukulele and corrected any iregularities and added back some of the glitter that disappeared from handling.

Step 8. Varnishing
Once I was happy with with the entire design I started on the varnishing. This is a very important step and don't be tempted to skip it as it will protect the paint from chipping. I used a gloss spray varnish from Montana as it seemed easier to apply on the irregular surface then regular brush-on types. I cut up a few bin bags to protect my table and opened the windows for this part of the project as varnish has a strong smell and spray varnish is particularly airborne! I applied the varnish to the front of the ukulele in a thin layer, waited until it was almost dry and applied it again. I repeated this until I was happy with the coverage then left the ukulele to dry overnight.
The next day I flipped over the instrument and varnished the back side. By the end I had a ukulele with a mirror shine which made it not only waterproof but very easy to keep clean!

Step 9. Fitting Pegs, Saddle and Strings
This was the final step where I turned my irregularly shaped canvas back into a working intrument and it was the most stressful part! I had to get new strings as the old set was missing one then I had to quickly teach myself the fixtures since I have never done this before. What made it even more complicated is that despite my best efforts the paint got into the peg holes and the bridge too, so I had to carve into these a little to make space for these parts. I was really worried that my DIY job will result in a ukulele that only looks like an instrument but sounds nothing like one but I was proven wrong. Phew!

The Results
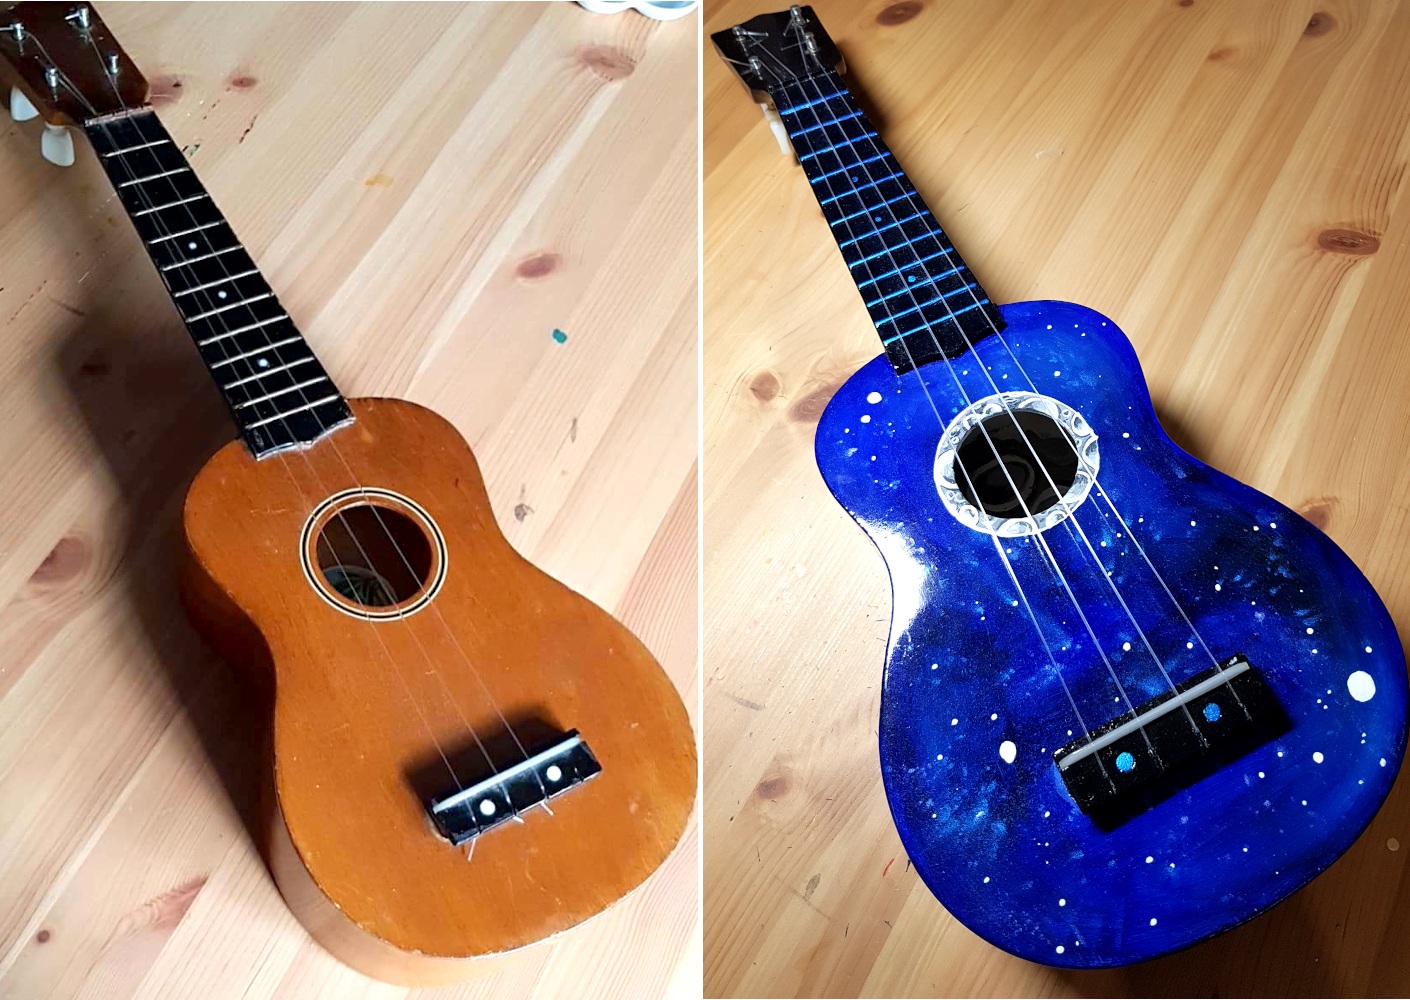
Here are the before and after photos of the ukulele. I hope you enjoyed this article and that it inspires you.
Tip: you can create your own design for painting a unique ukulele and you will find that many people have done this before. There are pinterest boards like this one that can give you ideas and inspiration. Have fun!


