Negative Painting with Watercolour
Watercolour is a popular medium all year around with the prospect of taking it outdoors in good weather. With not much to do outside in the winter, it is equally fun to cosy up and wait for spring with a warm cup of tea and a watercolour palette.
If you haven't tried this medium before, negative painting can be a fantastic way in; it is quick and simple and making mistakes with it is virtually impossible!
What is Negative Painting?
Negative painting is an alternative technique where instead of building up the painting by putting layers on top of each other, you paint around an object leaving it unpainted. This creates a contrast between light and dark areas as the object stays light and the background gets gradually darker as more and more layers are added. This is utilised in watercolour painting to express depth and to create shapes, from simple exercises (such as the one that follows) to complex artworks.
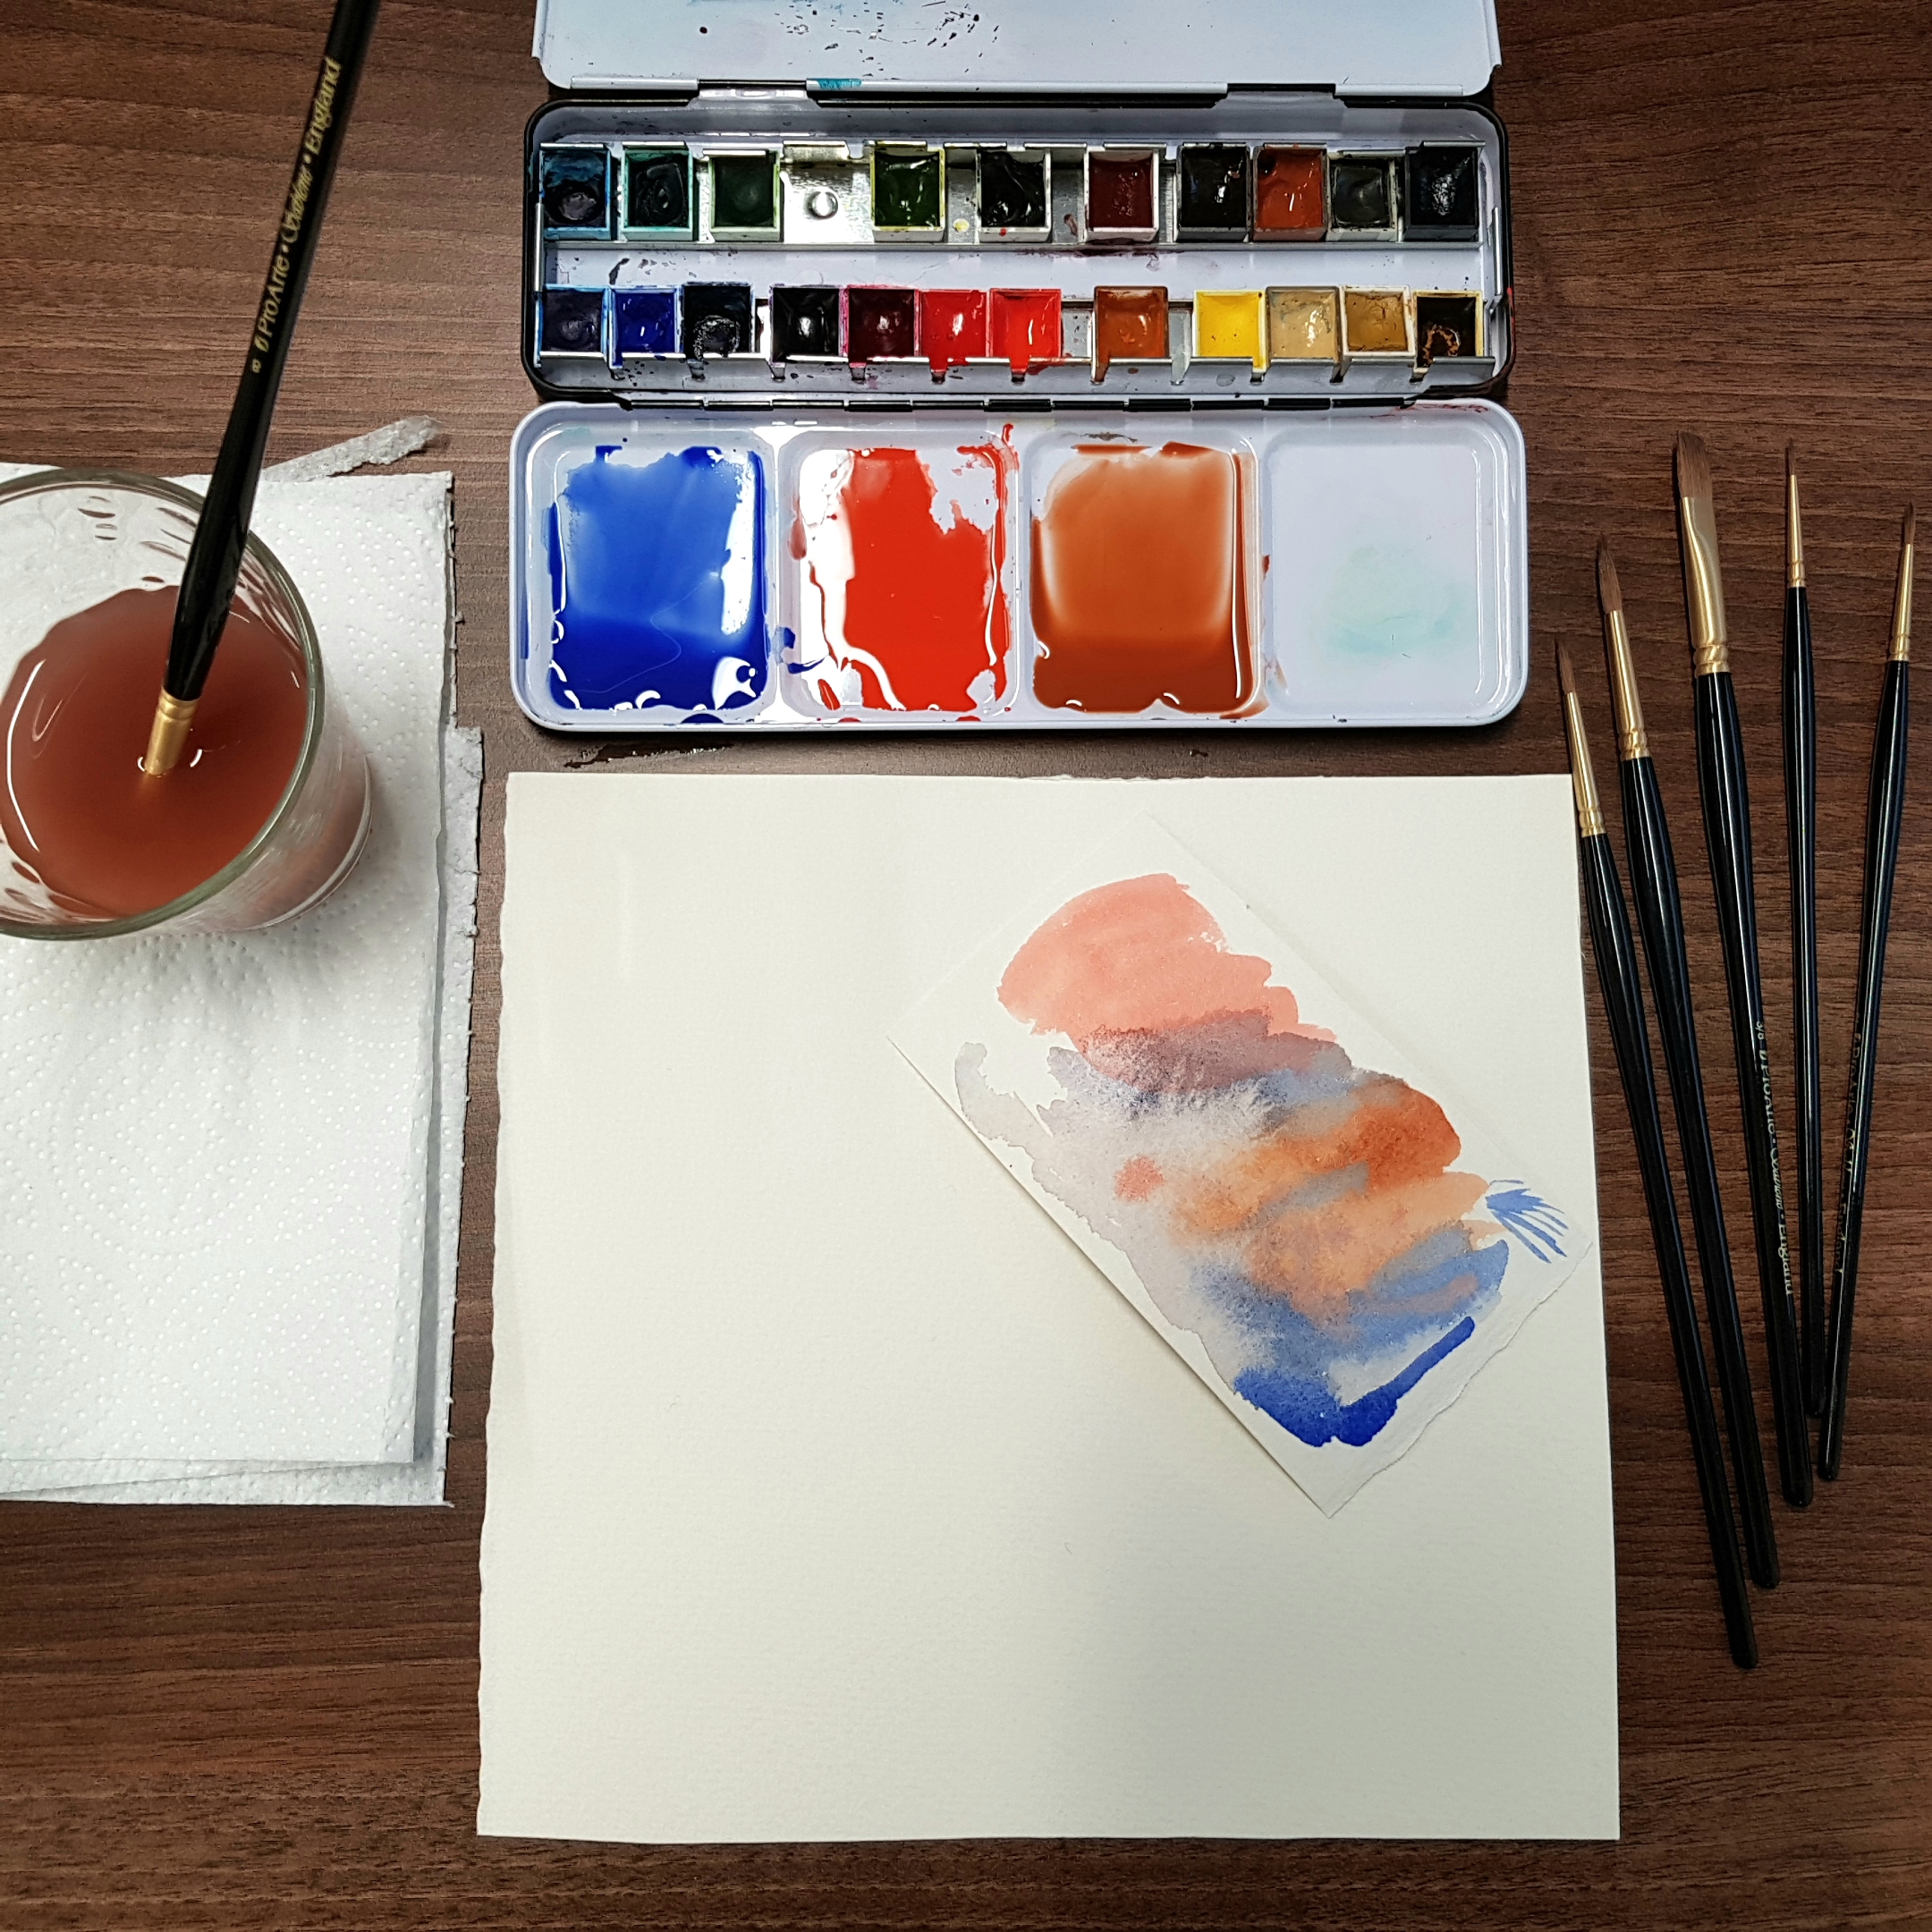
What you will need:
- 2-3 different colours (I used complimentary colours Old Holland Burnt Sienna and Ultramarine, plus Cadmium Red Light for variety). Keep in mind that transparent and semi-transparent pigments are best for glazing.
- A round brush - usually one size is enough (I used a number 8 Pro Arte Sablene on a 20 x 20 cm paper)
- watercolour paper (I used rough Khadi paper in 320gsm weight)
Step 1: Drawing the Image
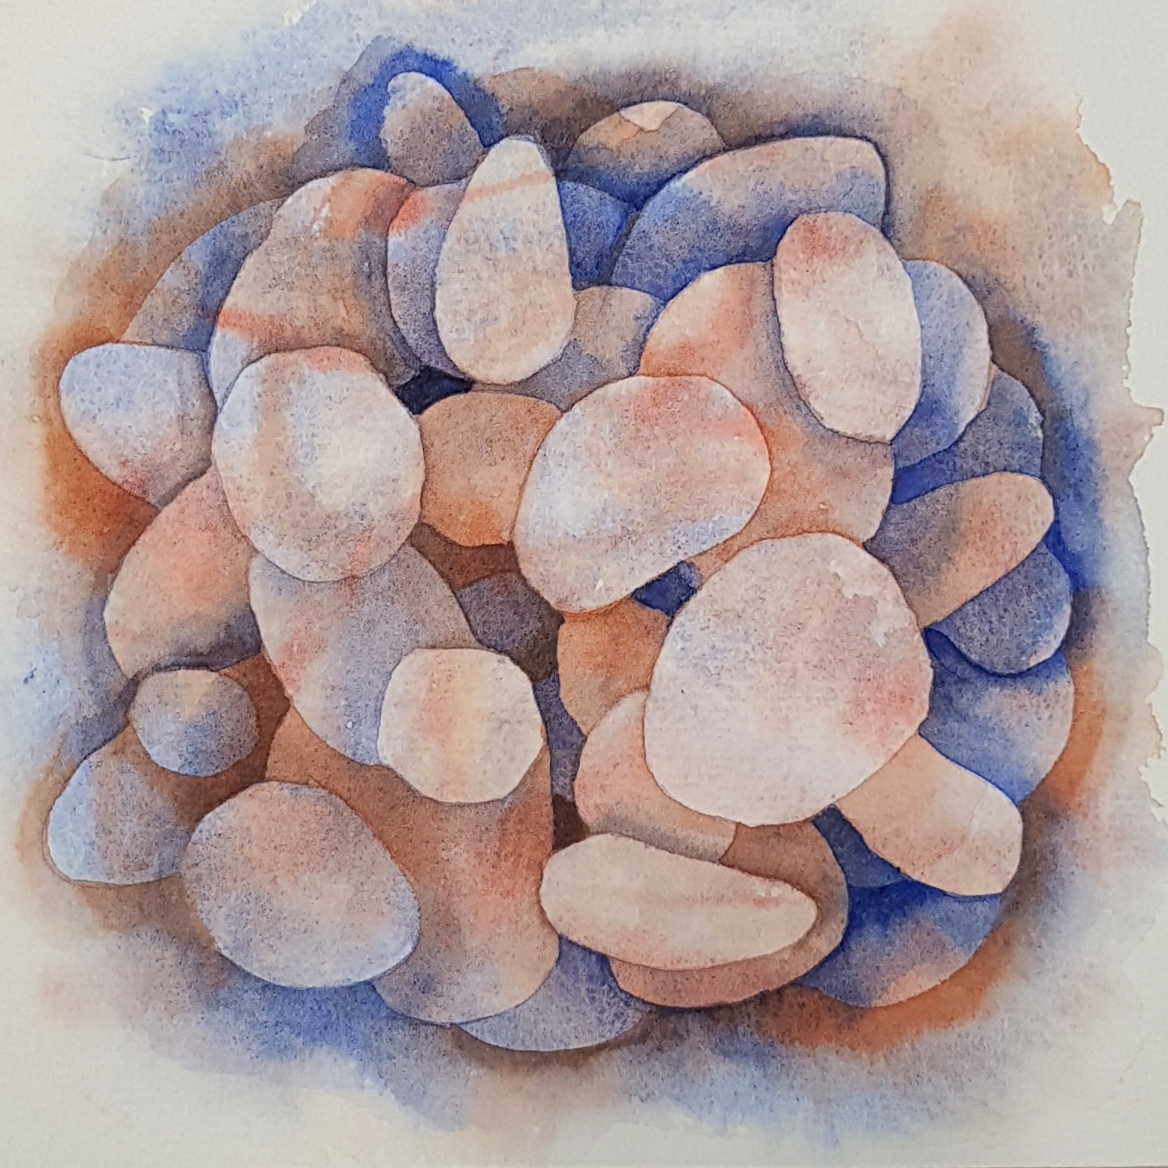
Decide on a simple shape to work with. In my case it was oval shaped beach pebbles. If you want a bigger challenge you can go with flowers, hearts or trees even - something that you can arrange over one another in a cluster. I started with 8-10 pebbles which would become the foreground then moved onto a layer underneath to draw the next round of pebbles.
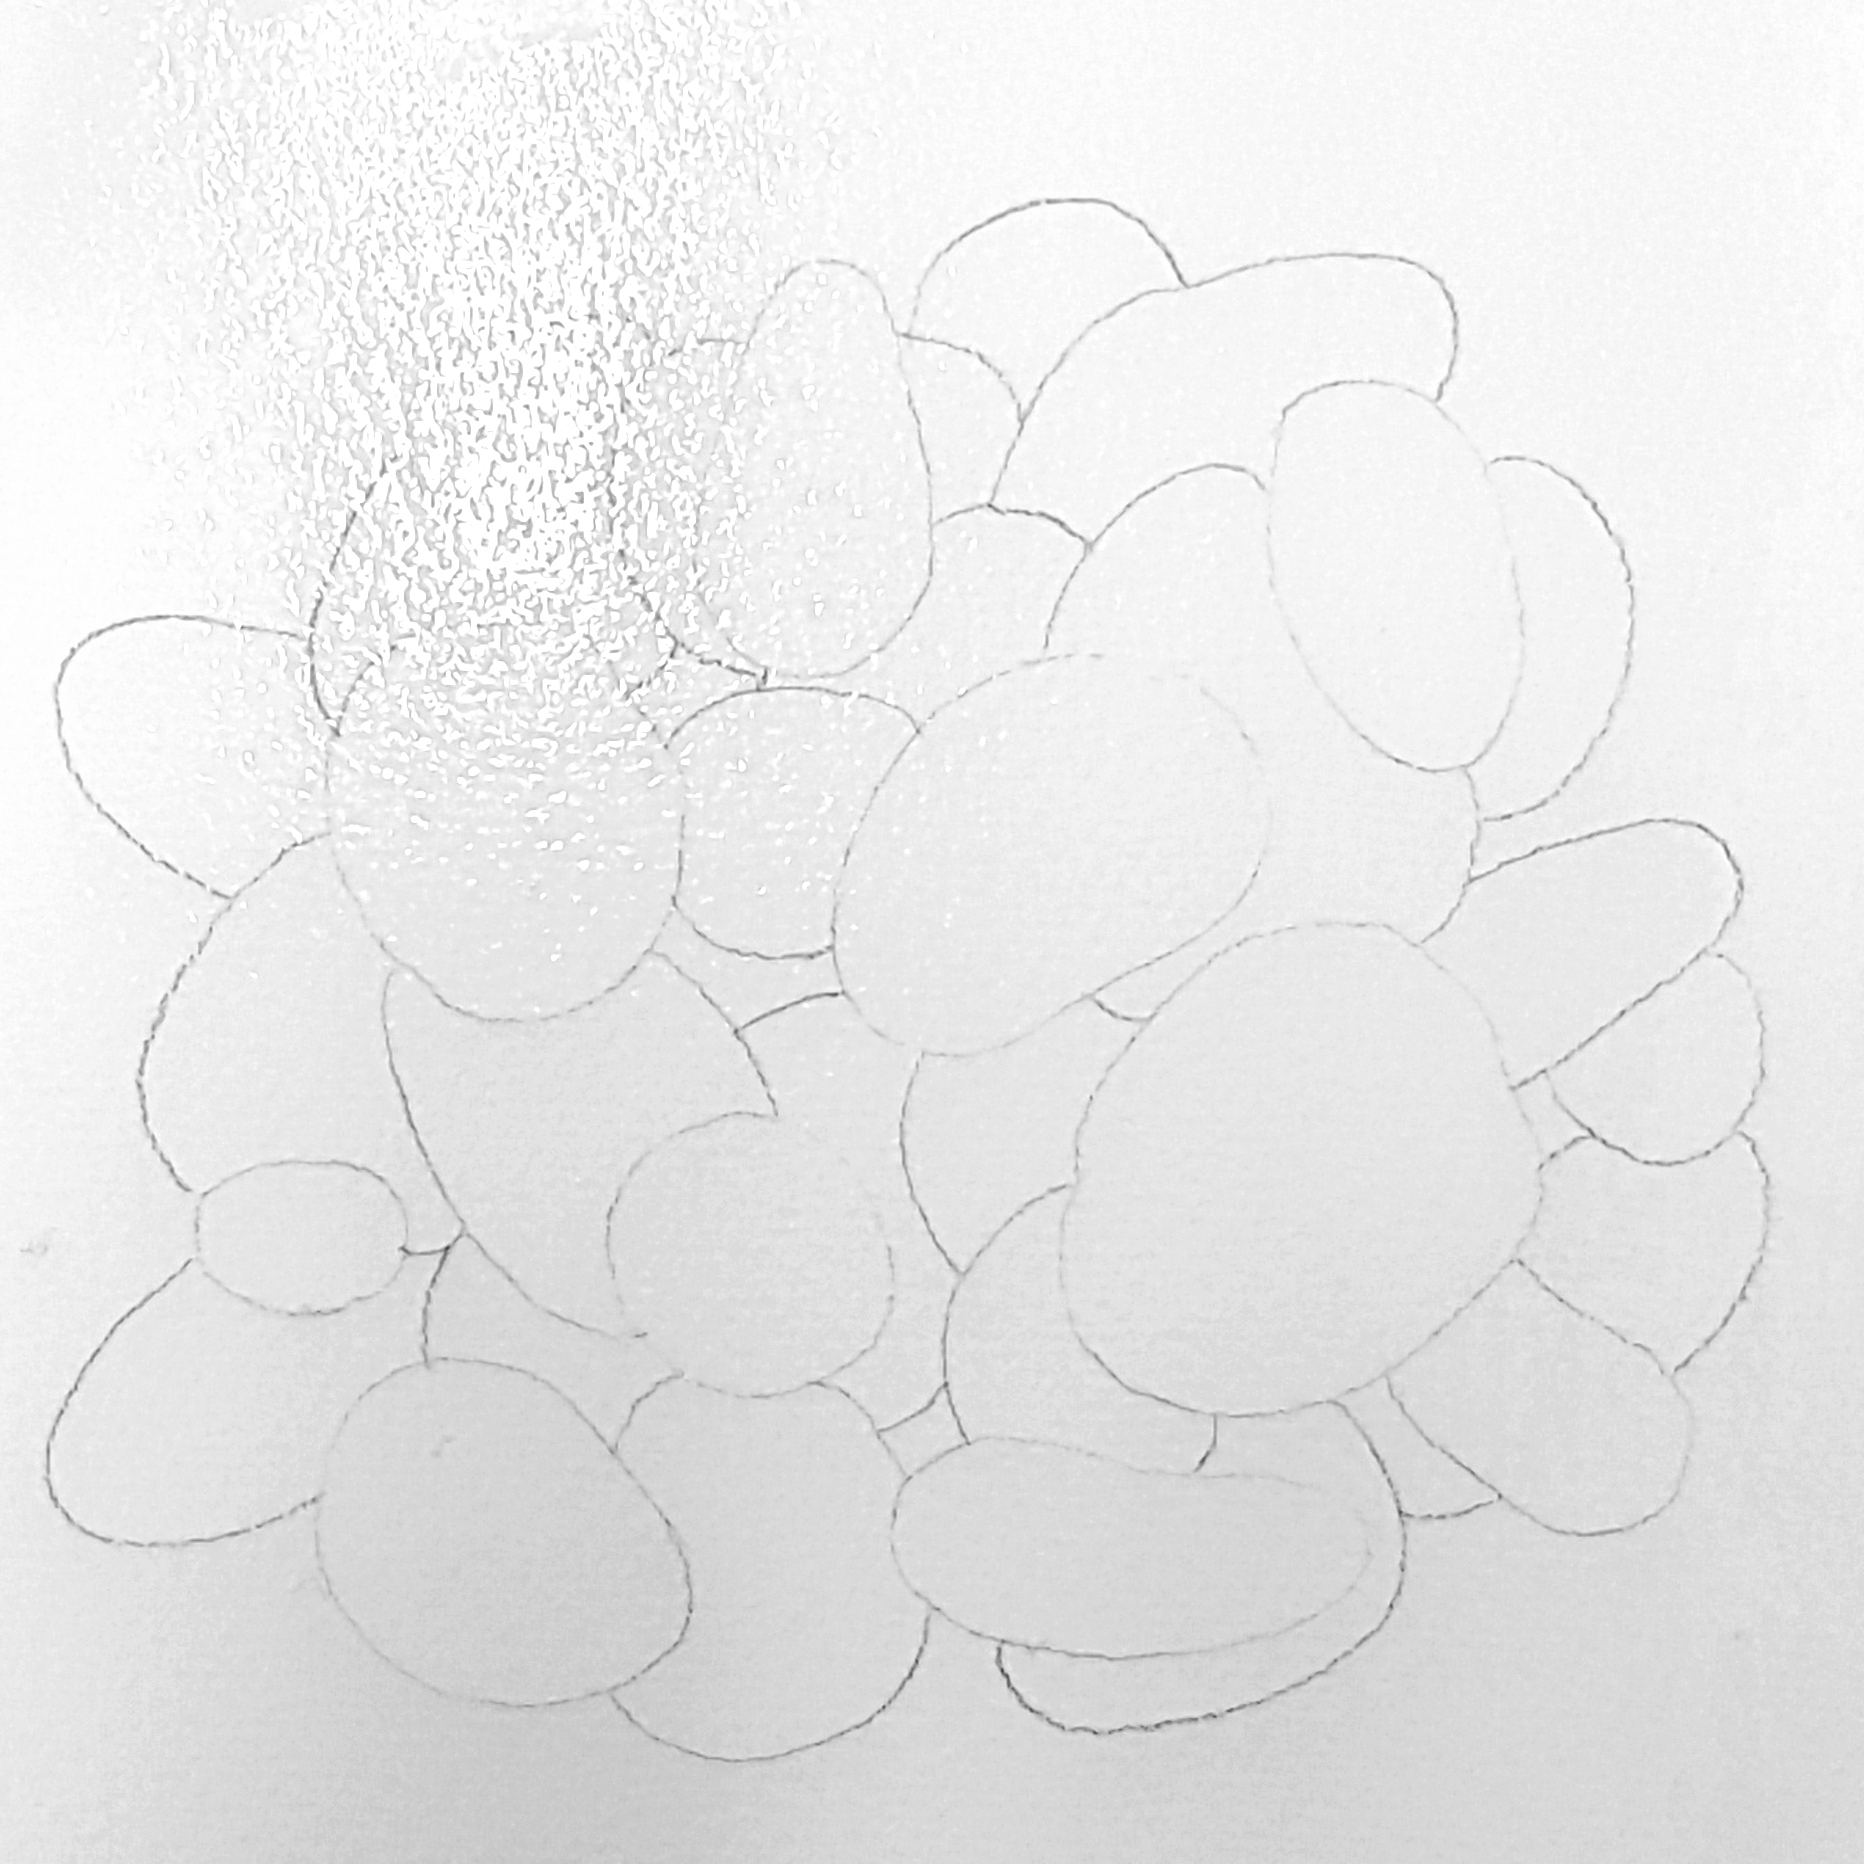
Instead of putting pebbles in the empty spaces, make sure they are overlapping with the layer above. Carry on with more layers and alternate the sizes and shapes of your objects until you are satisfied, paying attention to your composition too. Once it's finished wet the paper thoroughly.
Step 2: Layer 1 - Wet in Wet
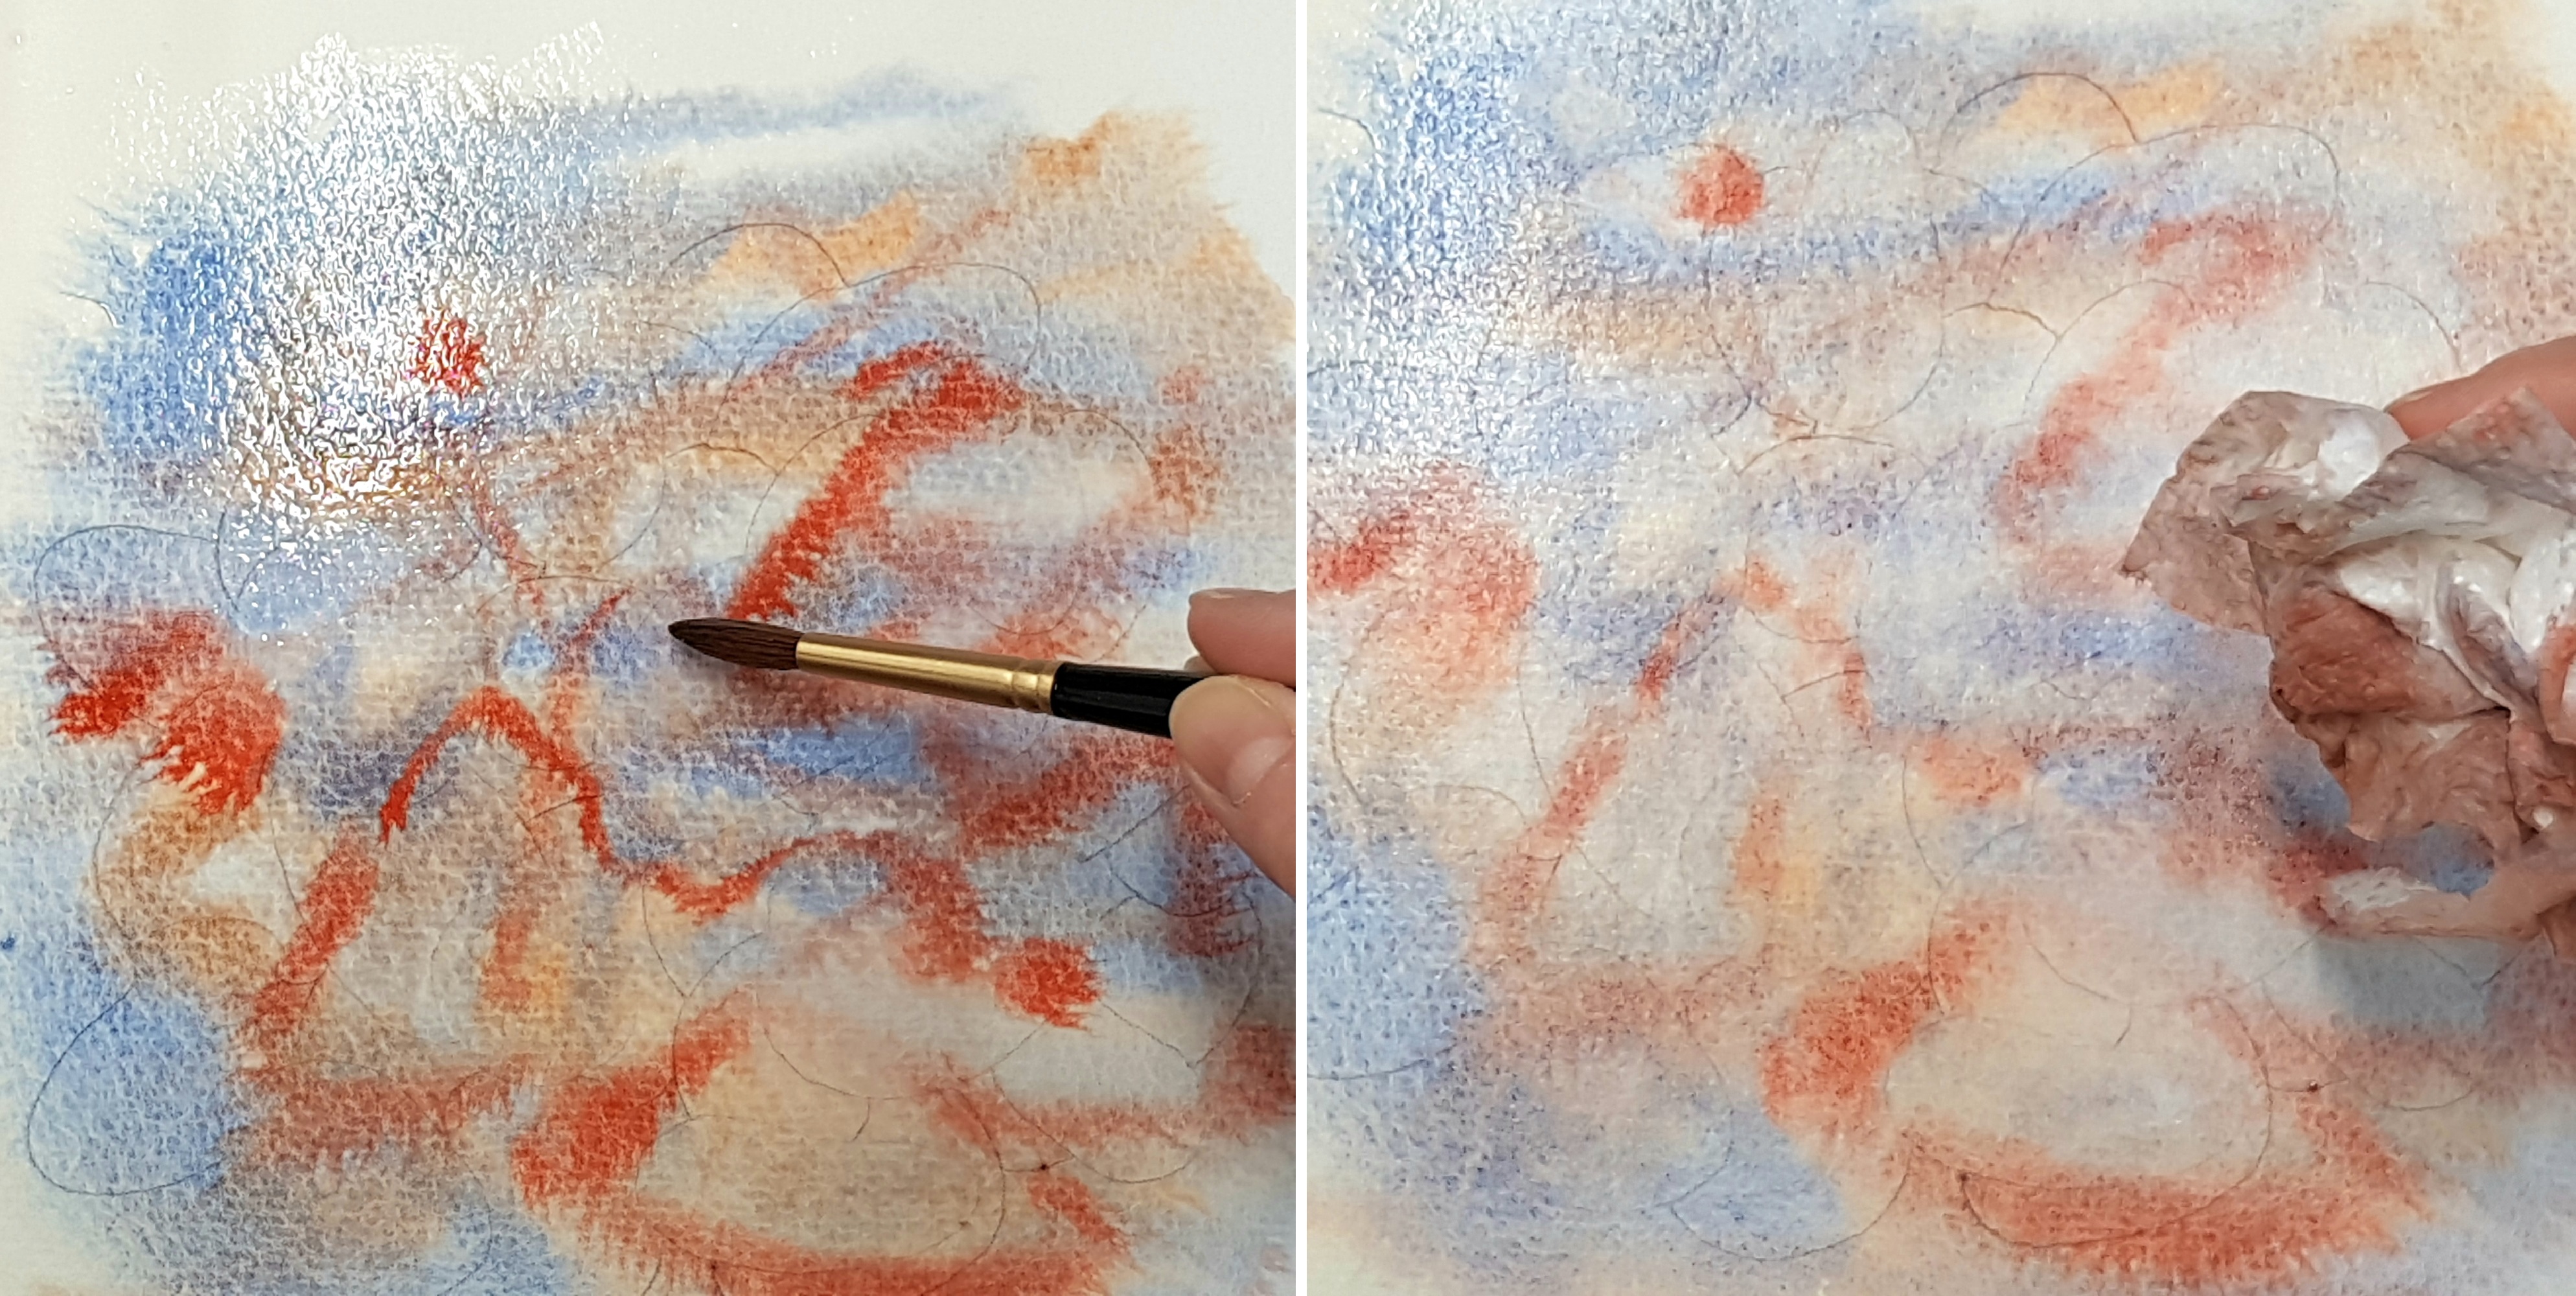
Start dropping colour onto your wet paper. I used complementary colours Burnt Sienna and Ultramarine Blue. When they collide they make a wonderful grey. Cadmium Red was added in streaks to offset the colour scheme and to provide some texture to the pebbles. If the wash gets a bit dark try adding clean water and dabbing it with tissue paper as you will need your pencil marks to show through later. Let the layer dry completely before the next step.
Step 3: Second Layer
Find your topmost pebbles and start painting around them. Rather than covering the whole background, add colour just around the pebble then blend it into the background with clean water. Alternate colours and don't be afraid to layer different colours on top of each other as this is how you will create the many shades in-between.
From this stage on I only used Burnt Sienna and Ultramarine. This kept the red streaky pattern of the pebbles separate from the background colours while the latter two were allowed to blend and create colourful greys.
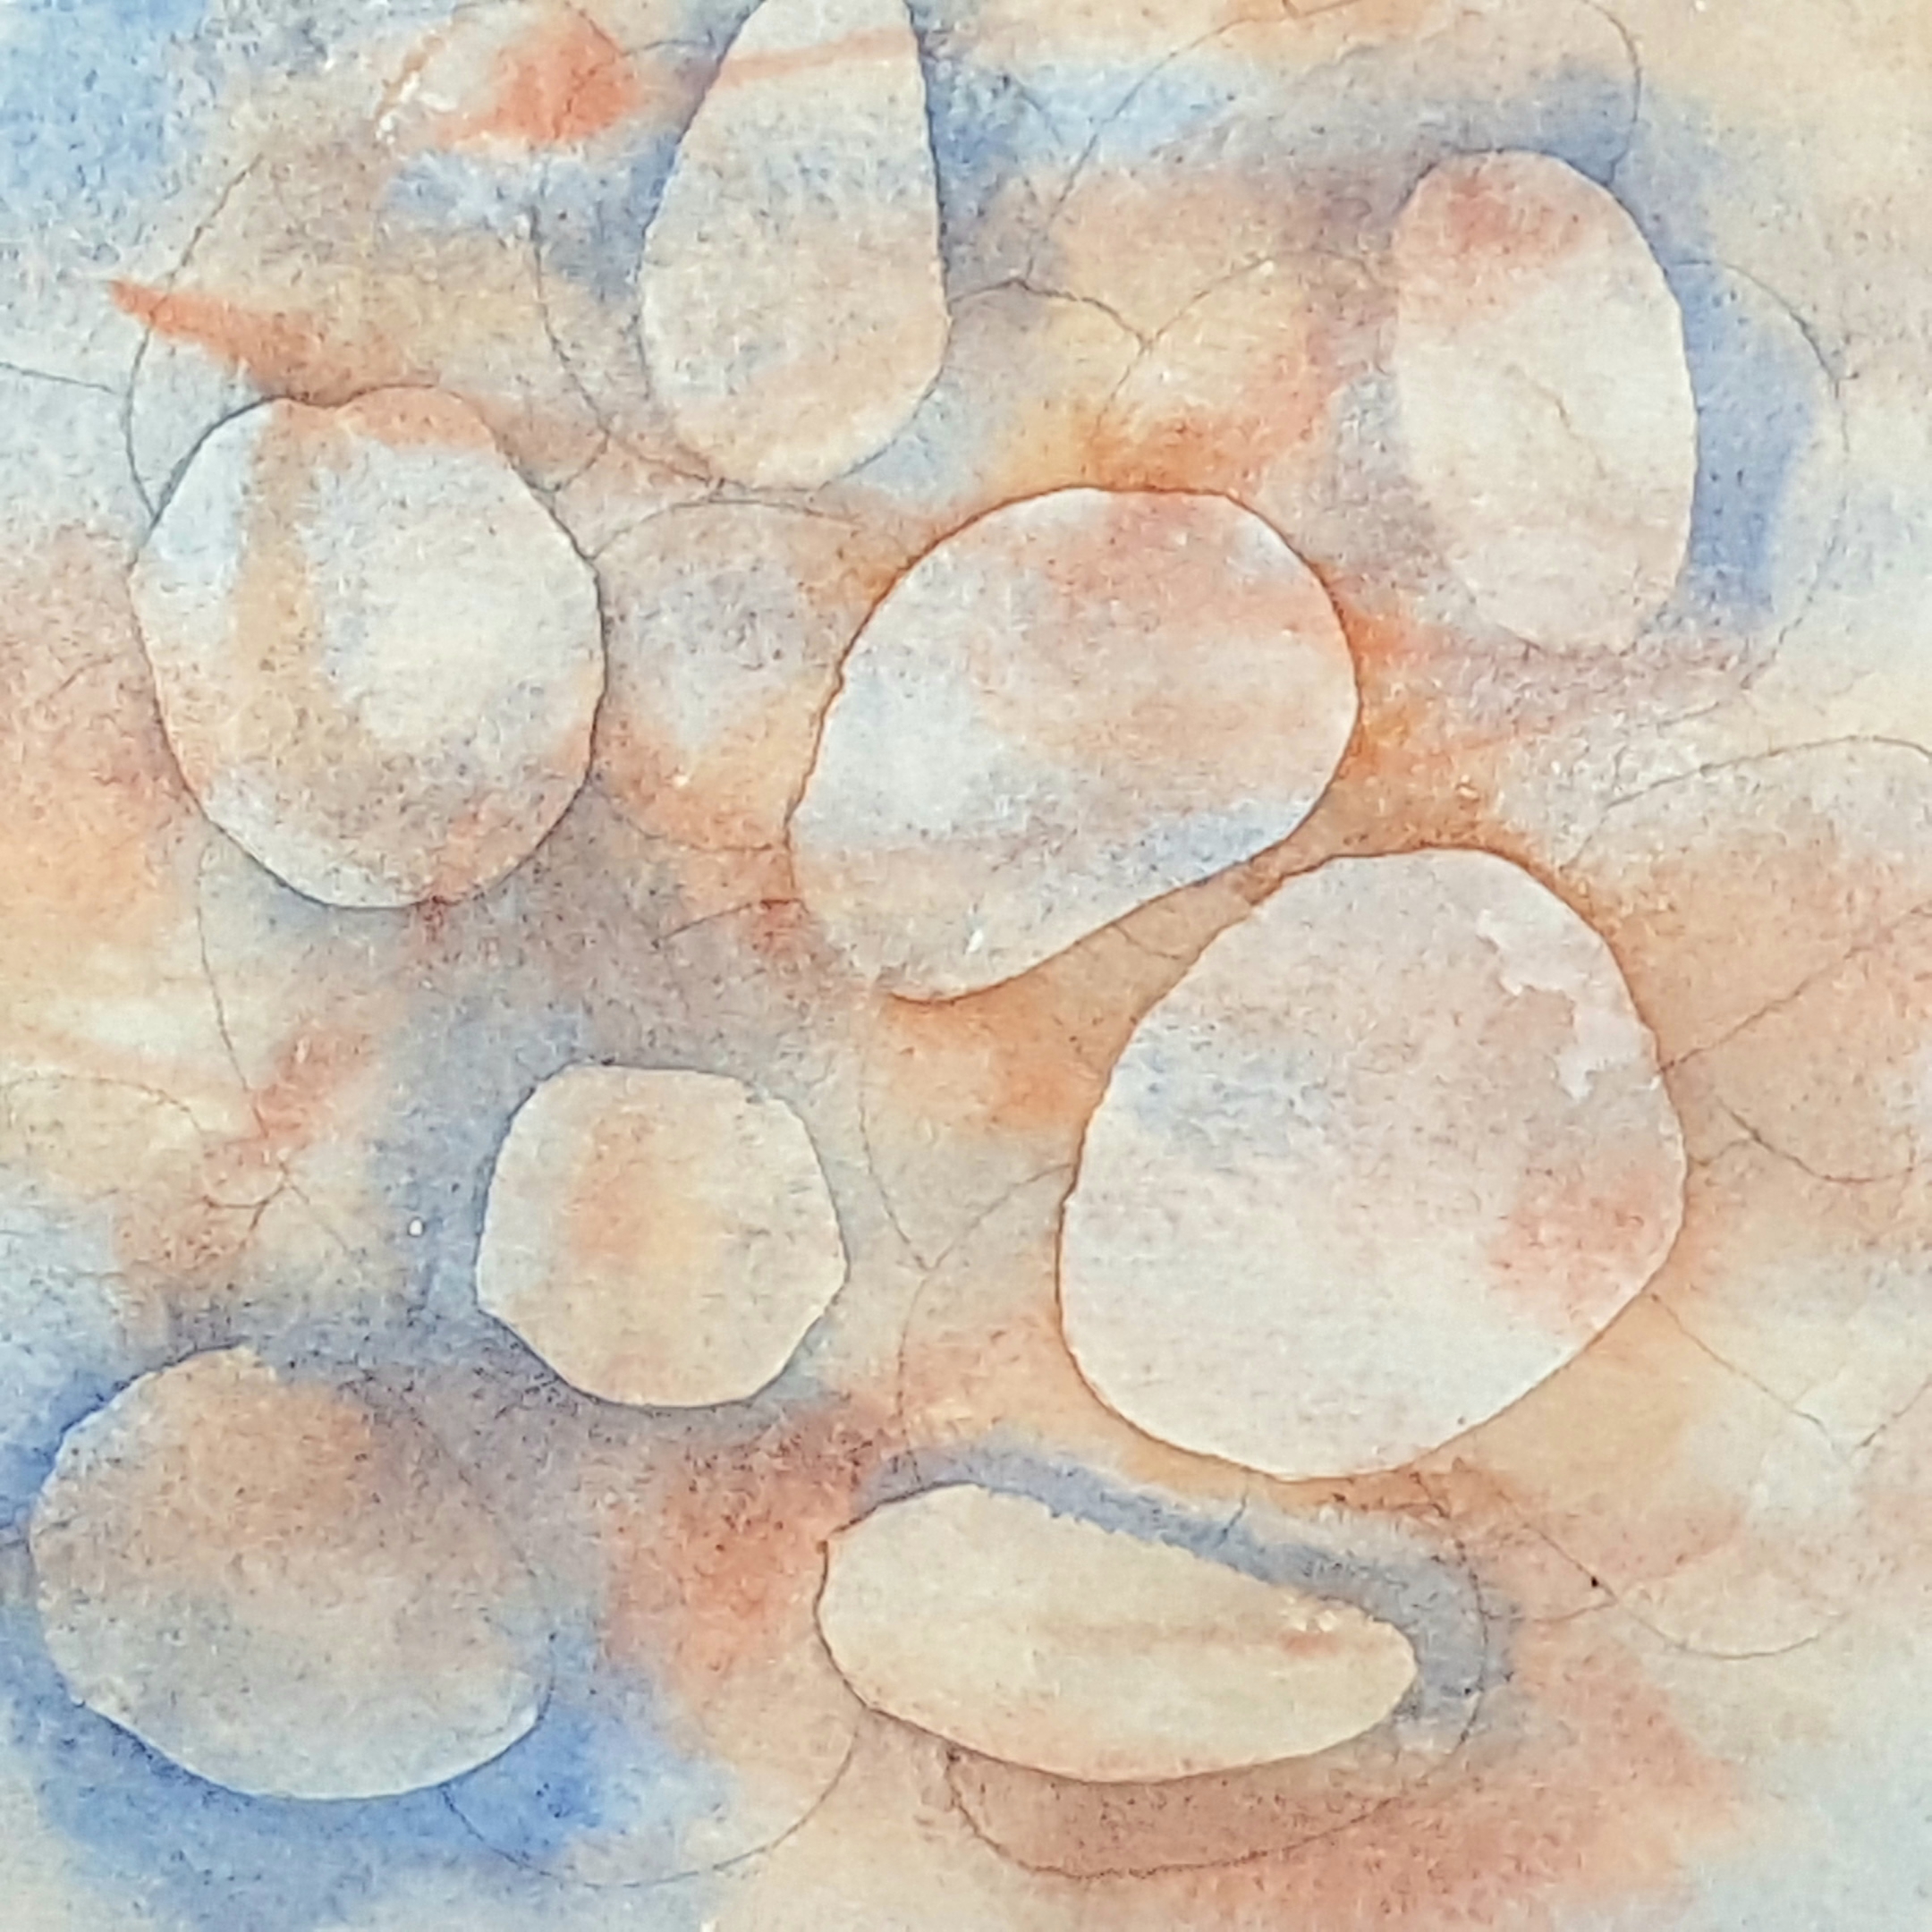
Step 4: Third Layer
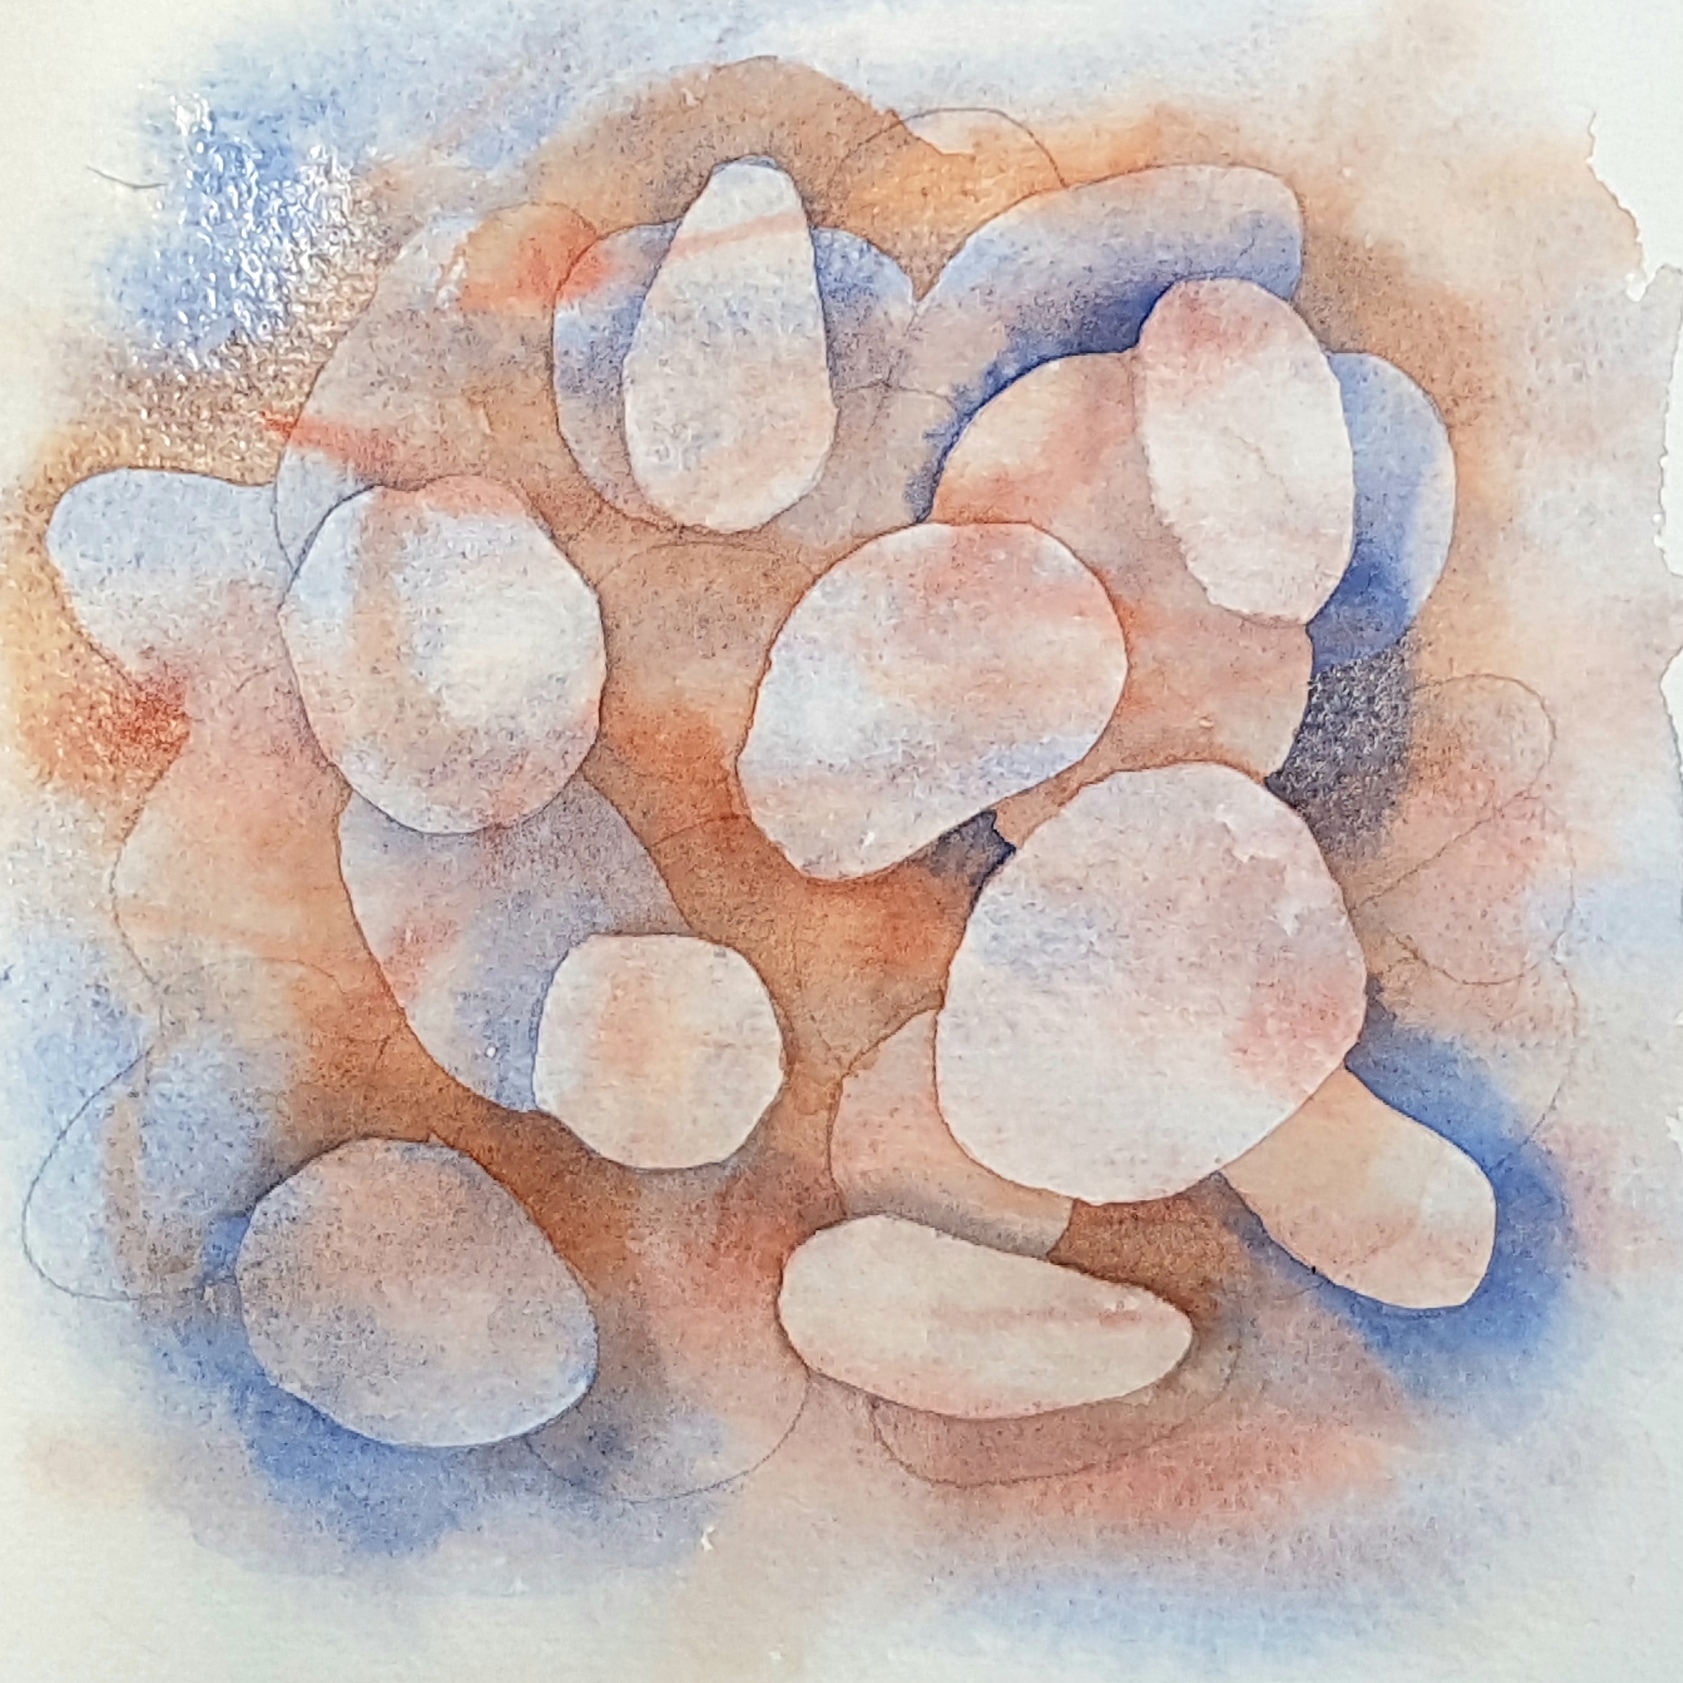
This is where it gets interesting - and a bit confusing as it can be hard to tell where one pebble starts and ends! Once your painting is dry, pick out the next few pebbles that lie directly under the top ones and paint around them, blending out the edges. If you accidentally overpaint a pebble that was meant to be in the same layer, don't worry! It will be fine to go in the next one. Make sure you keep the hues light - if you go too dark now, it will be harder to increase it in subsequent layers.
Step 5: Forth and Final Layers
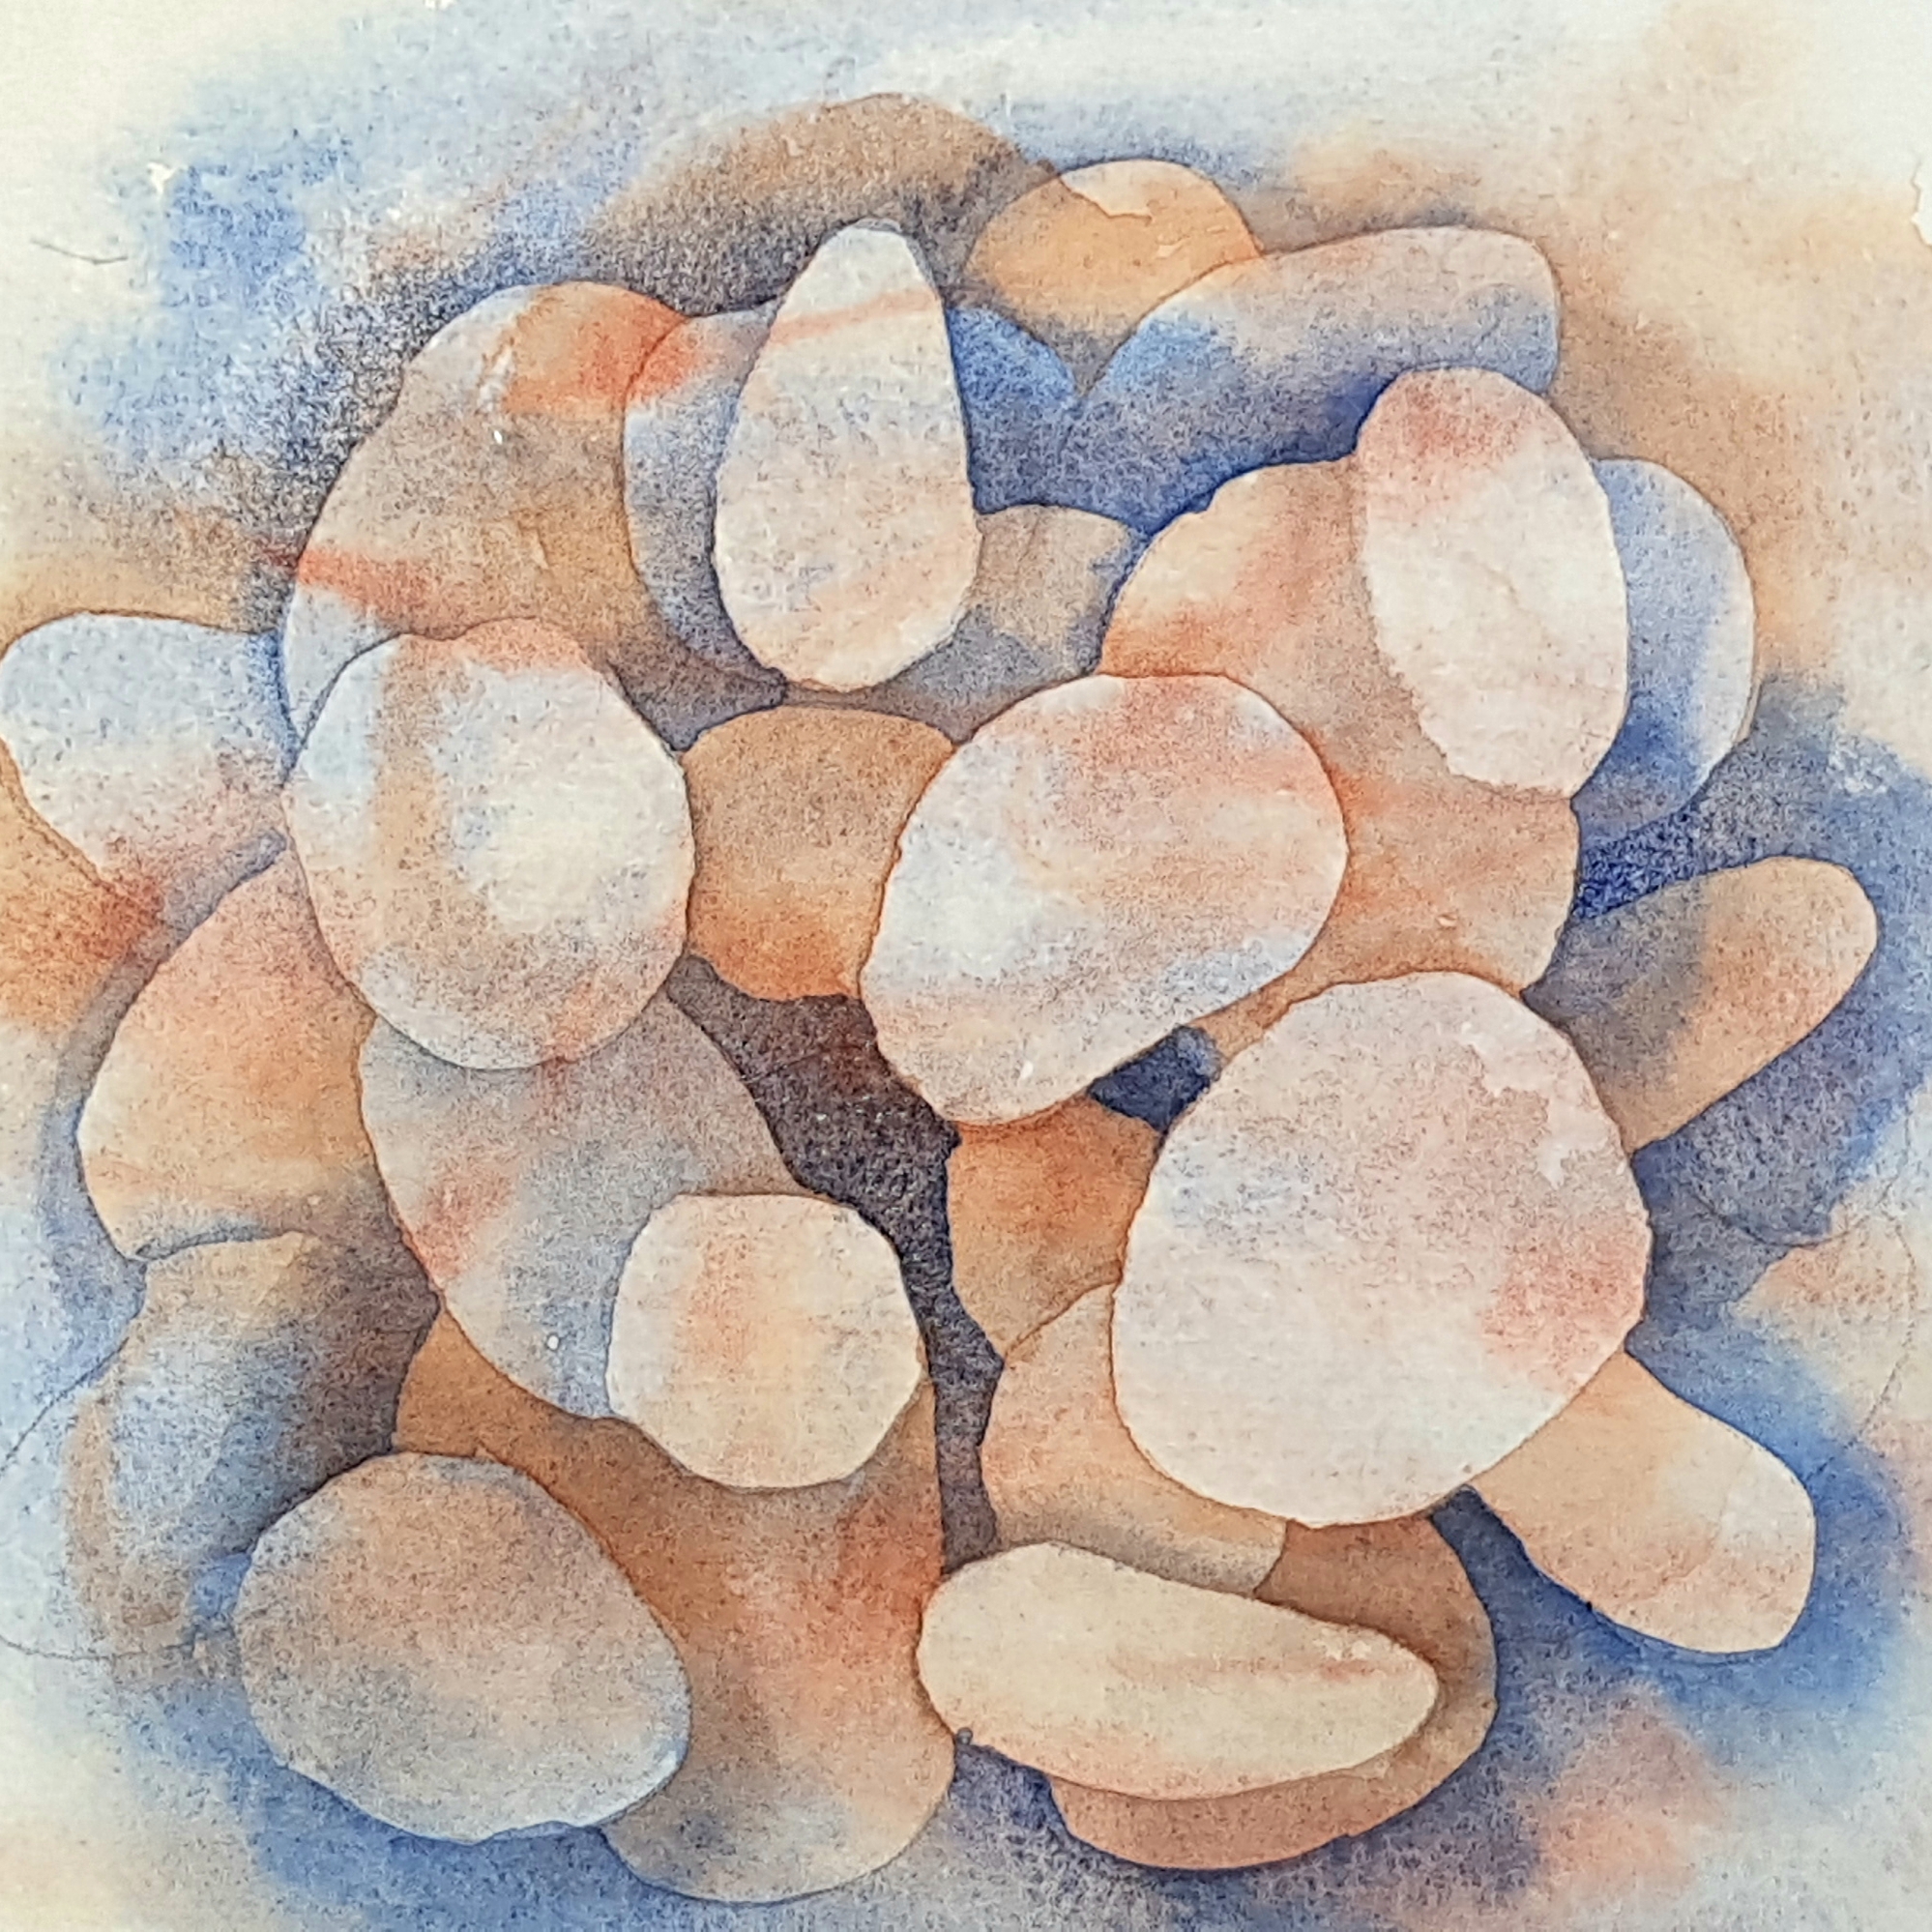
Keep going and find the next set of pebbles. At this point your gaps are getting narrower and narrower and if you are fussy you may want to switch to a smaller brush. Find the in-between spaces and darken them, separating one or more pebbles at a time. It's not necessary to wait for the whole painting to dry now as you are working on the edges and small details so just make sure that the next area you choose is dry. Keep going until you are happy with the painting.
Step 6: Cleaning up the Edges
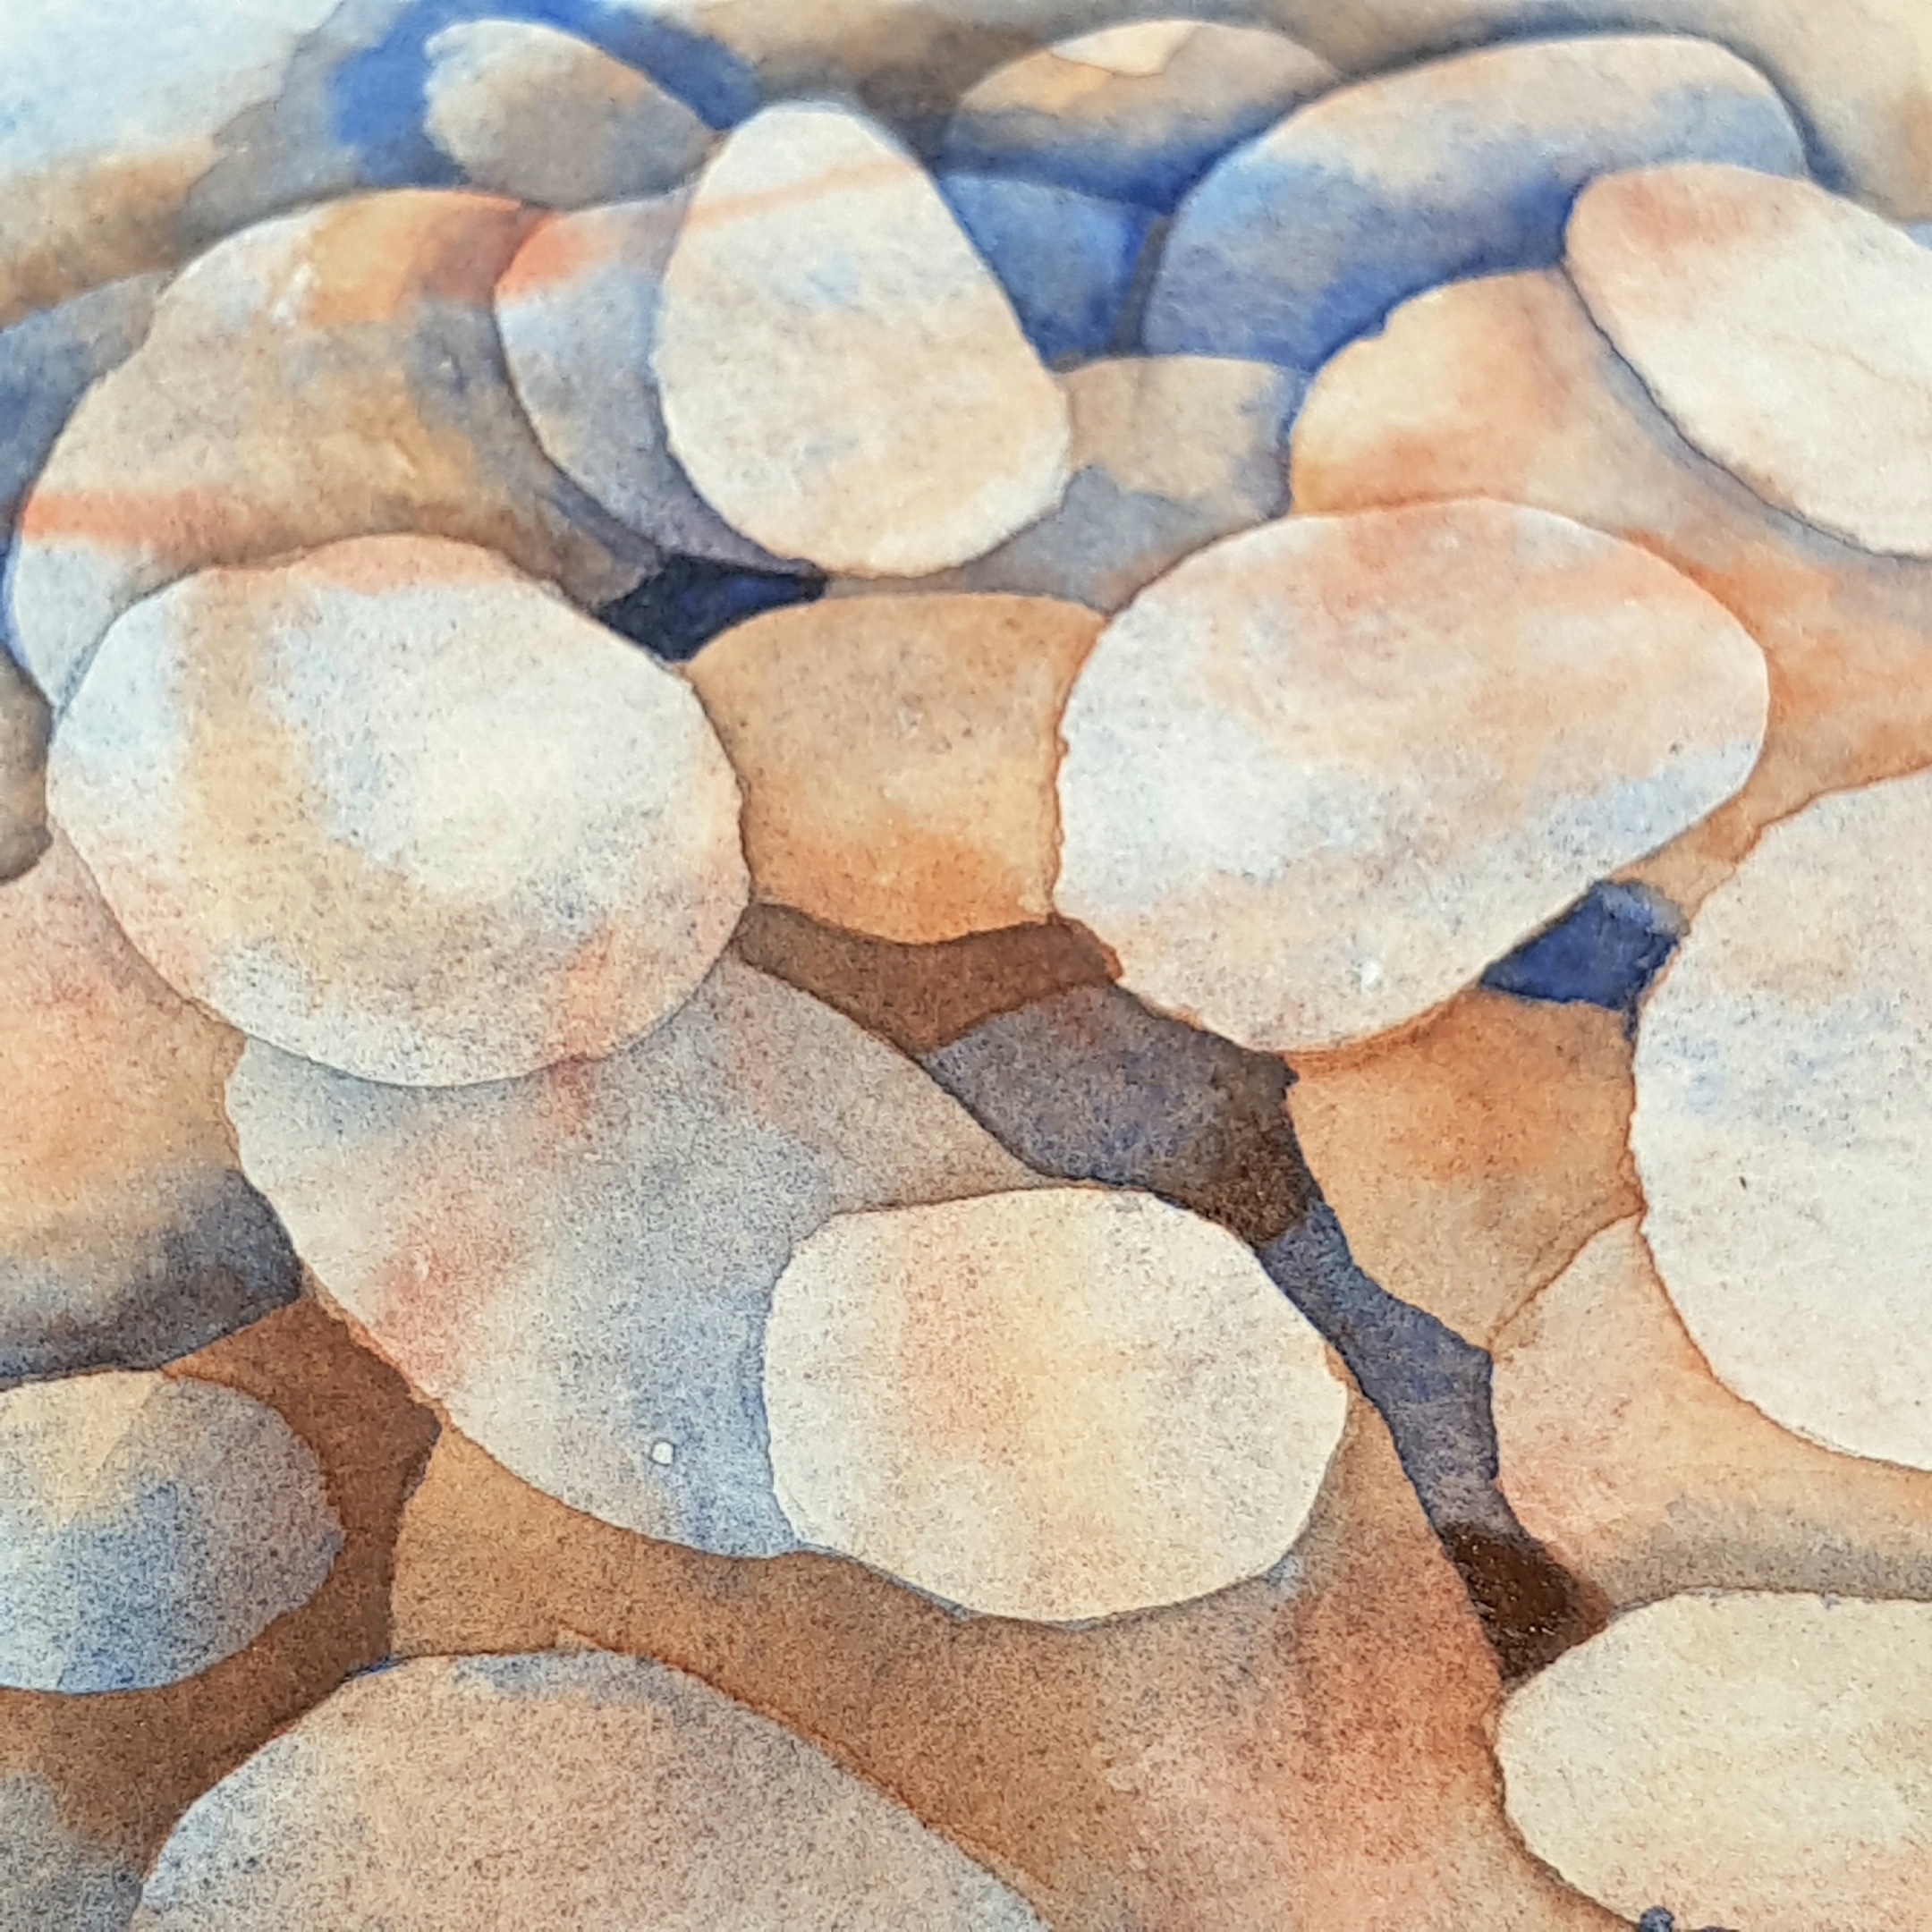
If you are a messy painter like me, this stage is invaluable! You can clean up ruggedy edges with a slightly damp brush by rubbing away excess pigment. How successful you are depends on the paper (Khadi was perfect for this) and how staining your pigment is. Phthalos and Cadmiums I wouldn't even try - you'll just burn a hole in the paper!
Now is the time to add whatever you forgot, balance the composition with more pebbles or glaze further colours onto your pebbles if you so desire.
The Results
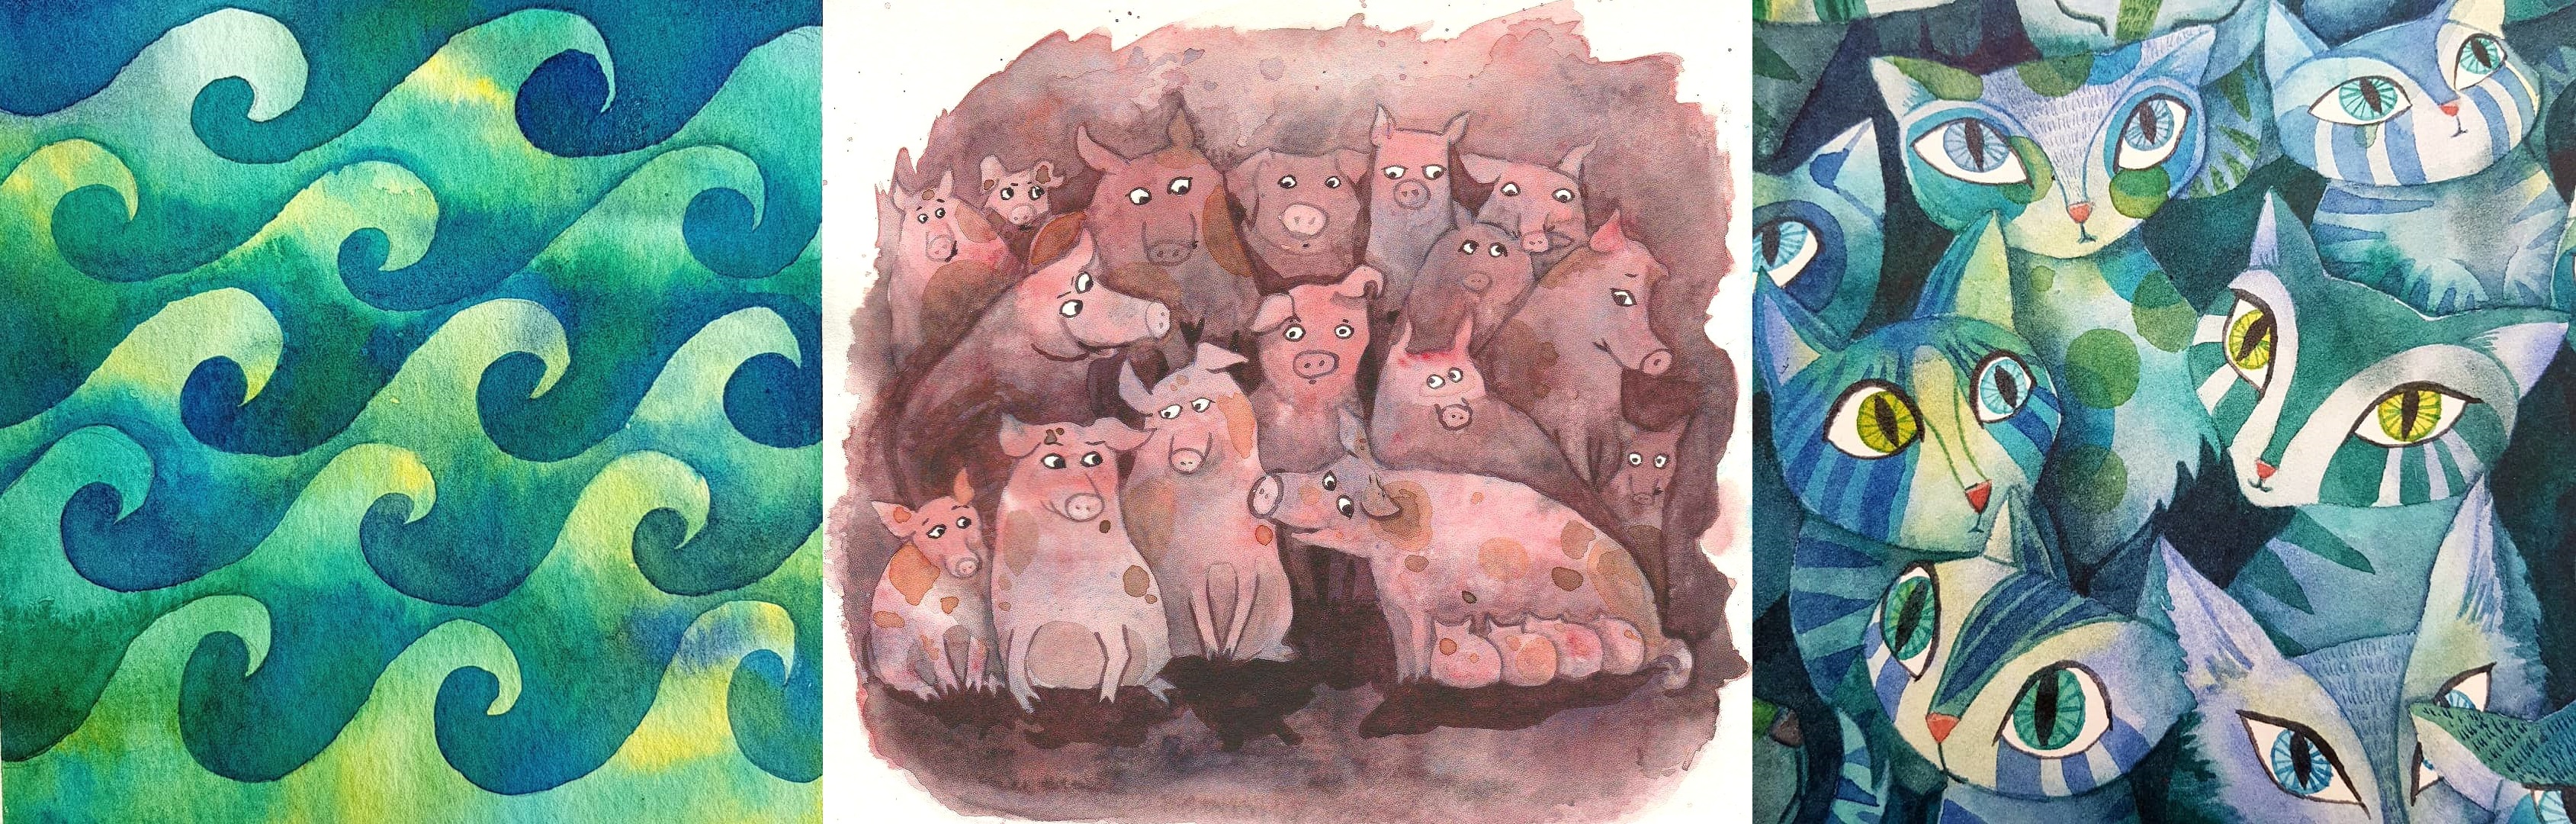
I hope you enjoyed this tutorial and that it inspired you to try this exercise. The negative painting technique can be used in so many ways to enrich your paintings that once you get the gist of it, you will find many ways to utilise it. Here's a few of my paintings where I used this technique.
We hope you enjoyed this demo and got inspired to be creative! You can follow Judy @judycsiky on Instagram and you can buy all products mentioned in this article online at www.lawrence.co.uk, in our Hove shop at 208-212 Portland Road or by calling us on 01273 260260 ext. 1.


