How It's Made: An Enchanted Christmas Forest
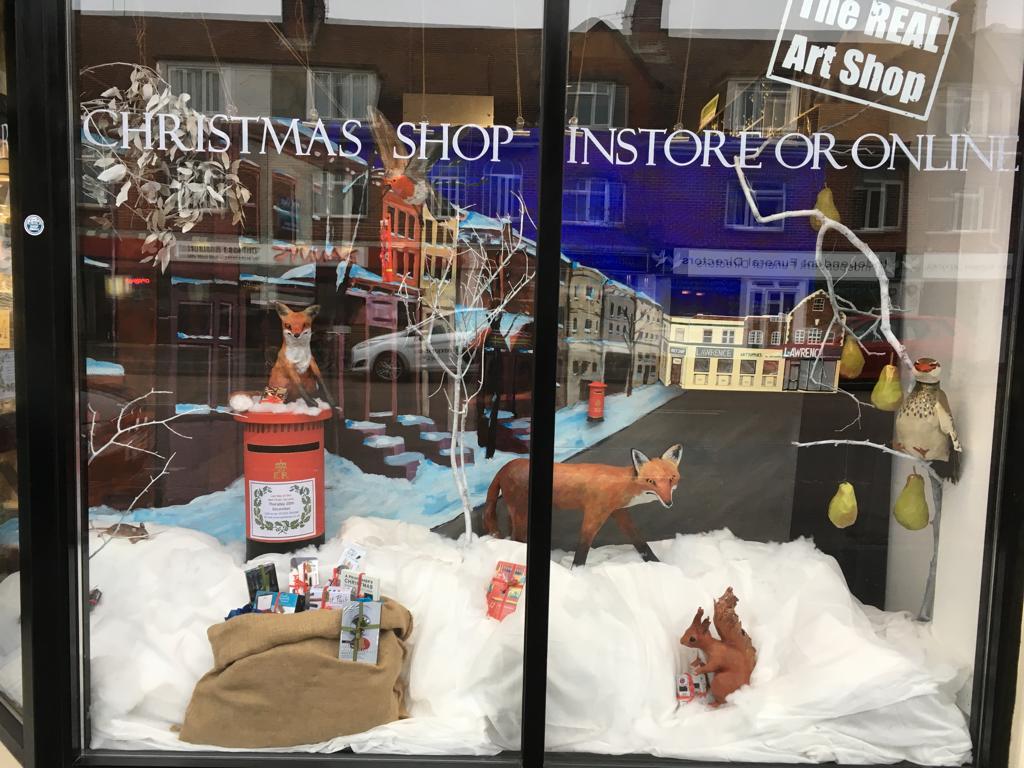
Our Lawrence Art Shop has been working on a collaborative craft project since early October to bring a Christmas forest scene to life. Our talented crew of artists made over a dozen figurines and set up a wintry street leading to a miniature model of the Lawrence Art Shop. Using commonly available materials in the household such as newspaper, cardboard and glue you can make your own paper mache models by following this simple guide.
The Idea
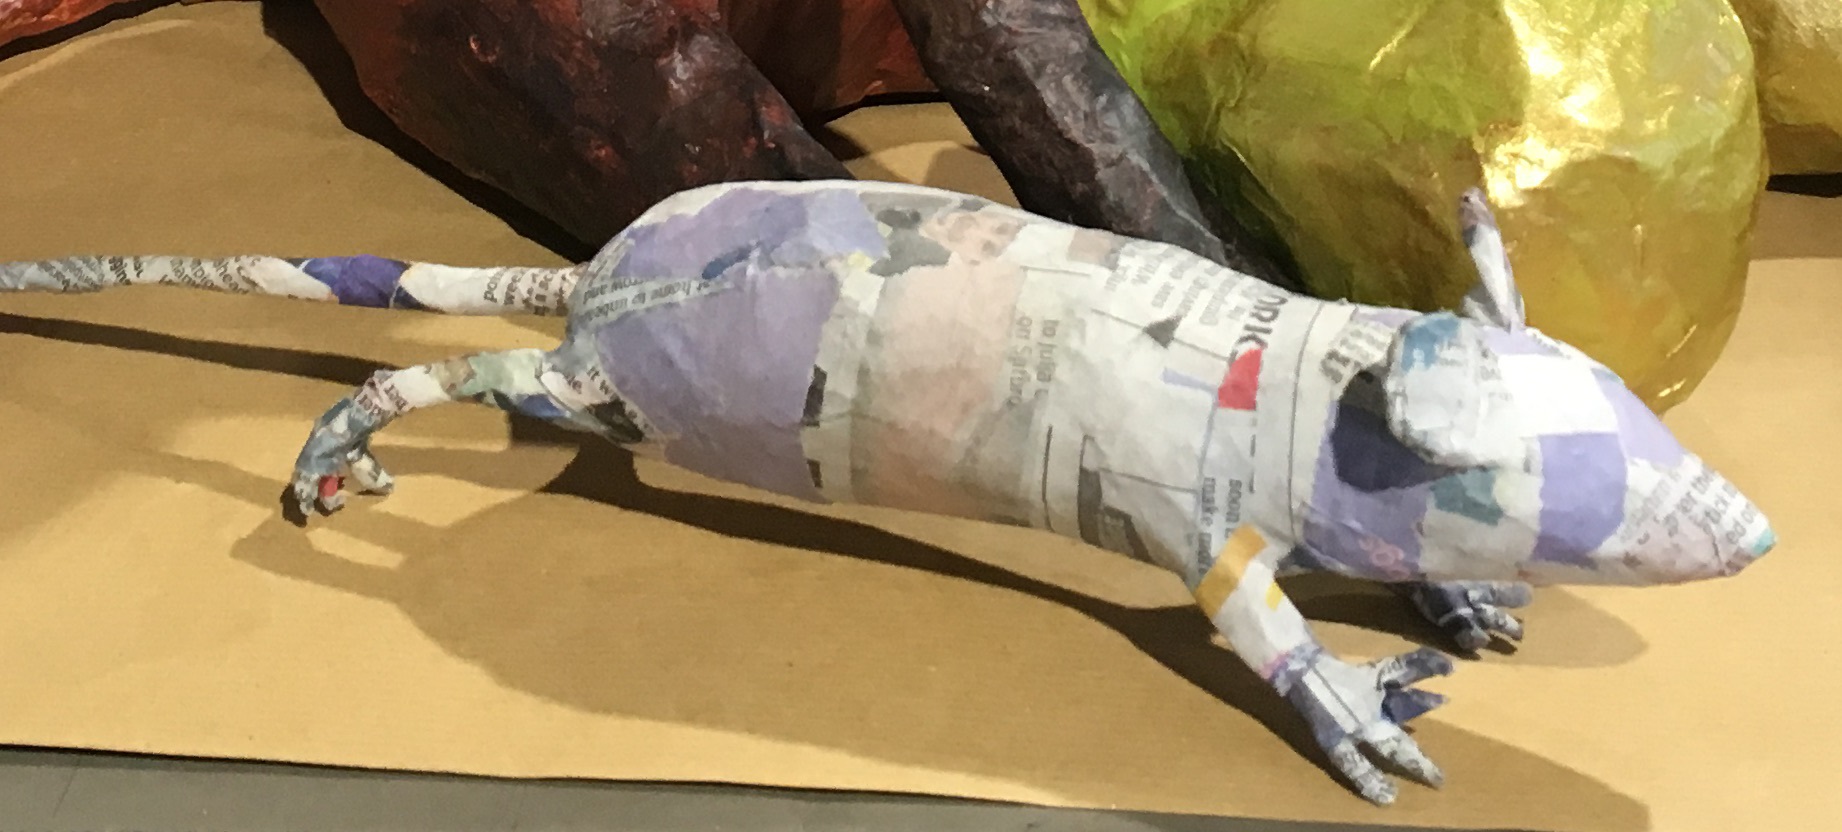
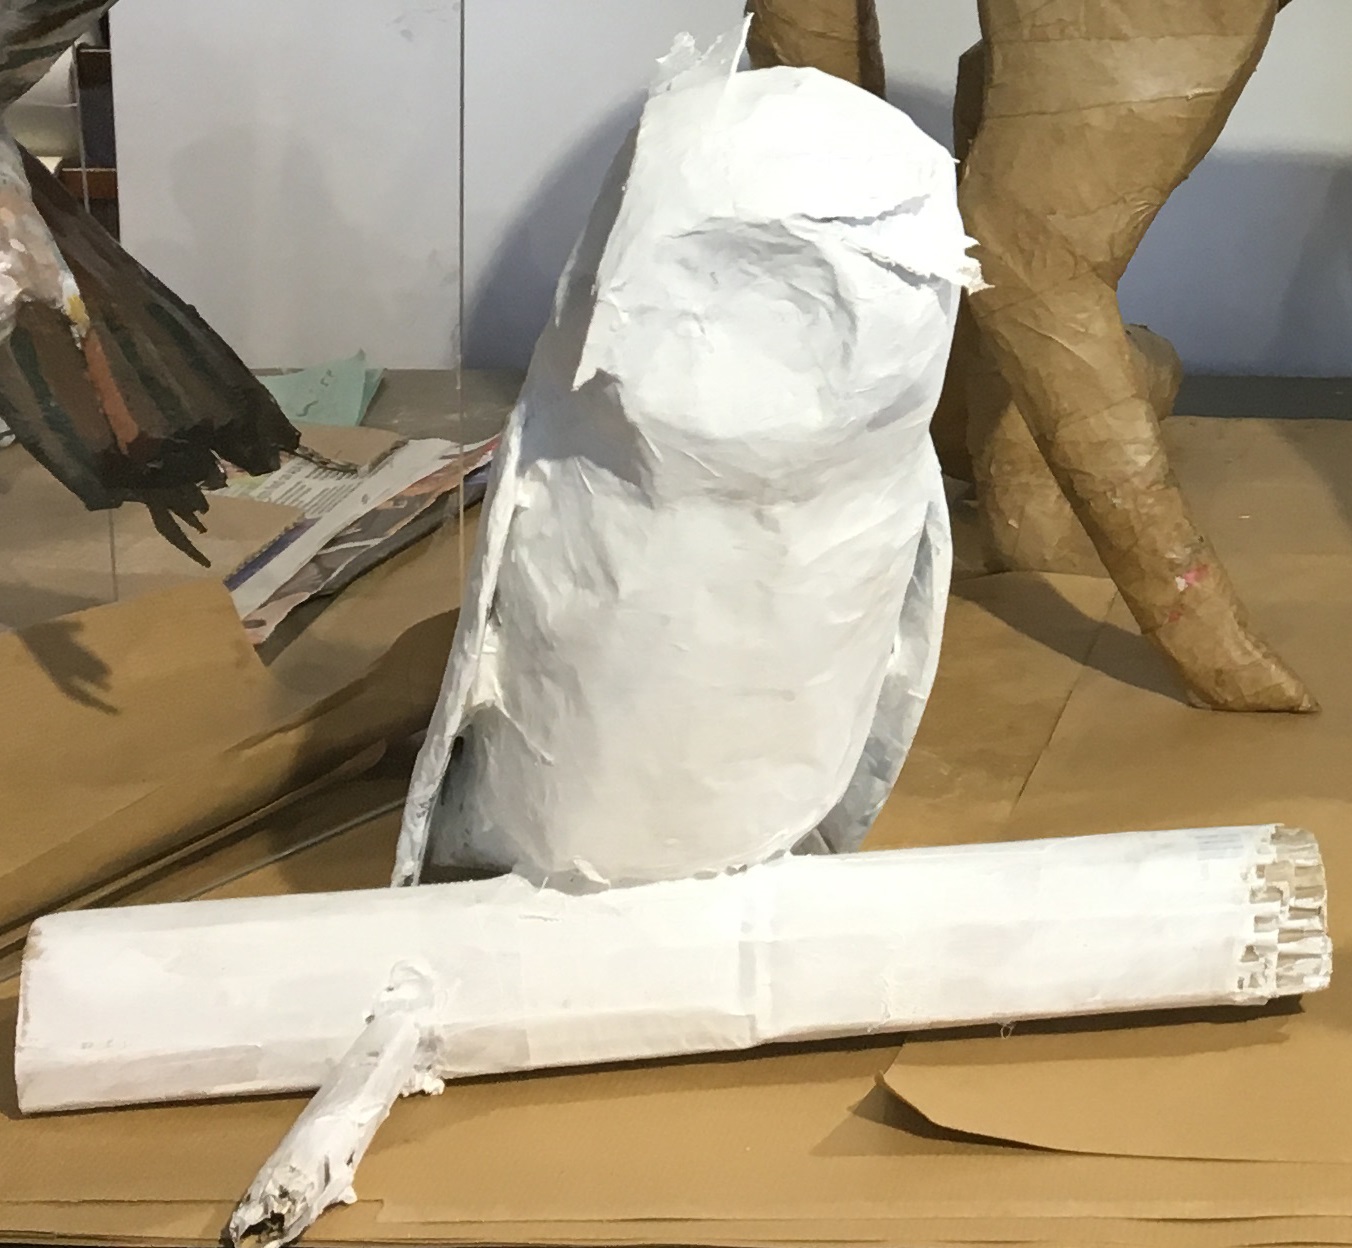
Creating a snowy Christmas night scene was a great project for our Christmas window display! It was originally our shop manager, Alexis' idea; she knows that most of our team members have an artistic bone in their body and love to participate. Daisy who is an artist & puppeteer and Vicky who is a printmaker and all-rounder had made paper mache figures before but everyone had their fair share of the project with Vic creating the owl, the partridge and the pears and Rachael making the postbox and the very realistic looking mini Lawrence shop.
Once all the parts were created - which took some time considering it had over 15 parts! - the assembly started. Our previous window display was removed and in its place the team laid down boxes of various sizes and covered them with wiping canvas to resemble snow. Alexis took on much of the assembly and organised the process; branches were spray painted and hung from the ceiling, animals fixed in their positions and the mini shop mounted on the backdrop. This step proved to be the most time consuming and headache inducing task of them all! The birds didn't want to fly, the squirrel liked falling on its face and the mini shop proved not so mini when it came to being mounted on the backdrop. Eventually, after a lot of balancing, gluing and pleading, the display was sitting steadily in our window, ready to entertain and wow local Christmas shoppers.
You can make your own paper mache animals for Christmas. and even include children in the process as this craft can be as simple or as complicated as you want it to be. Read our guide below and, if you need some advice, get in touch!
Paper Mache Animals
Materials Used:
- newspaper (for stuffing)
- masking tape/sellotape
- sheets of lighter weight paper (drawing or packing paper, tissue or just some more newspaper)
- PVA/craft glue
- gesso (acrylic primer)
- acrylic paint
- brushes, water pot, water
- optional: string, branches, wiping canvas, felt pieces, glitter etc. for hanging & decorating the snowy theme (feel free to customise as much as you like and use materials available to you)
The Process
- Scrunch up newspaper tightly to form the basis of the animal. You can use tape to adjust the body's shape and to form the legs and tail.
2. Tear pieces of lighter weight paper into smaller strips. The smaller the animal or the specific area, the smaller pieces you need.
3. Prepare the glue mixture with 1 part glue and 1 part water. If you have a stiffer type of glue or need to adjust the mix, keep adding water until it resembles the consistency of custard.

4. Wet the pieces of paper one by one with the glue mix and layer them on top of the newspaper base. Make sure to follow the angles and curves of your animal and to smooth out air bubbles with your fingers or with a brush. You can use a softer tissue paper for smaller areas like covering little toes or ears. Keep adding the pieces until the model is covered and leave it to dry.
5. Once completely dry, apply two layers of gesso. This will give the model an even surface and base colour and make sure it is ready to accept the acrylic paint without the risk of peeling. You may need more layers if you are creating a lighter coloured animal or if you used newspaper or coloured paper and worry about it showing through your final design.
6. Paint your model. Get creative! Use acrylic paint and go as detailed and as realistic as you want! Or you could even do the opposite and paint your animals funky purple with yellow stripes if that's your heart's desire.

The Lawrence Team
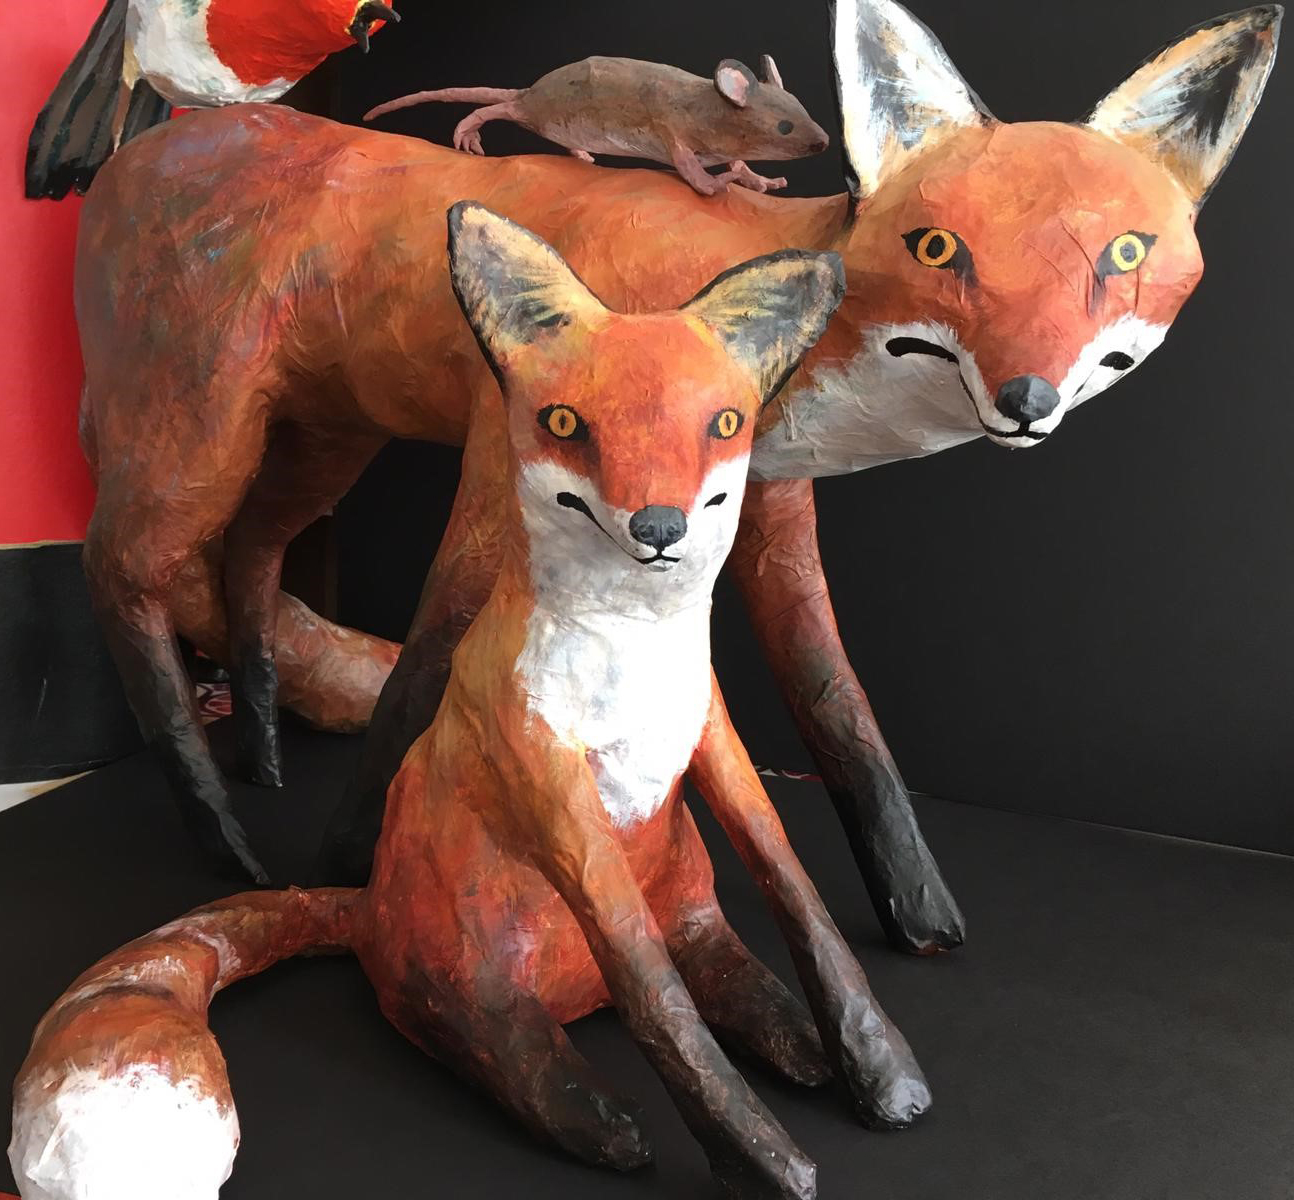
Daisy Jordan is an artist & puppeteer who creates her own puppets. She performs regularly all around the city. She created the foxes, the squirrel and the rat in our display. Visit her at www.daisy-jordan.weebly.com and on Instagram @daisy_barelyhumanpuppets
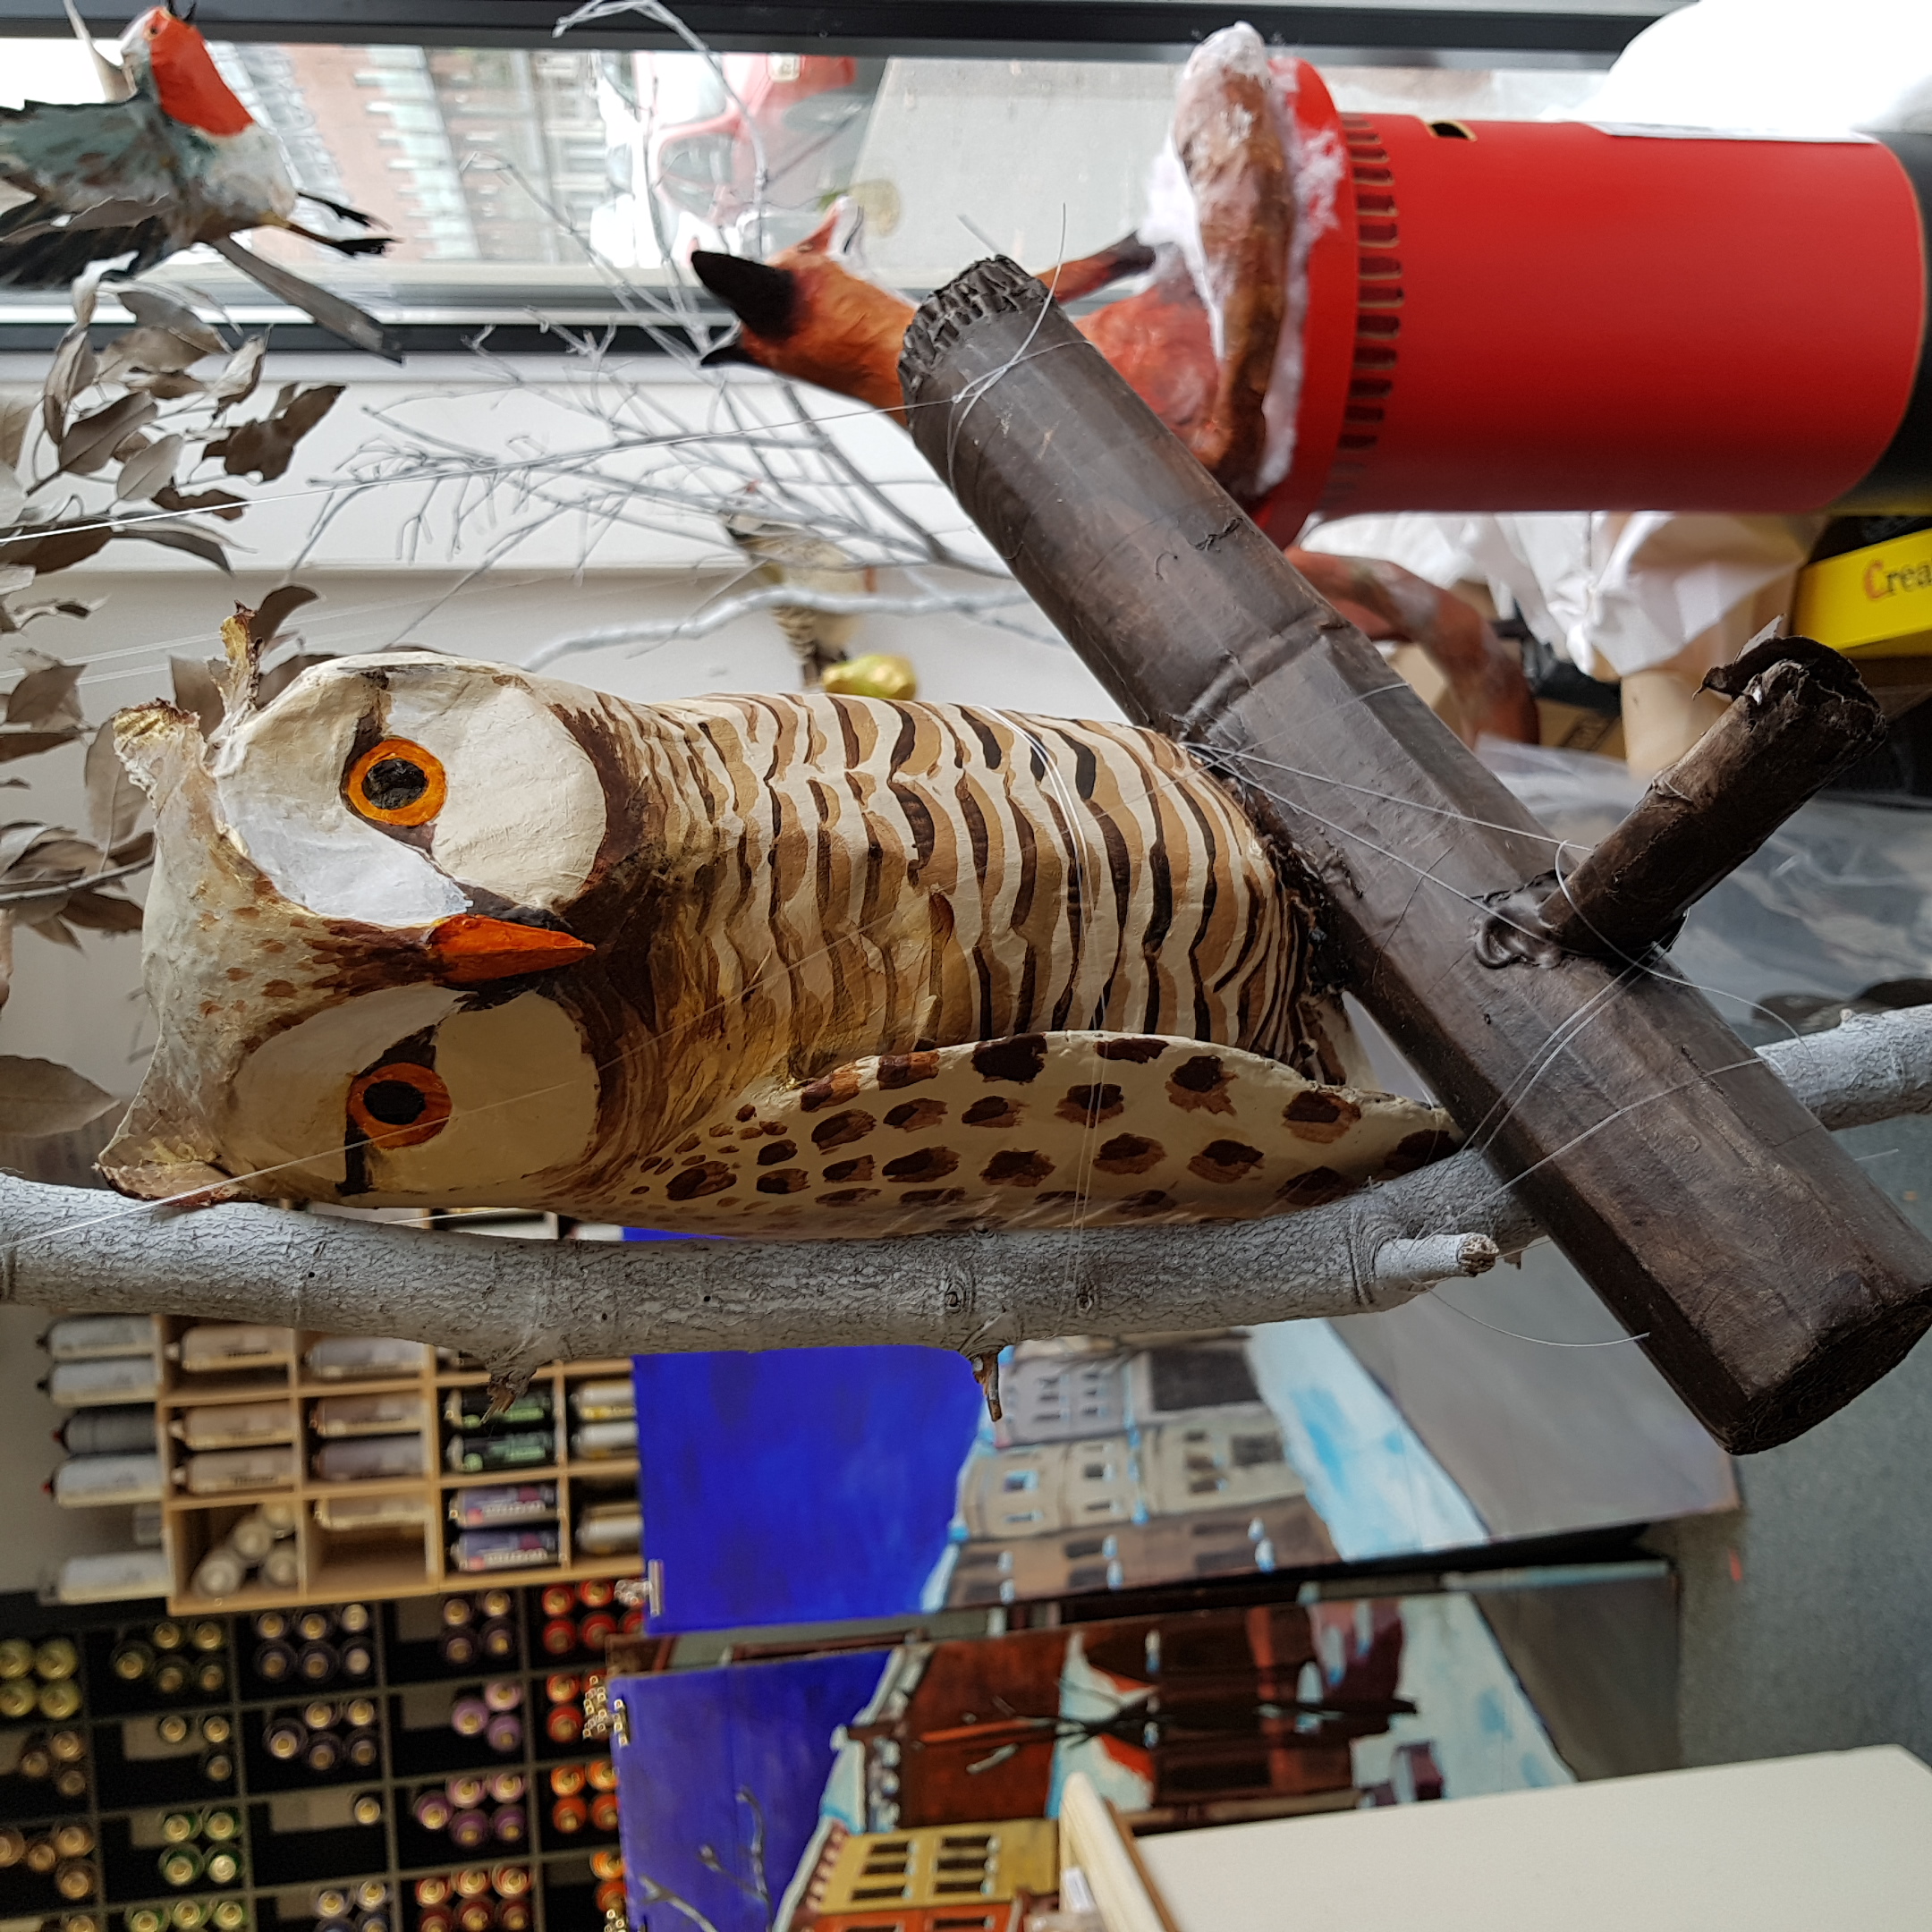
Victoria Homewood (Vic) is a painter of contemporary subjects, using oils & watercolour. She made the owl, the partridge and the pears. You can follow Vic on Instagram @v_i_c_t_o_r_i_a_h_o_m_e_w_o_d/

Rachael Jordan enjoys life drawing, painting, illustration and any sorts of arts & crafts she can put her hands on. She created the post boxes and the mini Lawrence building made from mountboard, measured and drawn from reference photos. She painted the model with acrylic, used acetate for the windows and decopatch paper for the brickwork. Follow Rachael at https://www.instagram.com/r_a_c_h_y__j/
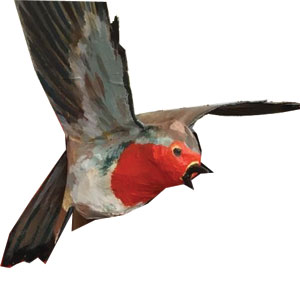
Vicky Ramsey is a painter/printmaker who makes the funniest inappropriate greeting cards! Vicky painted the backdrop to the night scene and made the flying robin. You can find her at www.vickyramsey.com and at https://www.instagram.com/likks_/
We hope you enjoyed this blog post and it inspired your creativity. You can find everything you need to make paper mache animals on our website and you can also browse our fantastic selection of ready-made ones in our craft section or by popping into our shop where we will be more than happy to advise. Have a crafty, merry Christmas everyone!


