How to Make your Own Paint & Relief Ink
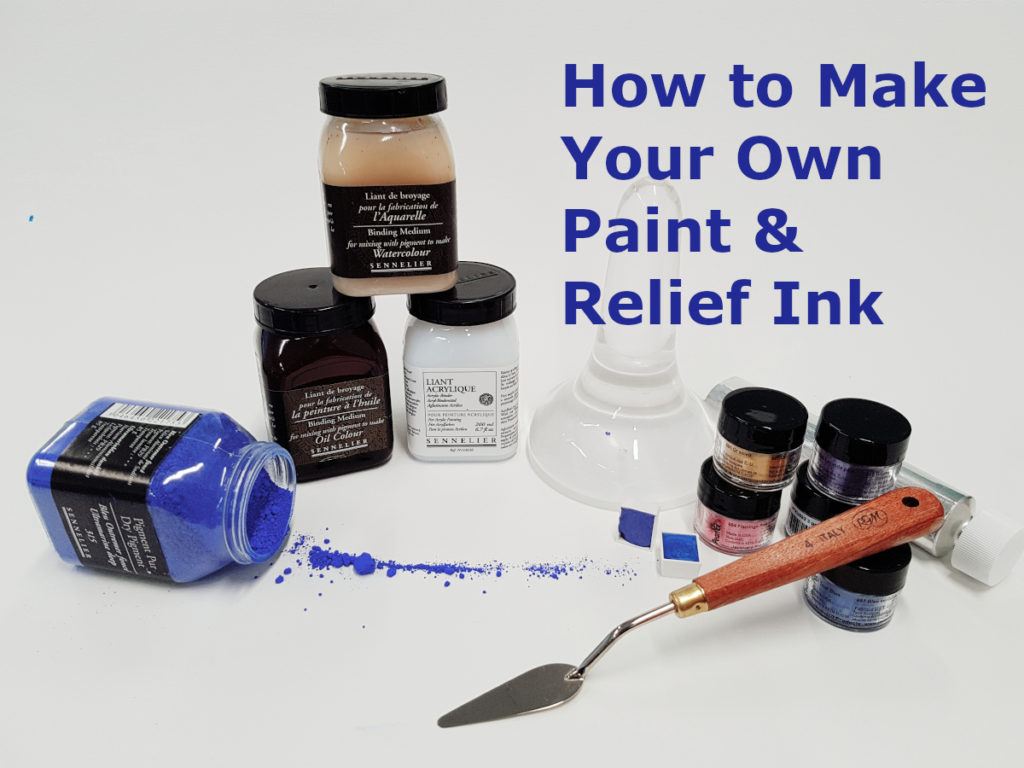
Have you ever thought about making your own paint or ink? In today’s world where quality art supplies are easy to get hold of making your own materials might seem strange, but this trend is very popular with artists and hobbyists alike. Looking at the selection of beautiful pigments, it is easy to see why you would want to have a crack at it. Join us on our adventure of paint and ink making using metallic pigments and various binders and oils.
Why Make Paint/Ink?
Humans have made paint all throughout history. Think of the prehistoric paintings on cave walls circa 40.000 years ago where homo sapiens used ochres, charcoal and sometimes blood as paint. The Egyptians mixed naturally occurring pigments into water, egg or oils using advanced grinding kits. Not so long ago, before commercial paint manufacture emerged in Europe, the old masters regularly mixed their own supplies. They ground pigment into oils and rolled their own pastels. Whilst in our modern world excellent quality paints are readily available but some of us are still just as intrigued as ever to make our own materials – not from need but out of sheer curiosity.

Ultramarine Pigment mixed with Metallic Silver
There are plenty of benefits to making your own paint: you can mix unique shades that might not be available in commercial ranges or grind your own pigments from practically anything: dried leaves, crushed up shells, coffee, fruits etc. Some paints may contain fillers like chalk that bulk up the paint, or toxic pigments like cadmium or cobalt – when you make your own paint, you can control exactly what goes into your paint. It can also be economical as a tub of pigment goes a long way! And by making paint you can also feel closer to artists that came before you.
Pigments and Binders

You can find both organic and synthetic pigments on the market. They are finely ground solids, ready to be mixed with a ‘vehicle’ to make your own colour. A vehicle is composed of a binder (gum arabic, acrylic resin, oils etc.) that holds the paint together and an optional diluent (water or solvent).
You can find recipes on the web or experiment with your own using base ingredients such as gum arabic and water for watercolour or you can buy premixed binders that take care of the chemistry part of making paint and also contain preservatives. While this may sound like cheating, it is still up to you to find a good balance of pigment vs binder and this way you can focus on mixing your pigments, coming up with unique shades and perfecting your consistency – without the scary possibility of it all going wrong.

Sennelier Binders for watercolours, acrylics and oils
Making Watercolour Paint
The main ingredients are a pigment and a binder, something to mix the paint on (like a glass slab), something to mix it with (can be a spoon, a palette knife or a dedicated muller) and something to fill the paint into. Here’s the complete list of what we used for this specific experiment:

- PearlEx Metallic Pigments Set 2
- Sennelier Watercolour Binder
- Glass Inking Slab
- Glass Muller
- Palette Knife
- empty watercolour half-pans
- paper towels, wooden spatula (optional)

For this first experiment I selected a purple metallic pigment and poured about a third (1g) of the tub onto the glass slab and added a little binder with the wooden spatula. When using a premixed binder, you might find some of it’s contents settled on the bottom. Give it a good swirl to make sure it’s mixed properly. I used a palette knife to slowly fold the medium and pigment together and kept adding more binder in tiny drops and mixed until I was happy with the consistency.
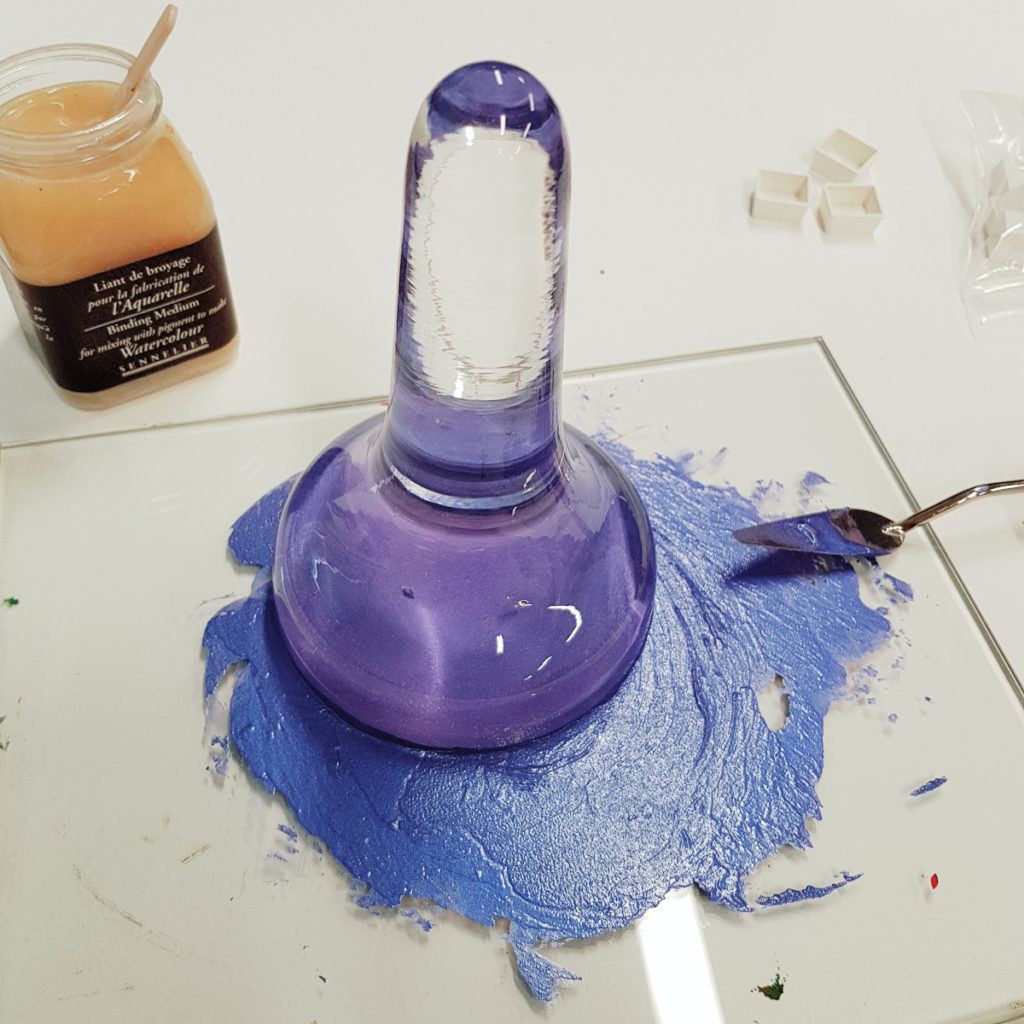
Then I started grinding it together with the glass muller. The more resistance you get from the glass the better as it is an indication that you have a lot of pigment in the mixture. If you find it runny, just keep adding pigment. If it’s too tacky or you can see pigment bubbles, add a little binder.
Every now and again scrape the paint from the glass and pile it all in the middle. Do the same with the muller as it tends to collect paint on its sides. Grind the paste some more in a circular pattern, scrape and repeat until you are satisfied. I got mine to a consistency slightly thicker than honey. Fill it into empty pans or any container that you can later paint from and allow it to dry for a few days before you store it.

Metallic Purple Watercolour – filled into an empty half-pan (left) and a colour test on Arches watercolour paper – Look at that shimmer!
I repeated the experiment with another colour, turquoise, and I made a slightly runnier mix using the full tub of metallic pigment (3g), filling 4 half-pans and the paint still came out well. I would not suggest diluting it any further or you’ll risk throwing off the balance and get a paint that is gummy and doesn’t dry. Similarly, if you don’t use enough binder/use too much pigment the risk is a paint that does not adhere to the paper properly and wipes off when dry.
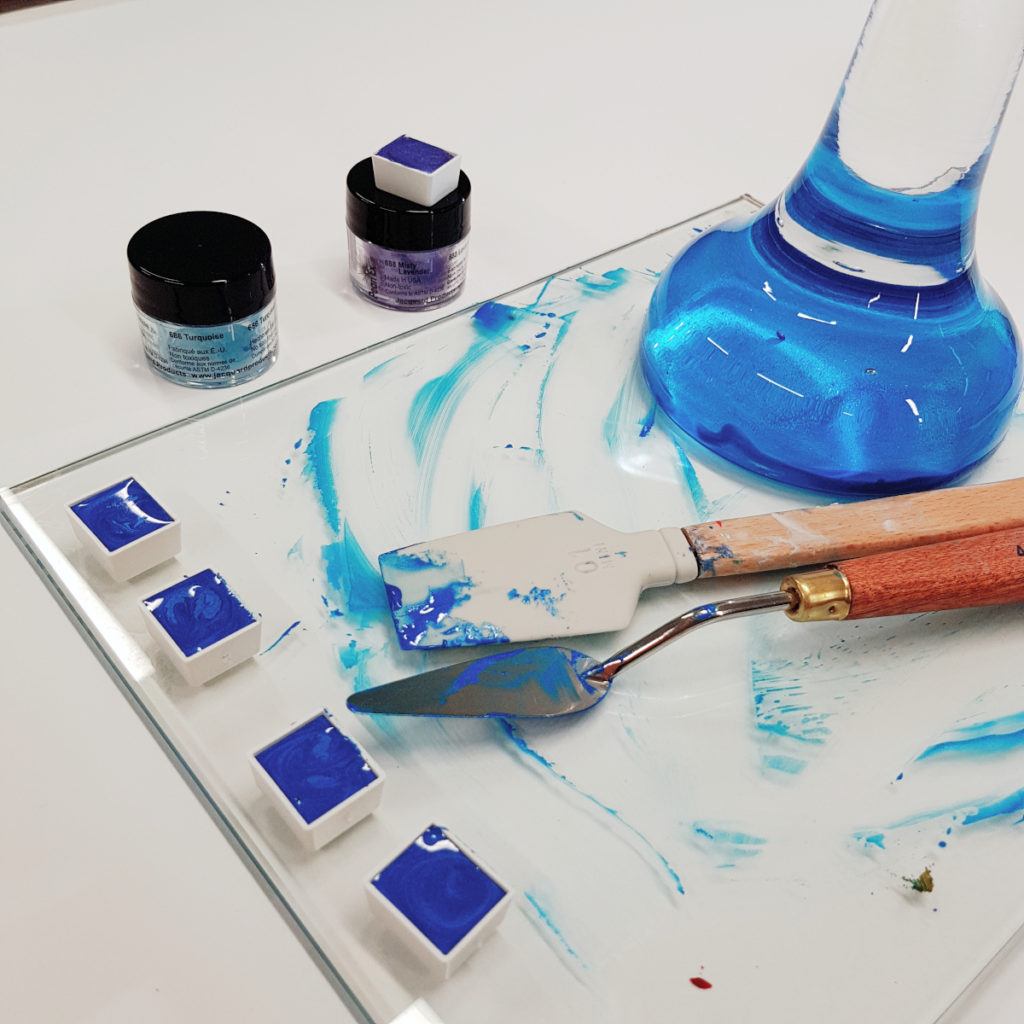
My second turquoise batch filled into 4 half-pans and the purple one drying in the background.
You can make acrylic and oil paints with the same method, using acrylic or oil binders. The consistency will have to be adjusted to the medium and it is a good idea to have some paint you normally use to compare it to.
Making Relief Ink
This was the hardest part of my project. Not many people attempt making relief ink as it can be quite difficult to figure out which ingredients each pigment needs. Before embarking on this project, I contacted Cranfield Colours, the manufacturer of art materials such as Spectrum Oils and Caligo Relief and Intaglio Inks. Their reply warned me that I might be attempting something near impossible without triple mill technology where ‘the pigment passes between water cooled cylinders that rotate at different speeds under enormous pressure’. Additionally, all pigments have a different ‘thirst’, requiring different oils. It is difficult to suggest a single go-to oil when the professionals use 17 types!

Caligo Relief Inks and modifiers
Nevertheless, because I am a forever optimist, I selected two different oils known to be used in making ink and an extender, and made three colours that I later tested with the help of the Lawrence Printmaking Club and Georgia Flowers.
Test 1: Silver Blue / Copper Plate Oil
Materials Used:

Materials used: pigments, copper plate oil, glass slab, muller and palette knife
The process is exactly the same as I described in the watercolour section. If you are using multiple pigments like I did here, make sure you mix your dry ingredients first then add the oil in small quantities. It’s a little bit like baking!

Mixing Pigments then adding copper plate oil
When you feel you’ve mixed it enough, grab the muller and start grinding. This can take some time and elbow grease as the oily mixture is a lot tackier than the water-based one!
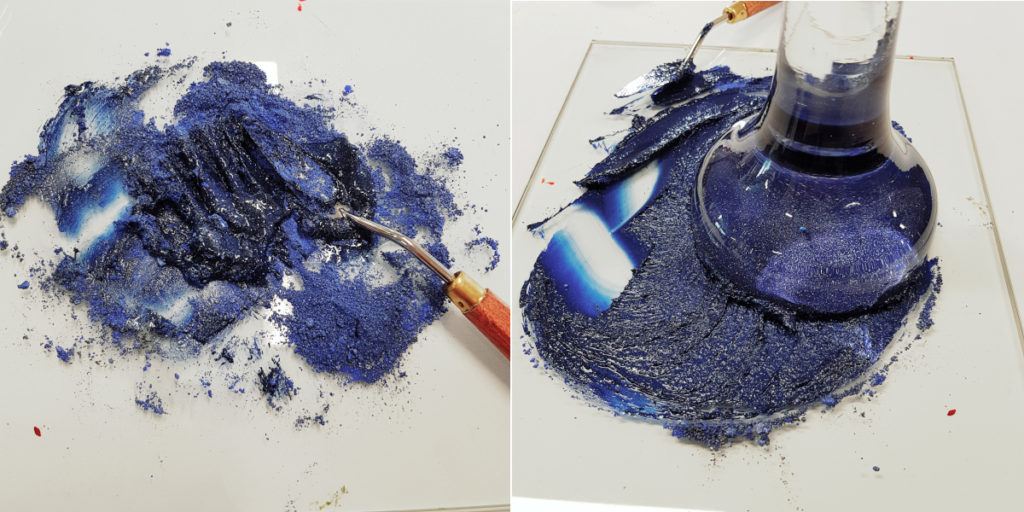
A very gritty mixture under the muller
Keep going until the mix feels smooth. Add pigments or oil if needed.

Silver Blue Relief Ink containing copper plate oil finished – Look at that sparkle under the muller!
The result was great, the colour felt smooth and looked very pretty with a consistency that looked very much like a relief printing ink. I couldn’t wait to print with it!
Test 2: Purple Blue / Cold Pressed Linseed Oil

This test used the same tools – except I used Flamingo Pink metallic colour and Cranfield Cold Pressed Linseed Oil. The method was the same too. Mix pigments, add oil, grind, adjust.

Mixing Ultramarine with metallic Flamingo Pink to create a lovely Purple
To my surprise the pink almost completely disappeared as soon as I added the oil. This was probably due to it’s transparency. I added the rest of the tub and then another colour as it soon turned out that the mixture was too thin, too buttery.

The ink felt too oily, even after adding a lot more pigment. The colour was not as purple as I wanted it either.
Nevertheless, I filled the mix into an empty tube. Now I had two inks to test with the club with another experiment in mind…

Tubes filled with home-made relief inks. Excuse my horrible rolling technique. When filling empty tubes, it is very important to not let air get trapped as it can dry out the ink. Much more important than how the tube ends up looking.
Test 3: Spring Green / Caligo Extender

My third experiment with making relief ink came from the idea that you can create transparent versions of colours by adding some extender. Normally, you would add your premixed ink but this time I just wanted to add some metallic pigments to see what happens. I used Caligo Safewash Extender.
Here’s my third test in pictures only.

Lovely metallic green pigment mixed with Caligo Extender, the iridescence of the resulting ink looked very impressive!
Testing the Printing Inks
I went to the Lawrence Art Studio where the Printmaking Club meets every Wednesday to test my new colours. Georgia Flowers, who is the dedicated leader of this small but tight-knit club helped me ink up a vinyl plate I carved for a previous project. First we tested the two blues: the Silver Blue made with Copper Plate Oil (image on left) and the Purple Blue made with Cold Pressed Lindseed Oil (image on right).
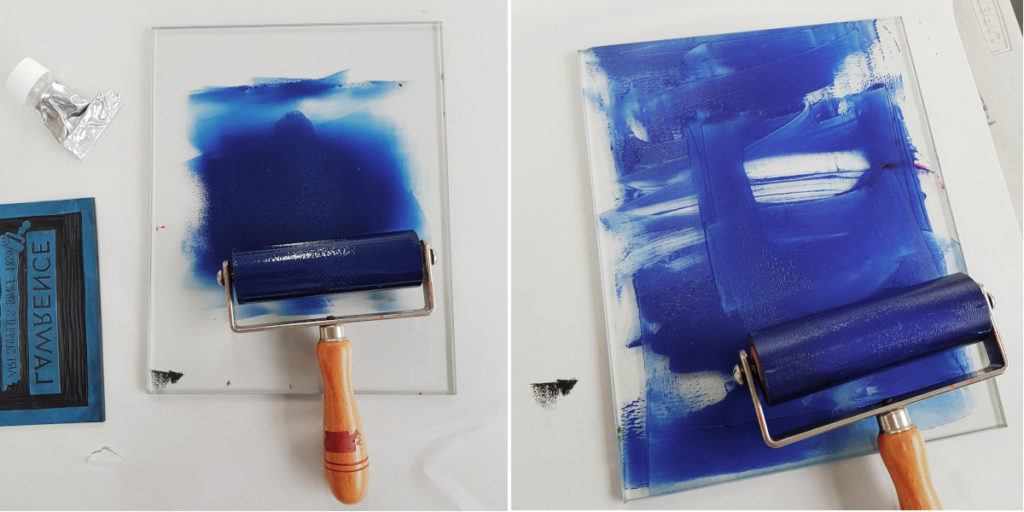
Copper Plate Oil based Ink (left) and Cold Pressed Linseed Oil Ink (right)
As you can see on the pictures, the Silver Blue rolled out perfectly but I had problems with the Purple Blue. The ink was too buttery and the roller kept slipping on the inking slab. It felt more like oil paint than printing ink and I didn’t have much hope for printing it.

The good (top) and the bad (bottom) ink
The Silver Blue printed very nicely and while the iridescence didn’t come across as much as with the watercolour I made, the quality was quite decent. The consistency was just right and the colour I made was really pretty. The Purple Blue, on the other hand, printed in a patchy manner, with a lot of loosely covered areas. Georgia confirmed that the ink didn’t have the right viscosity and it was more like oil paint.

Then she printed the green on a new design she was currently working on. The bird’s feathers are iridescent in the wild so it was match made in heaven, especially since iridescent relief inks are not readily available. However, the ink I made proved to be too thin and transparent and didn’t carry enough iridescence to the paper.

Georgia Flowers – Bird in progress – printed with Iridescent Pigments ground into Caligo Extender – the result was not strong enough to call successful.
We agreed that we would need to try adding more pigment into the extender to see if we can get a better ink with more iridescence. So even though only 1 out of the 3 inks I made was successful, I was happy. It was a very interesting experiment that I learnt a lot from. I concluded that the best vehicle for making relief inks was copper plate oil and that metallic pigments are a lot harder to make into working ink than ordinary ones.
We hope you enjoyed this paint/ink making post and that it inspired you to experiment with the many amazing pigments available or perhaps to collect ingredients from nature to make something unique. Remember, all art materials mentioned in this article can be purchased through our website, by calling 01273 260260 ext 1. or in our shop at 208-212 Portland Road, Hove.


