Mother's Day is just around the corner and what's better to honour Mum than with a handmade present?
Join us on our latest craft adventure - this time we are making a bouquet of paper roses! Grab your coloured paper and sharpen your scissors because this easy, kid-friendly project will put cut flowers to shame and make Mums smile.
.
.
.
.
.
..
Here's what you will need:
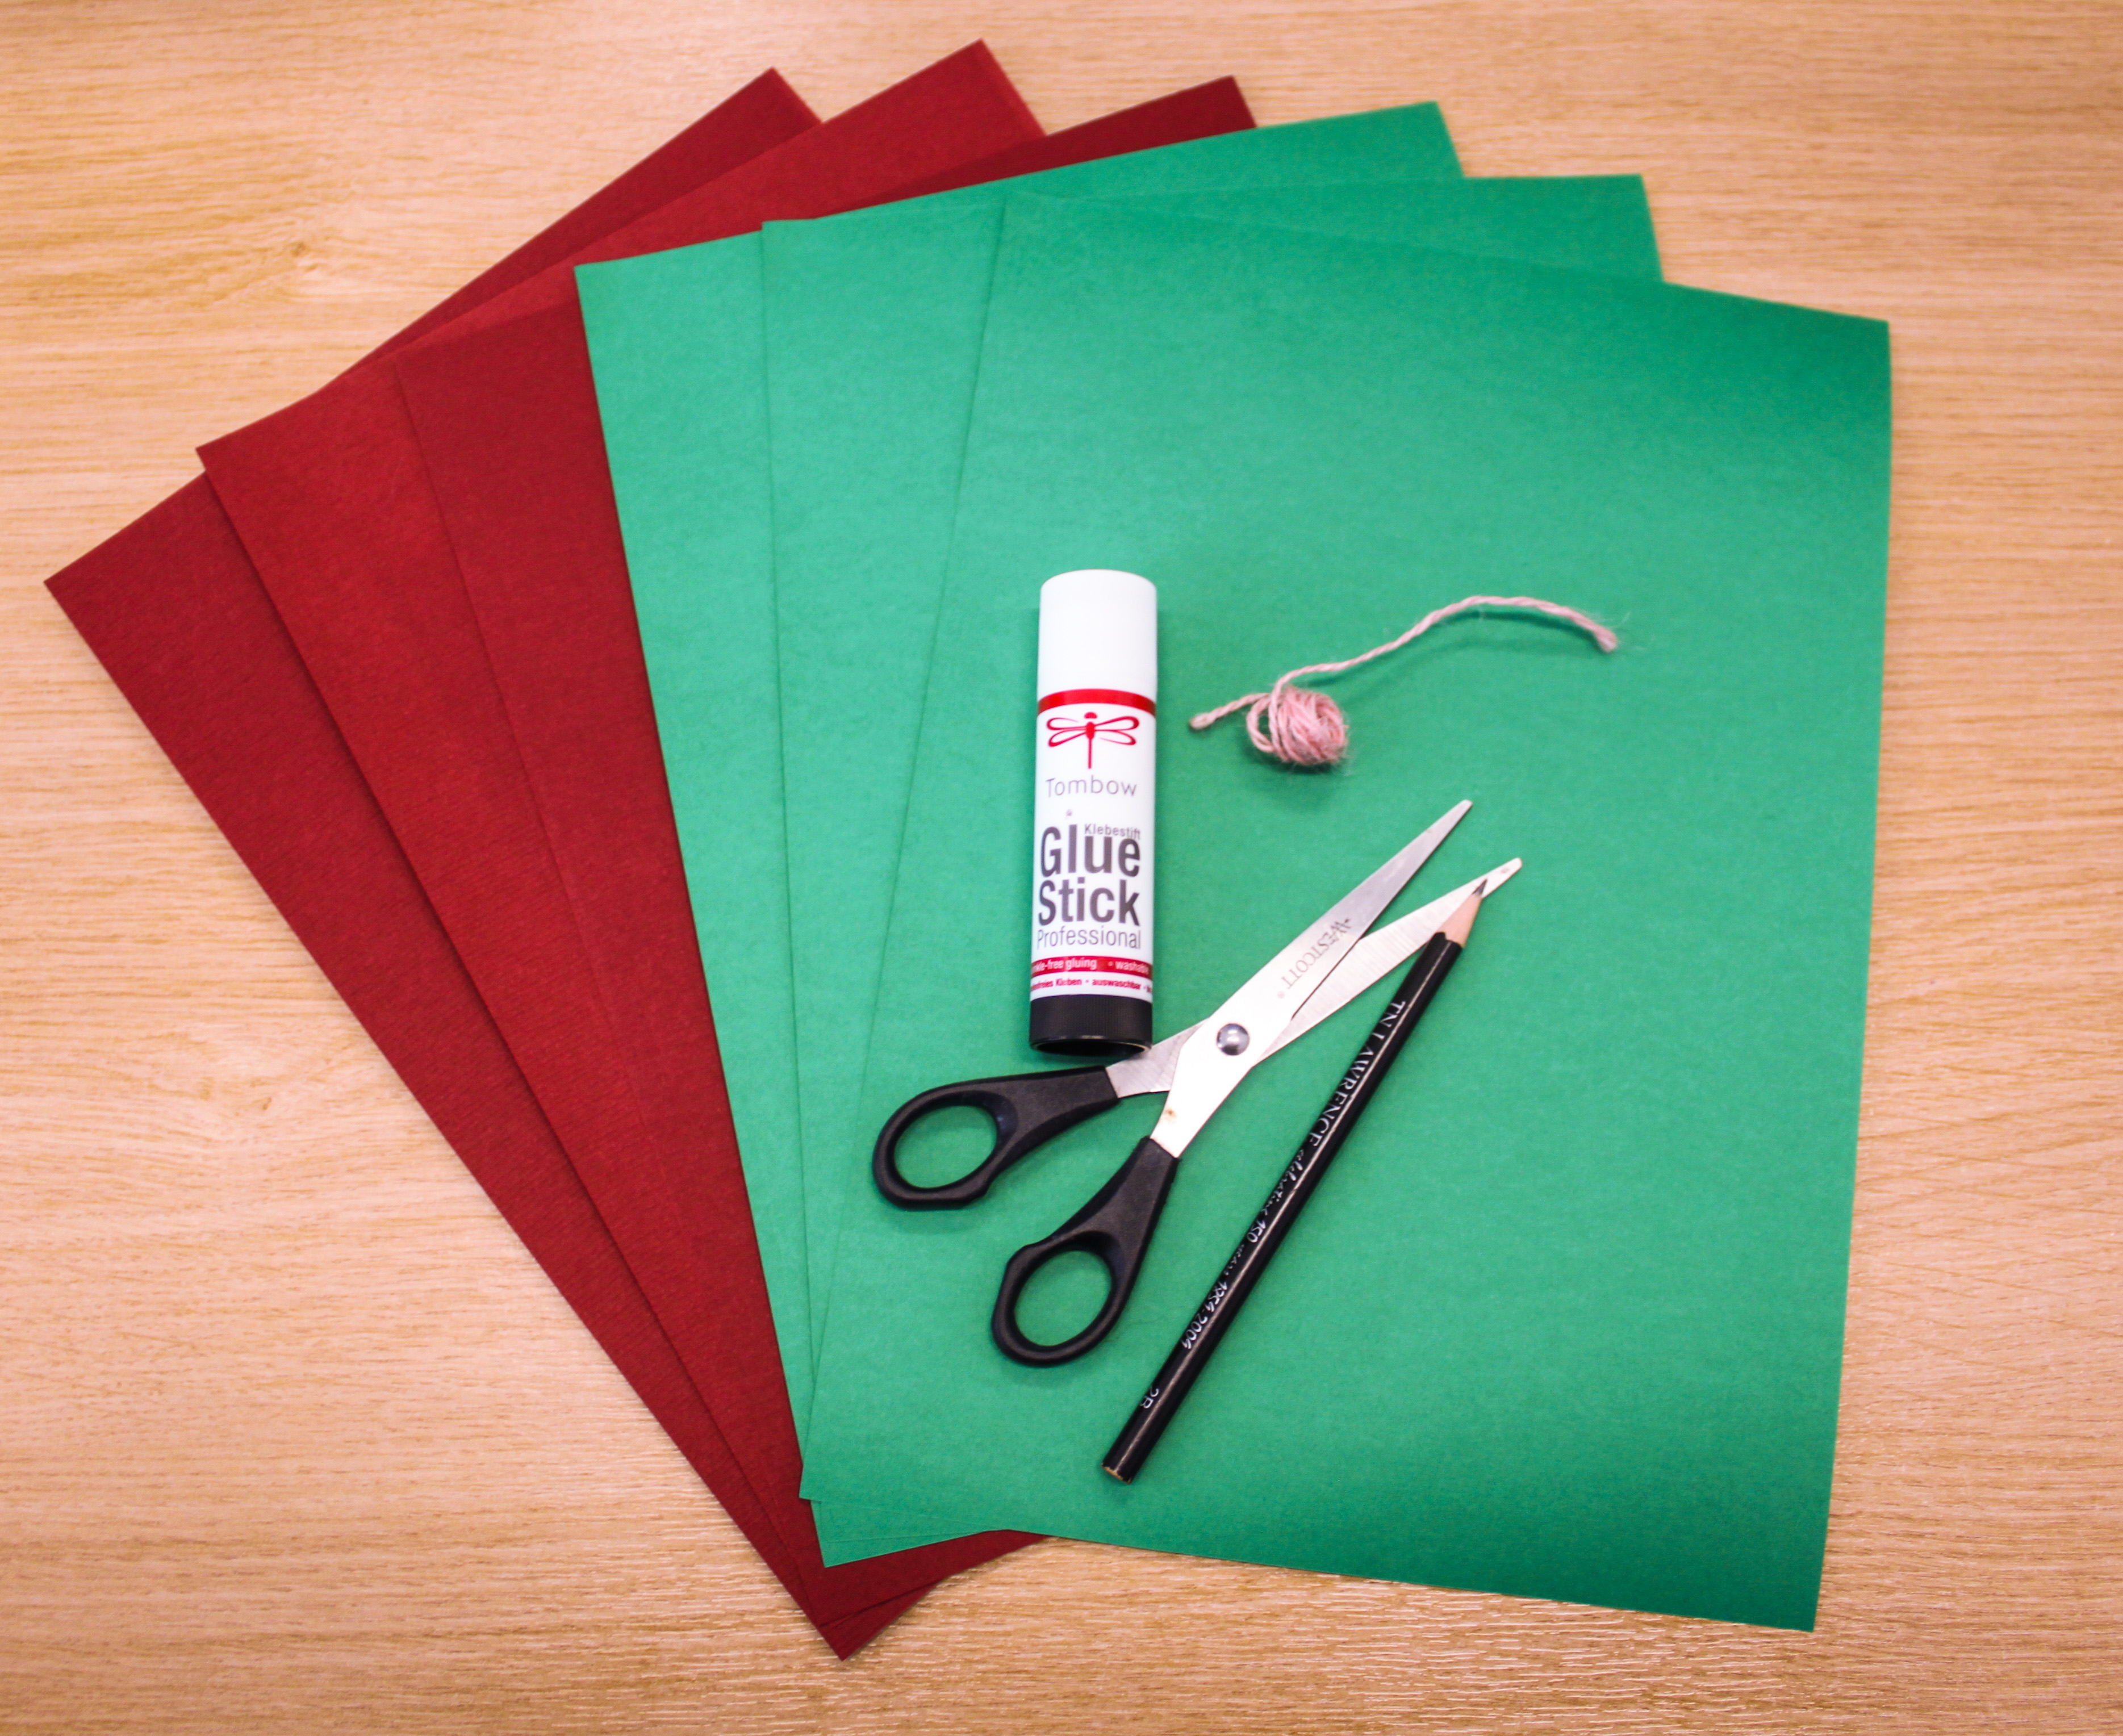
- coloured cards for the roses - go with Mum's favourite colour - we recommend Artoz A4 CARD 220gsm plain coloured (AZ650696)
- coloured paper for the stems - go green or go crazy with colours, it's up to you - we recommend Artoz A4 100gsm plain coloured (AZ650796)
- a pair of scissors
- glue - any paper glue will do but we recommend the Tombow Glue Stick (TBPTM)
- a pencil
- a colourful string or ribbon (optional)
- glitter (optional)
[caption id="attachment_598" align="alignleft" width="584"]
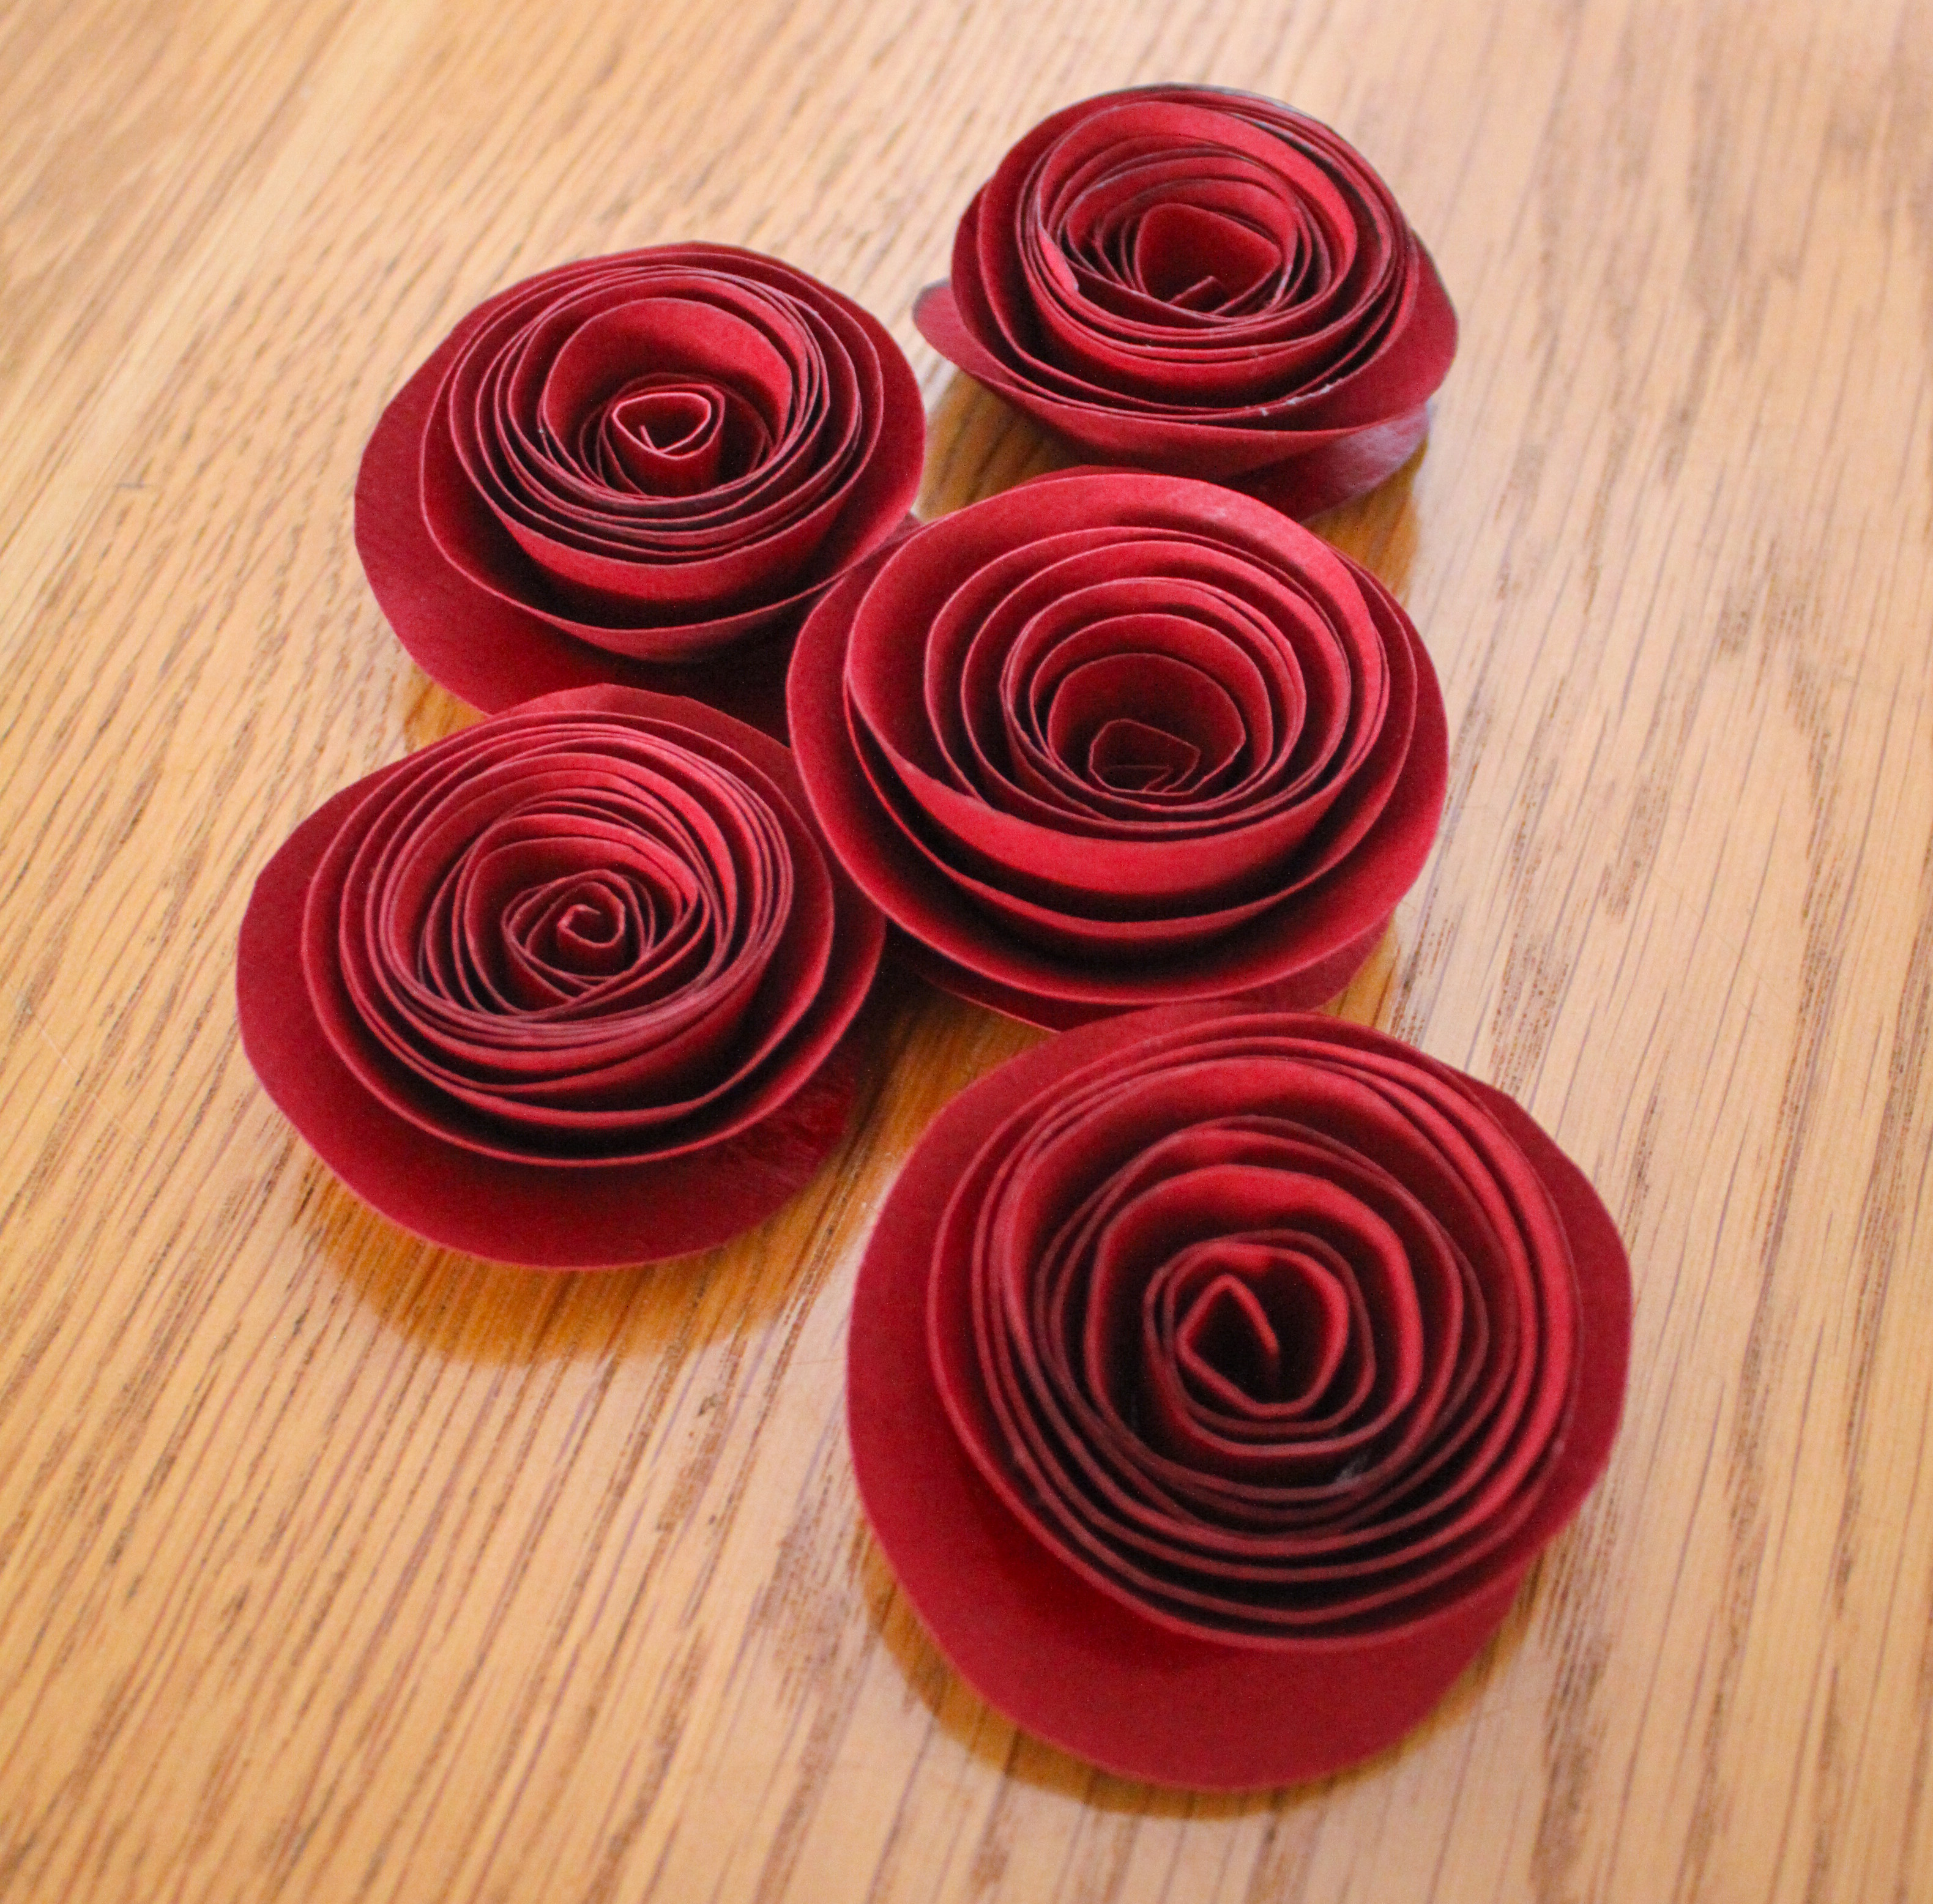
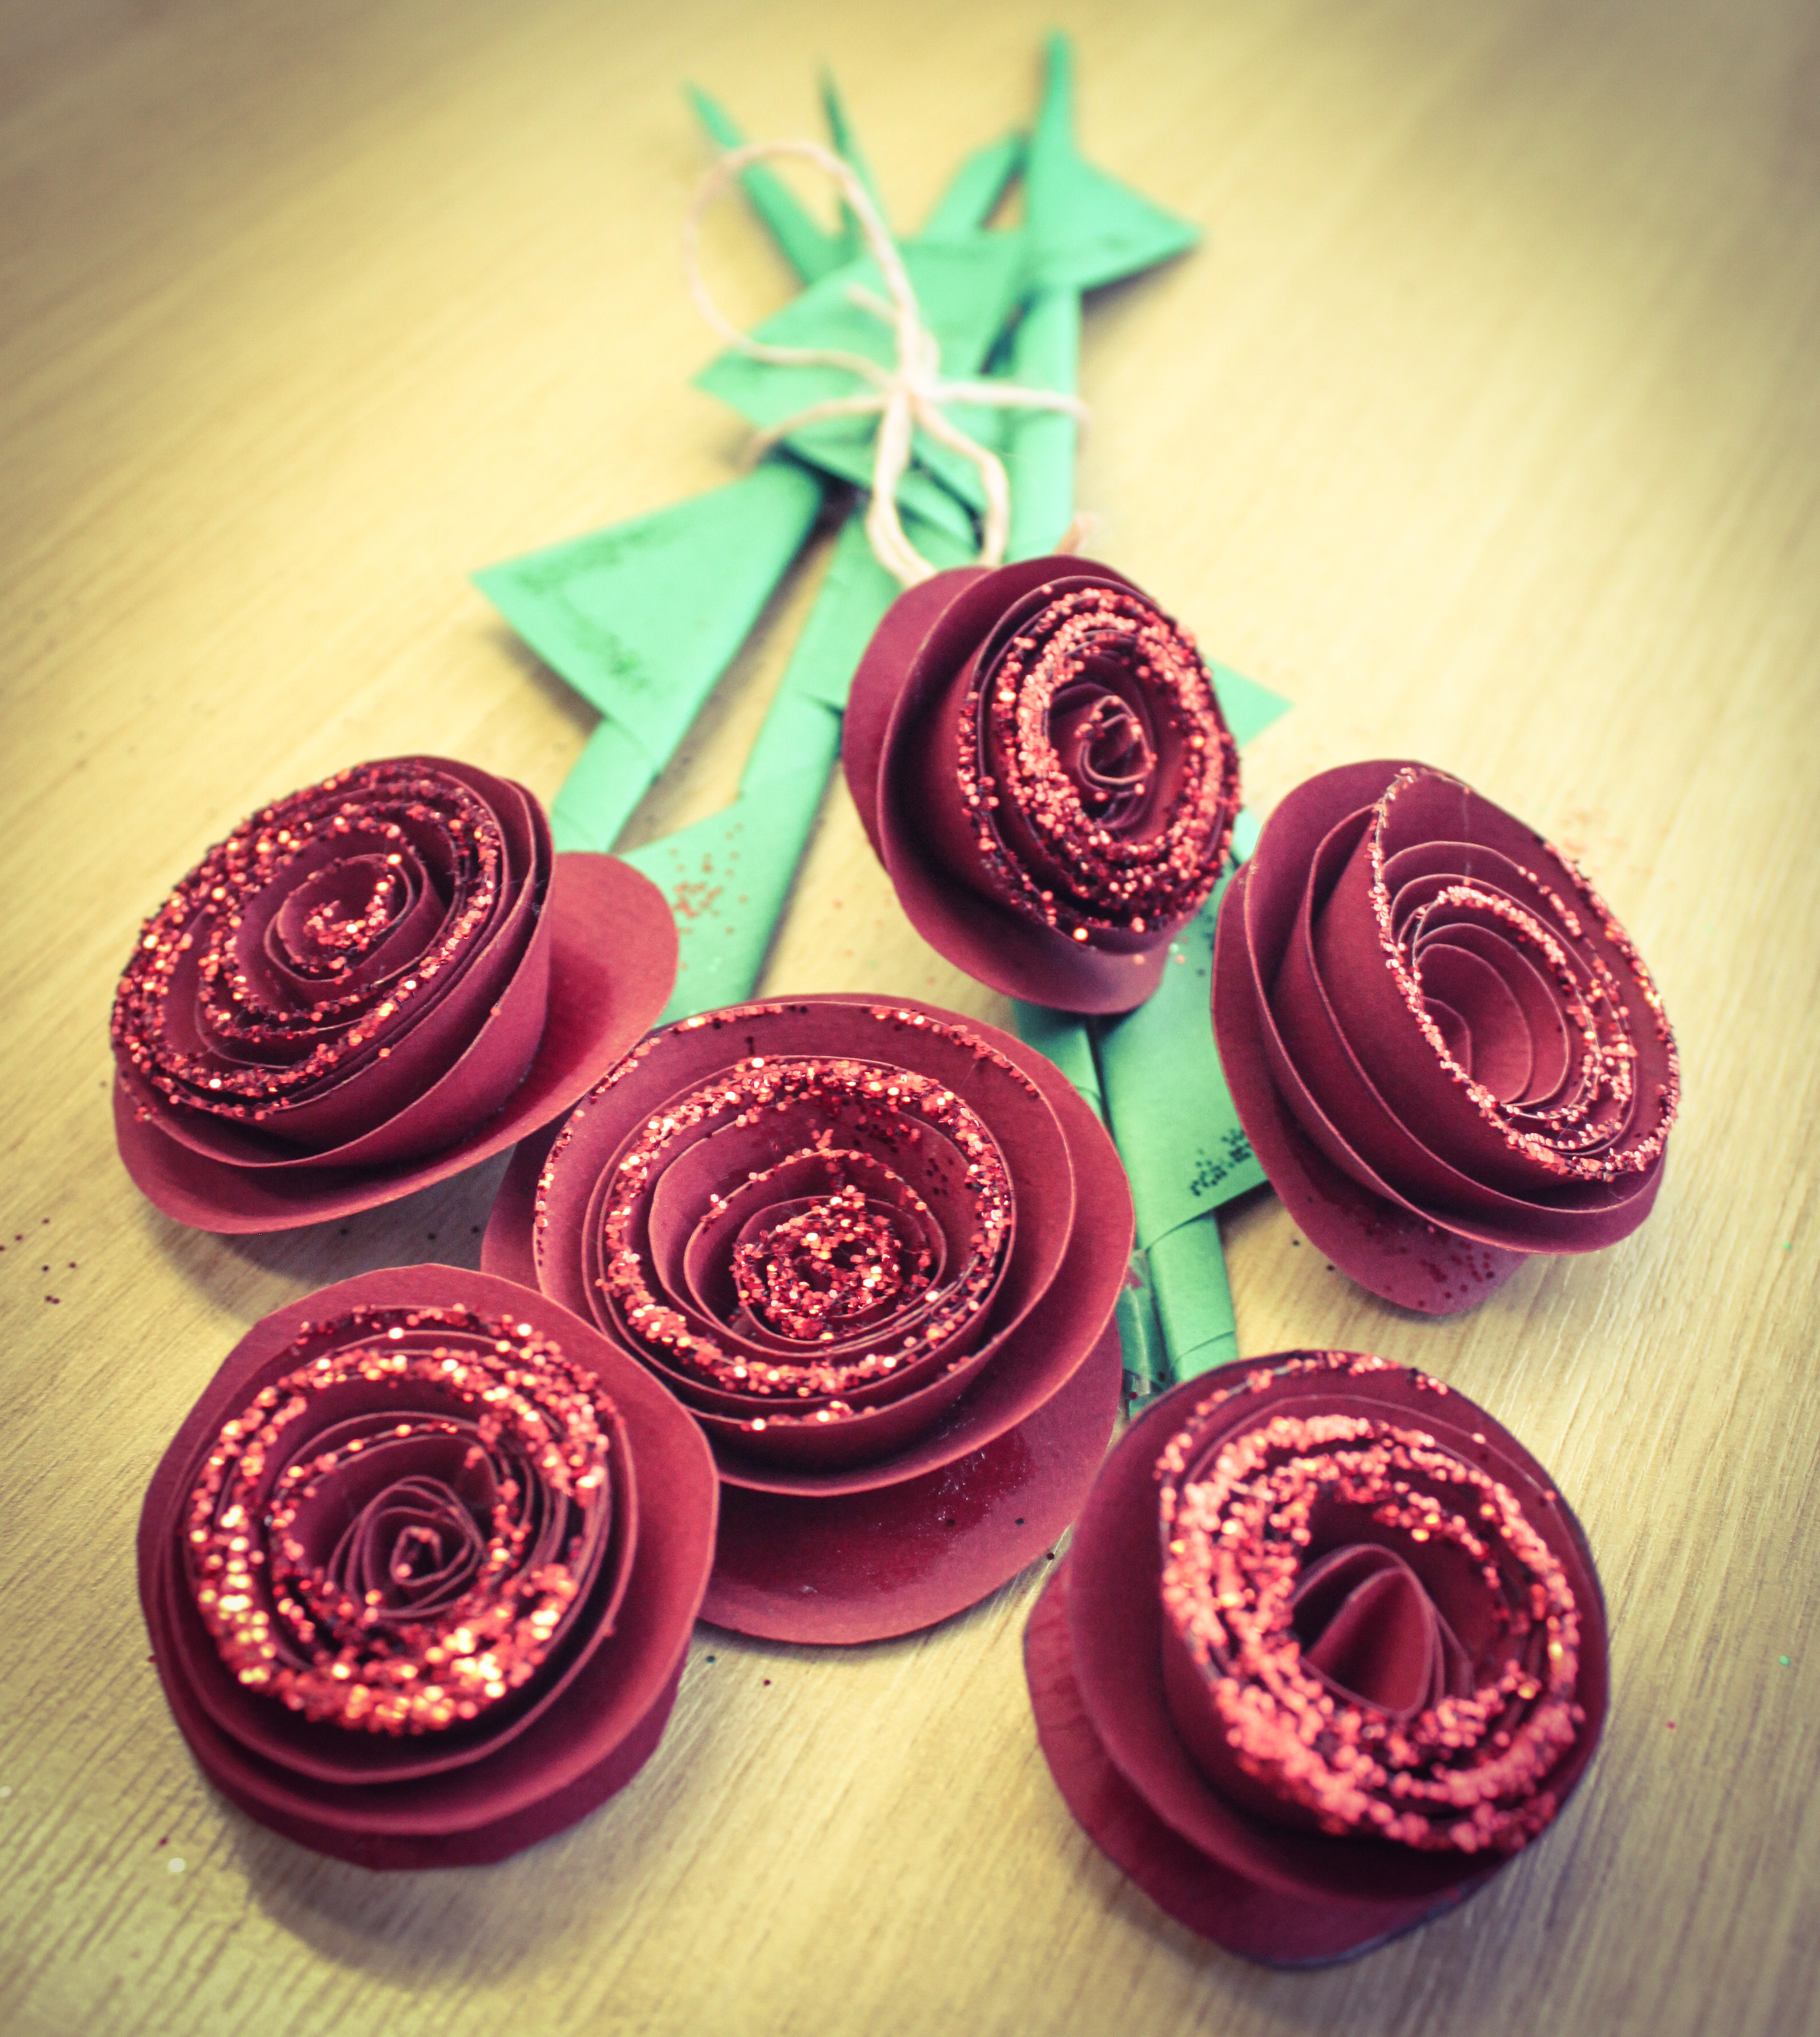
Tip: Three sheets of red card and green paper will make six roses. If you want more, just half the number you want and you will get the number of papers needed of each colour.[/caption]
Step 1. First we make the roses' heads.
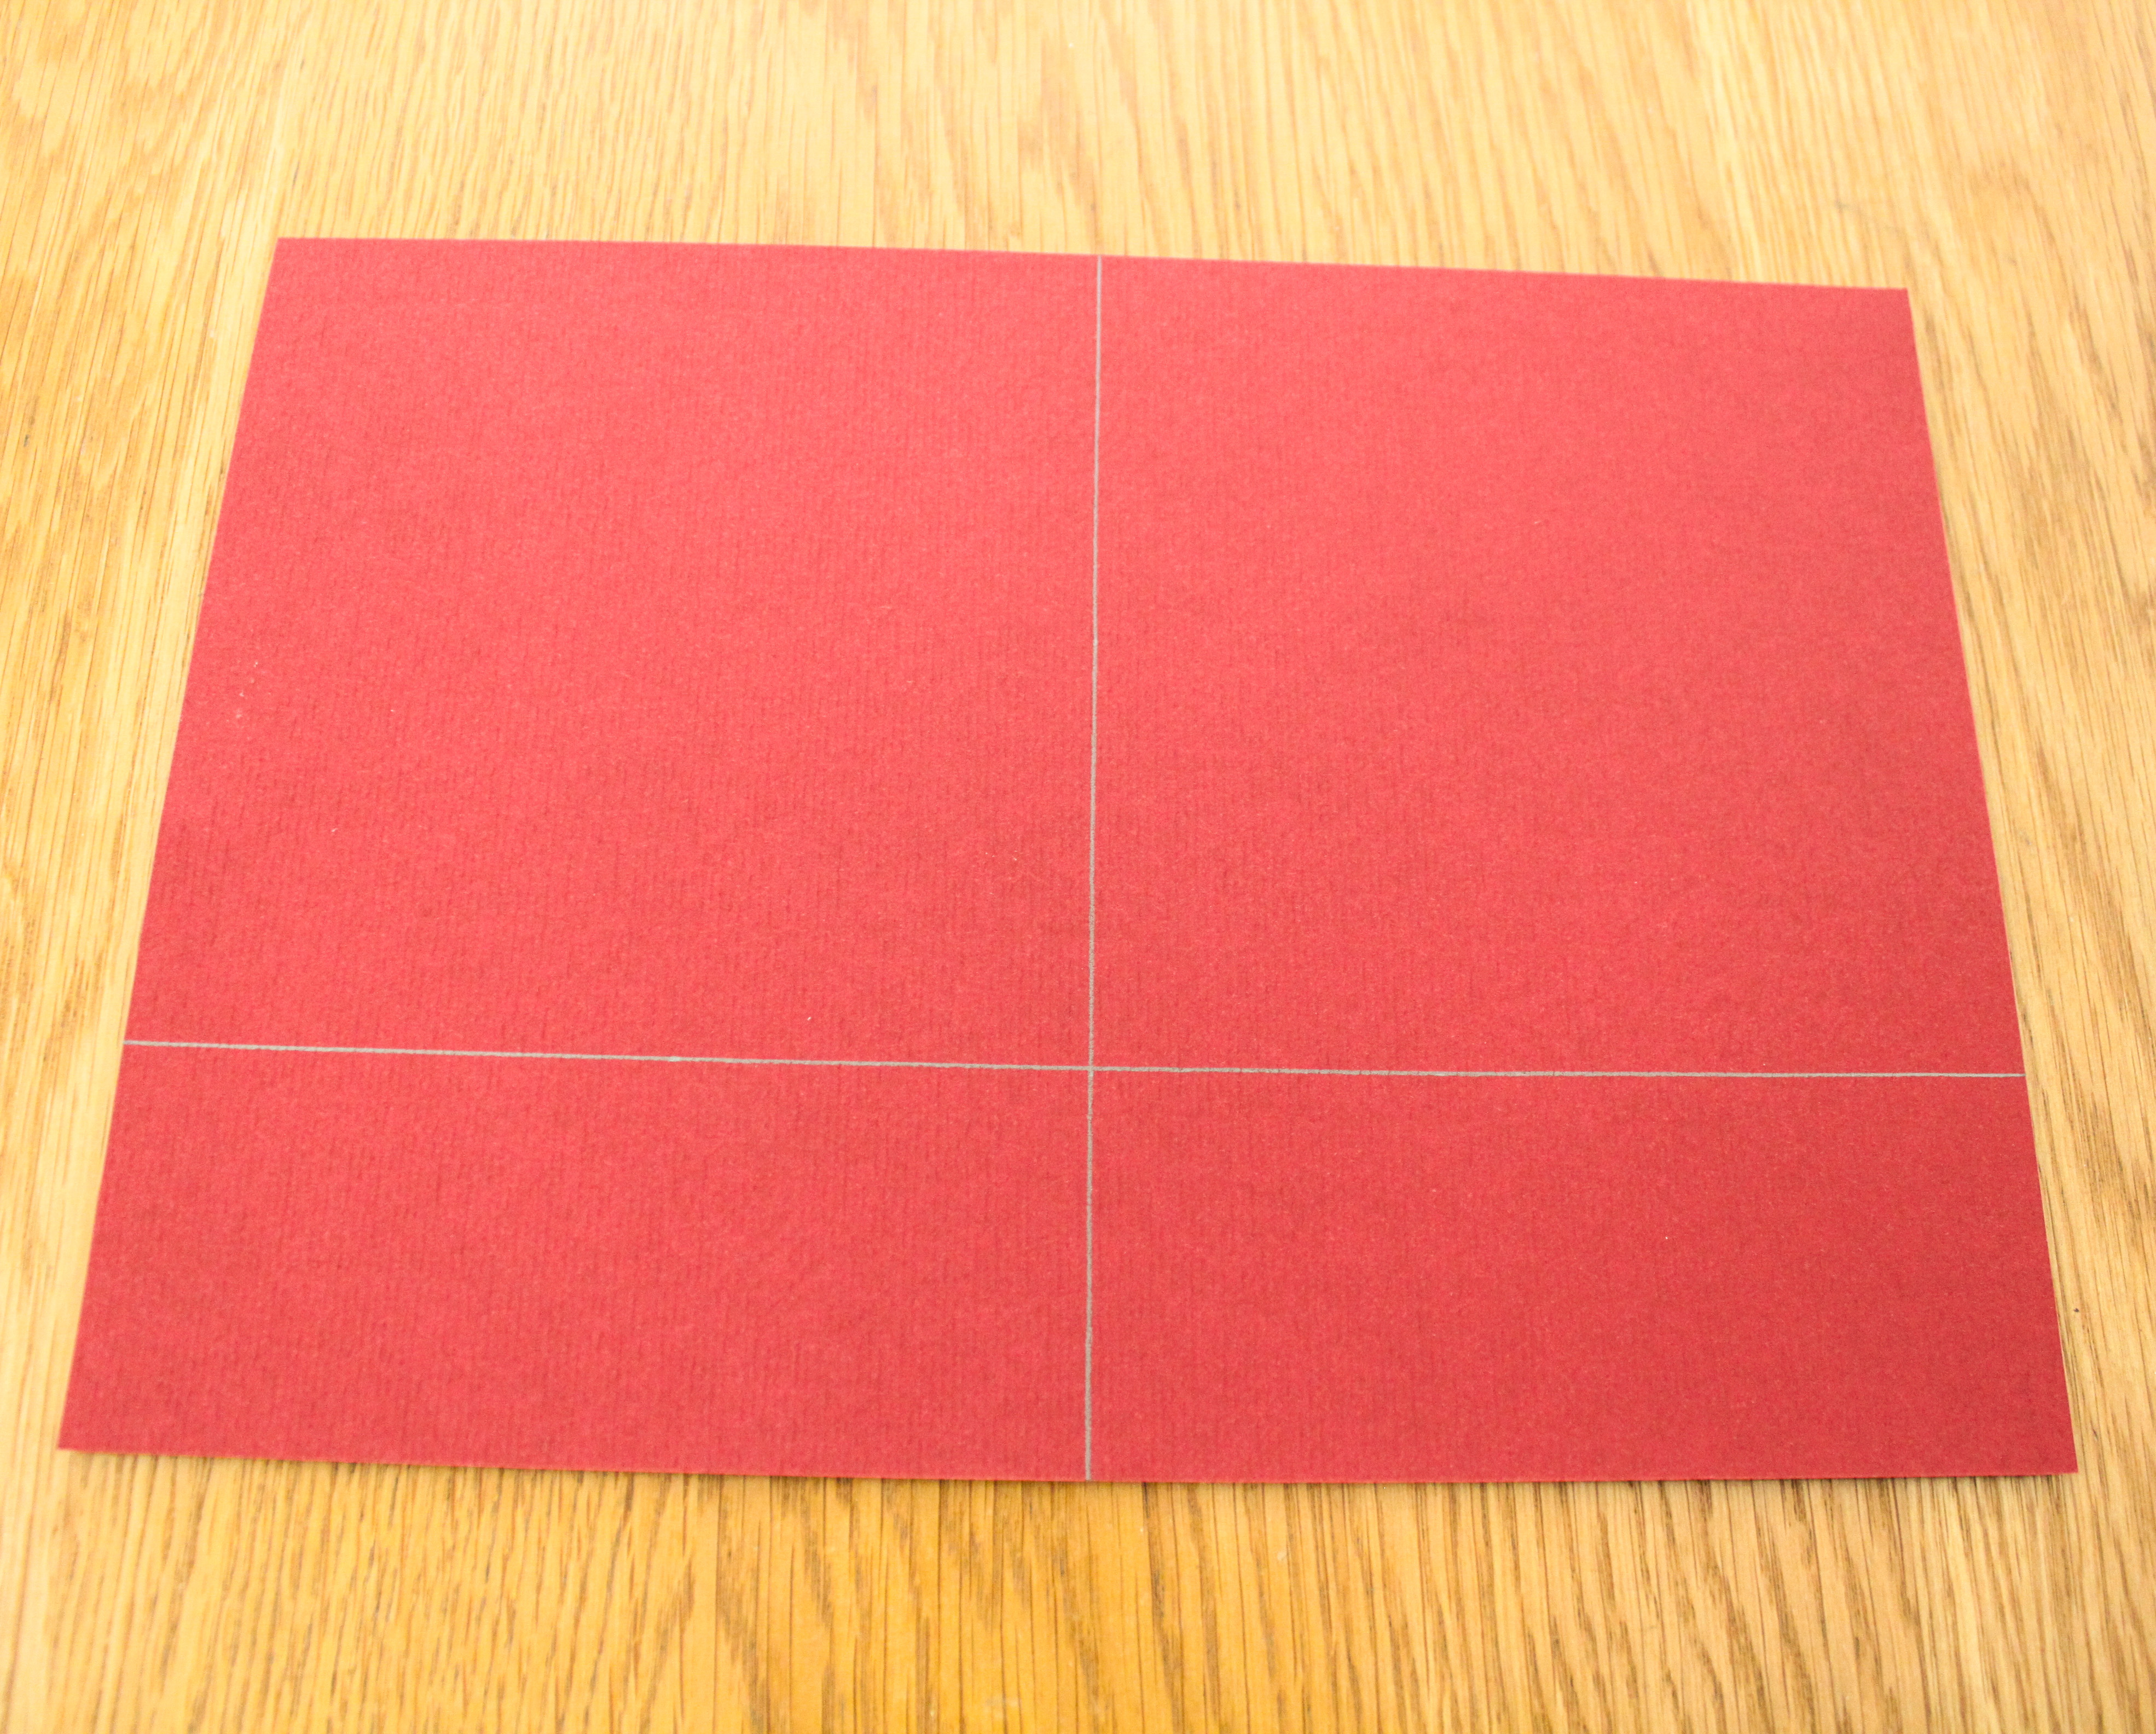
Lay out your first card and draw a line in the
middle. Draw another line across, so that you get two squares. Don't worry too much if they are not perfect; it won't ruin your roses.
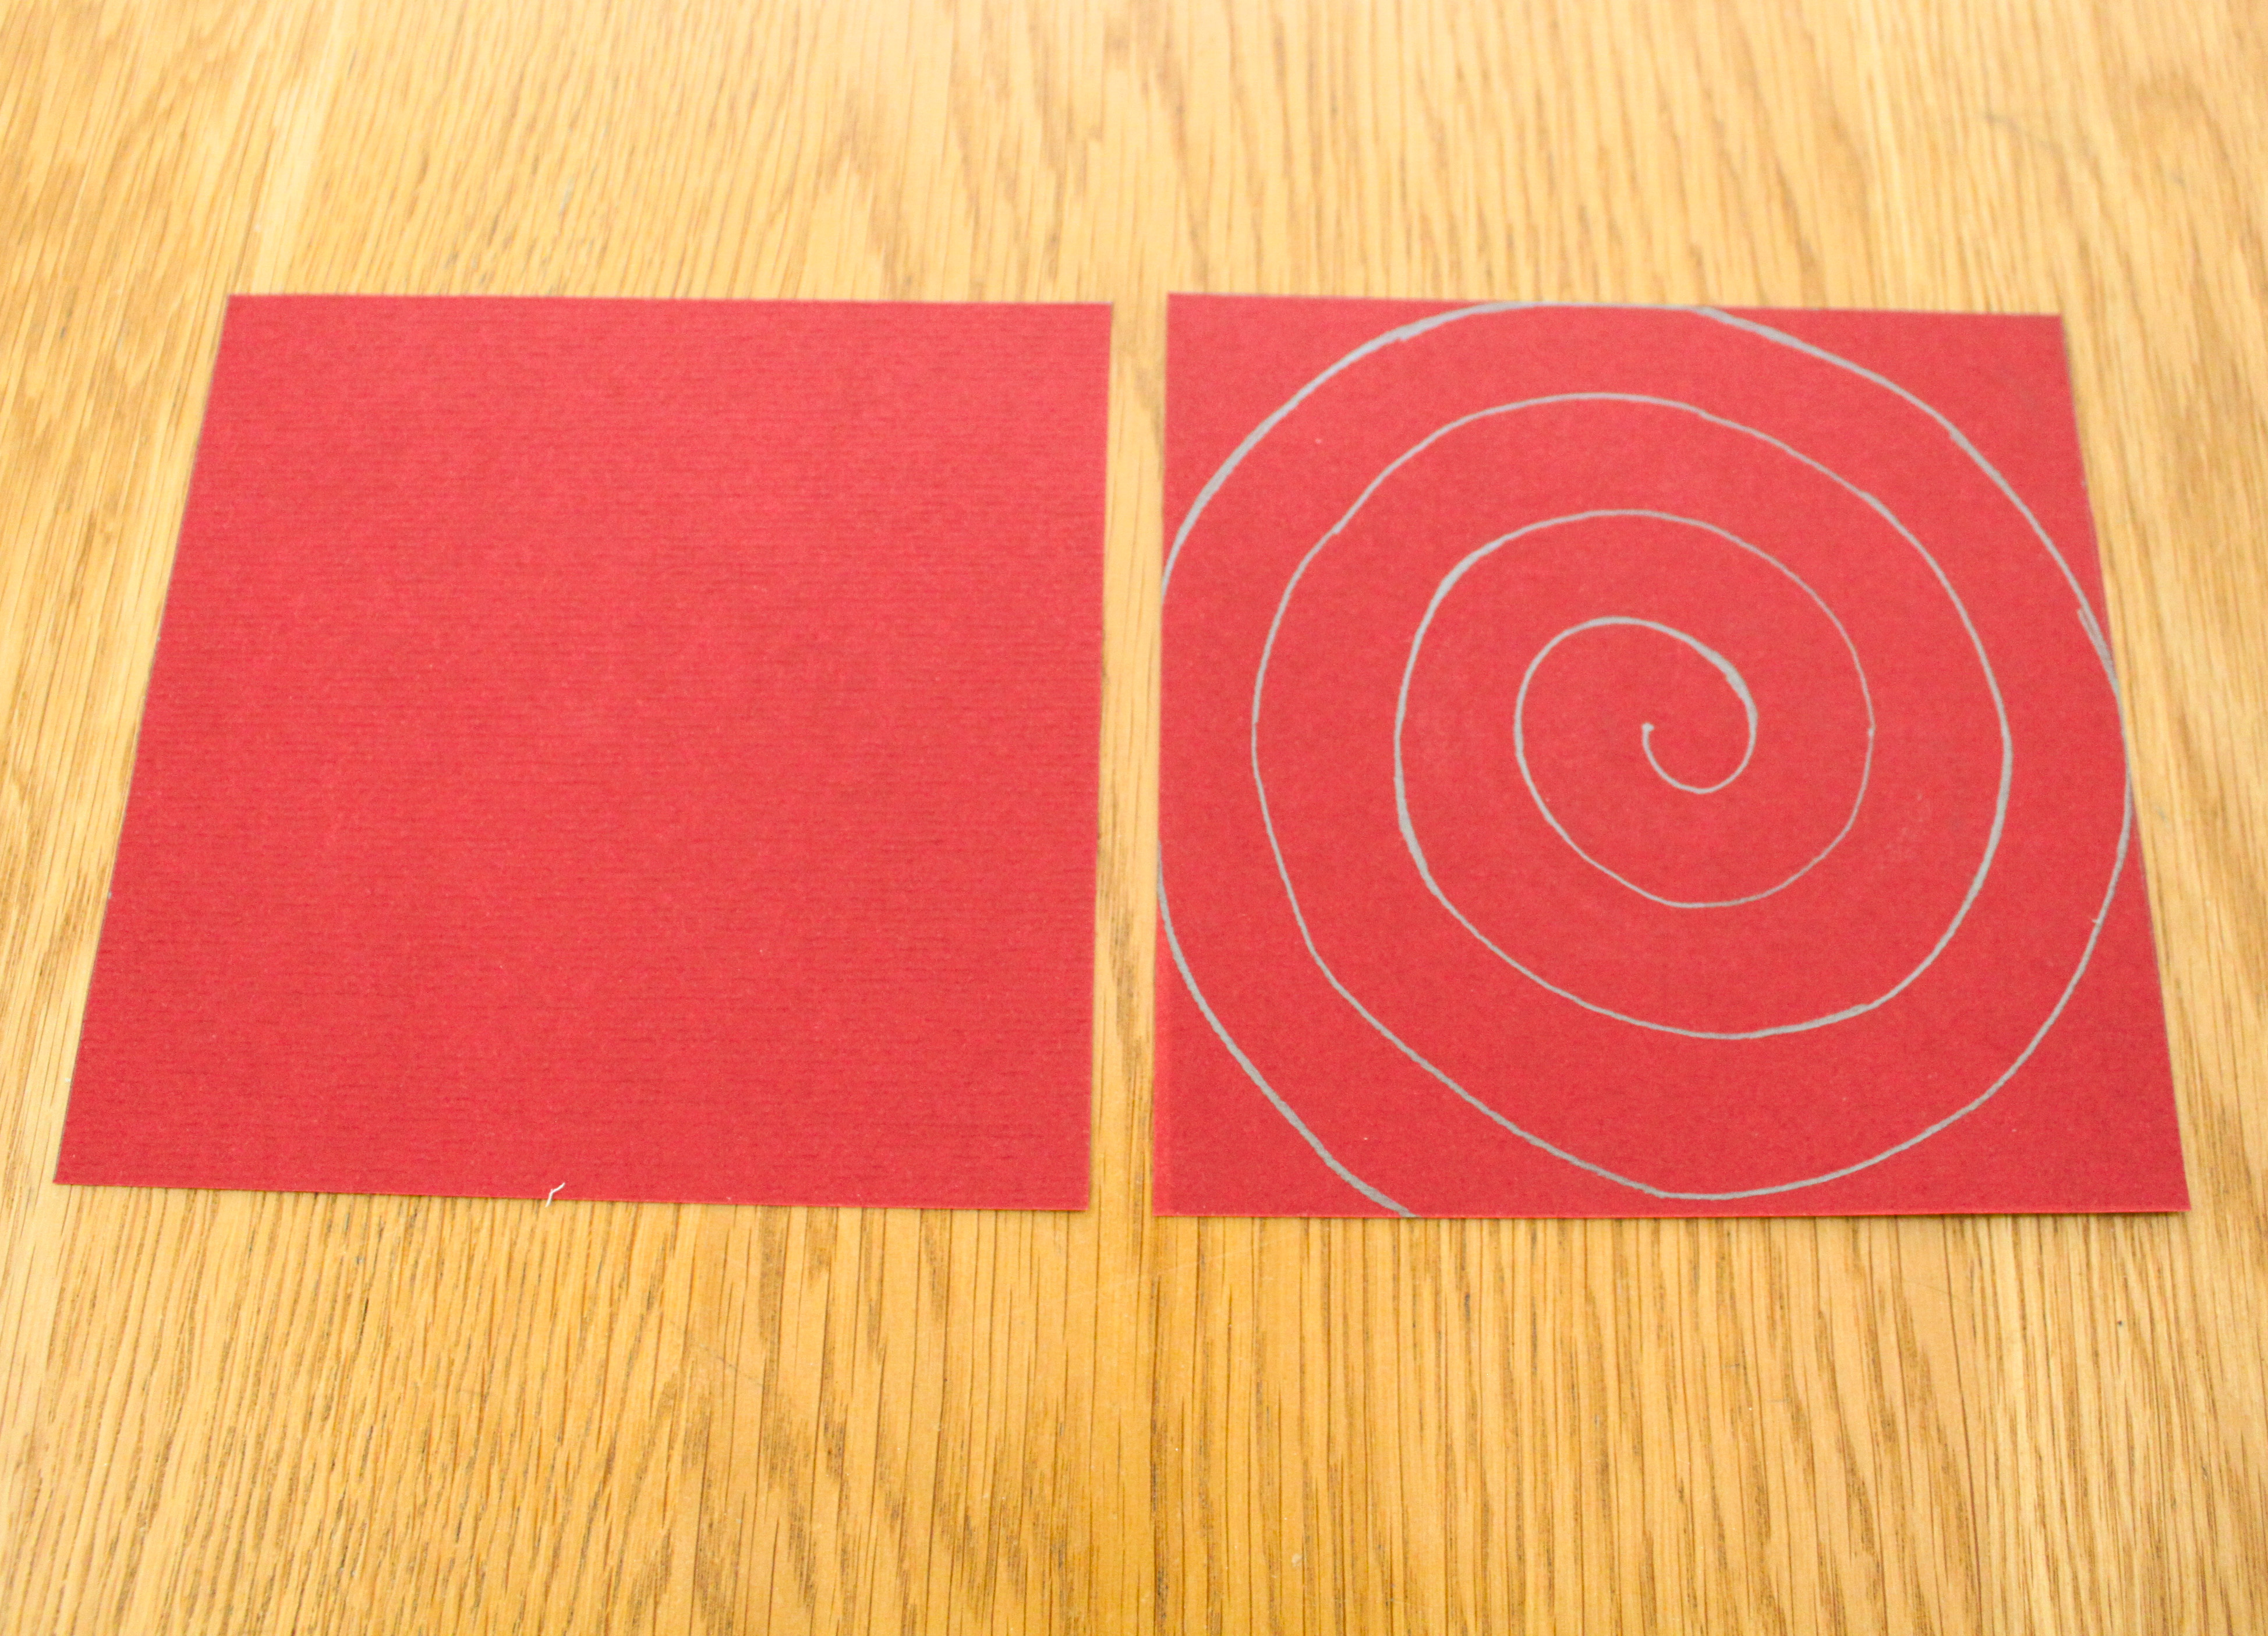
Step 2. Draw a spiral starting from the middle of your square and ending near the edge. Then cut off the corners and start cutting along the spiral line all the way to the middle.
 Step 3. Roll up the paper strip between your fingers starting from the outside and moving along the spiral until you get to the middle.
 Step 4.
 Apply a generous amount of glue in the middle of the spiral and push down the petals until the glue dries. Your flower head is ready, now repeat it as many times as many roses you want to make.
 Step 5.
 Now that the roses are ready, it's
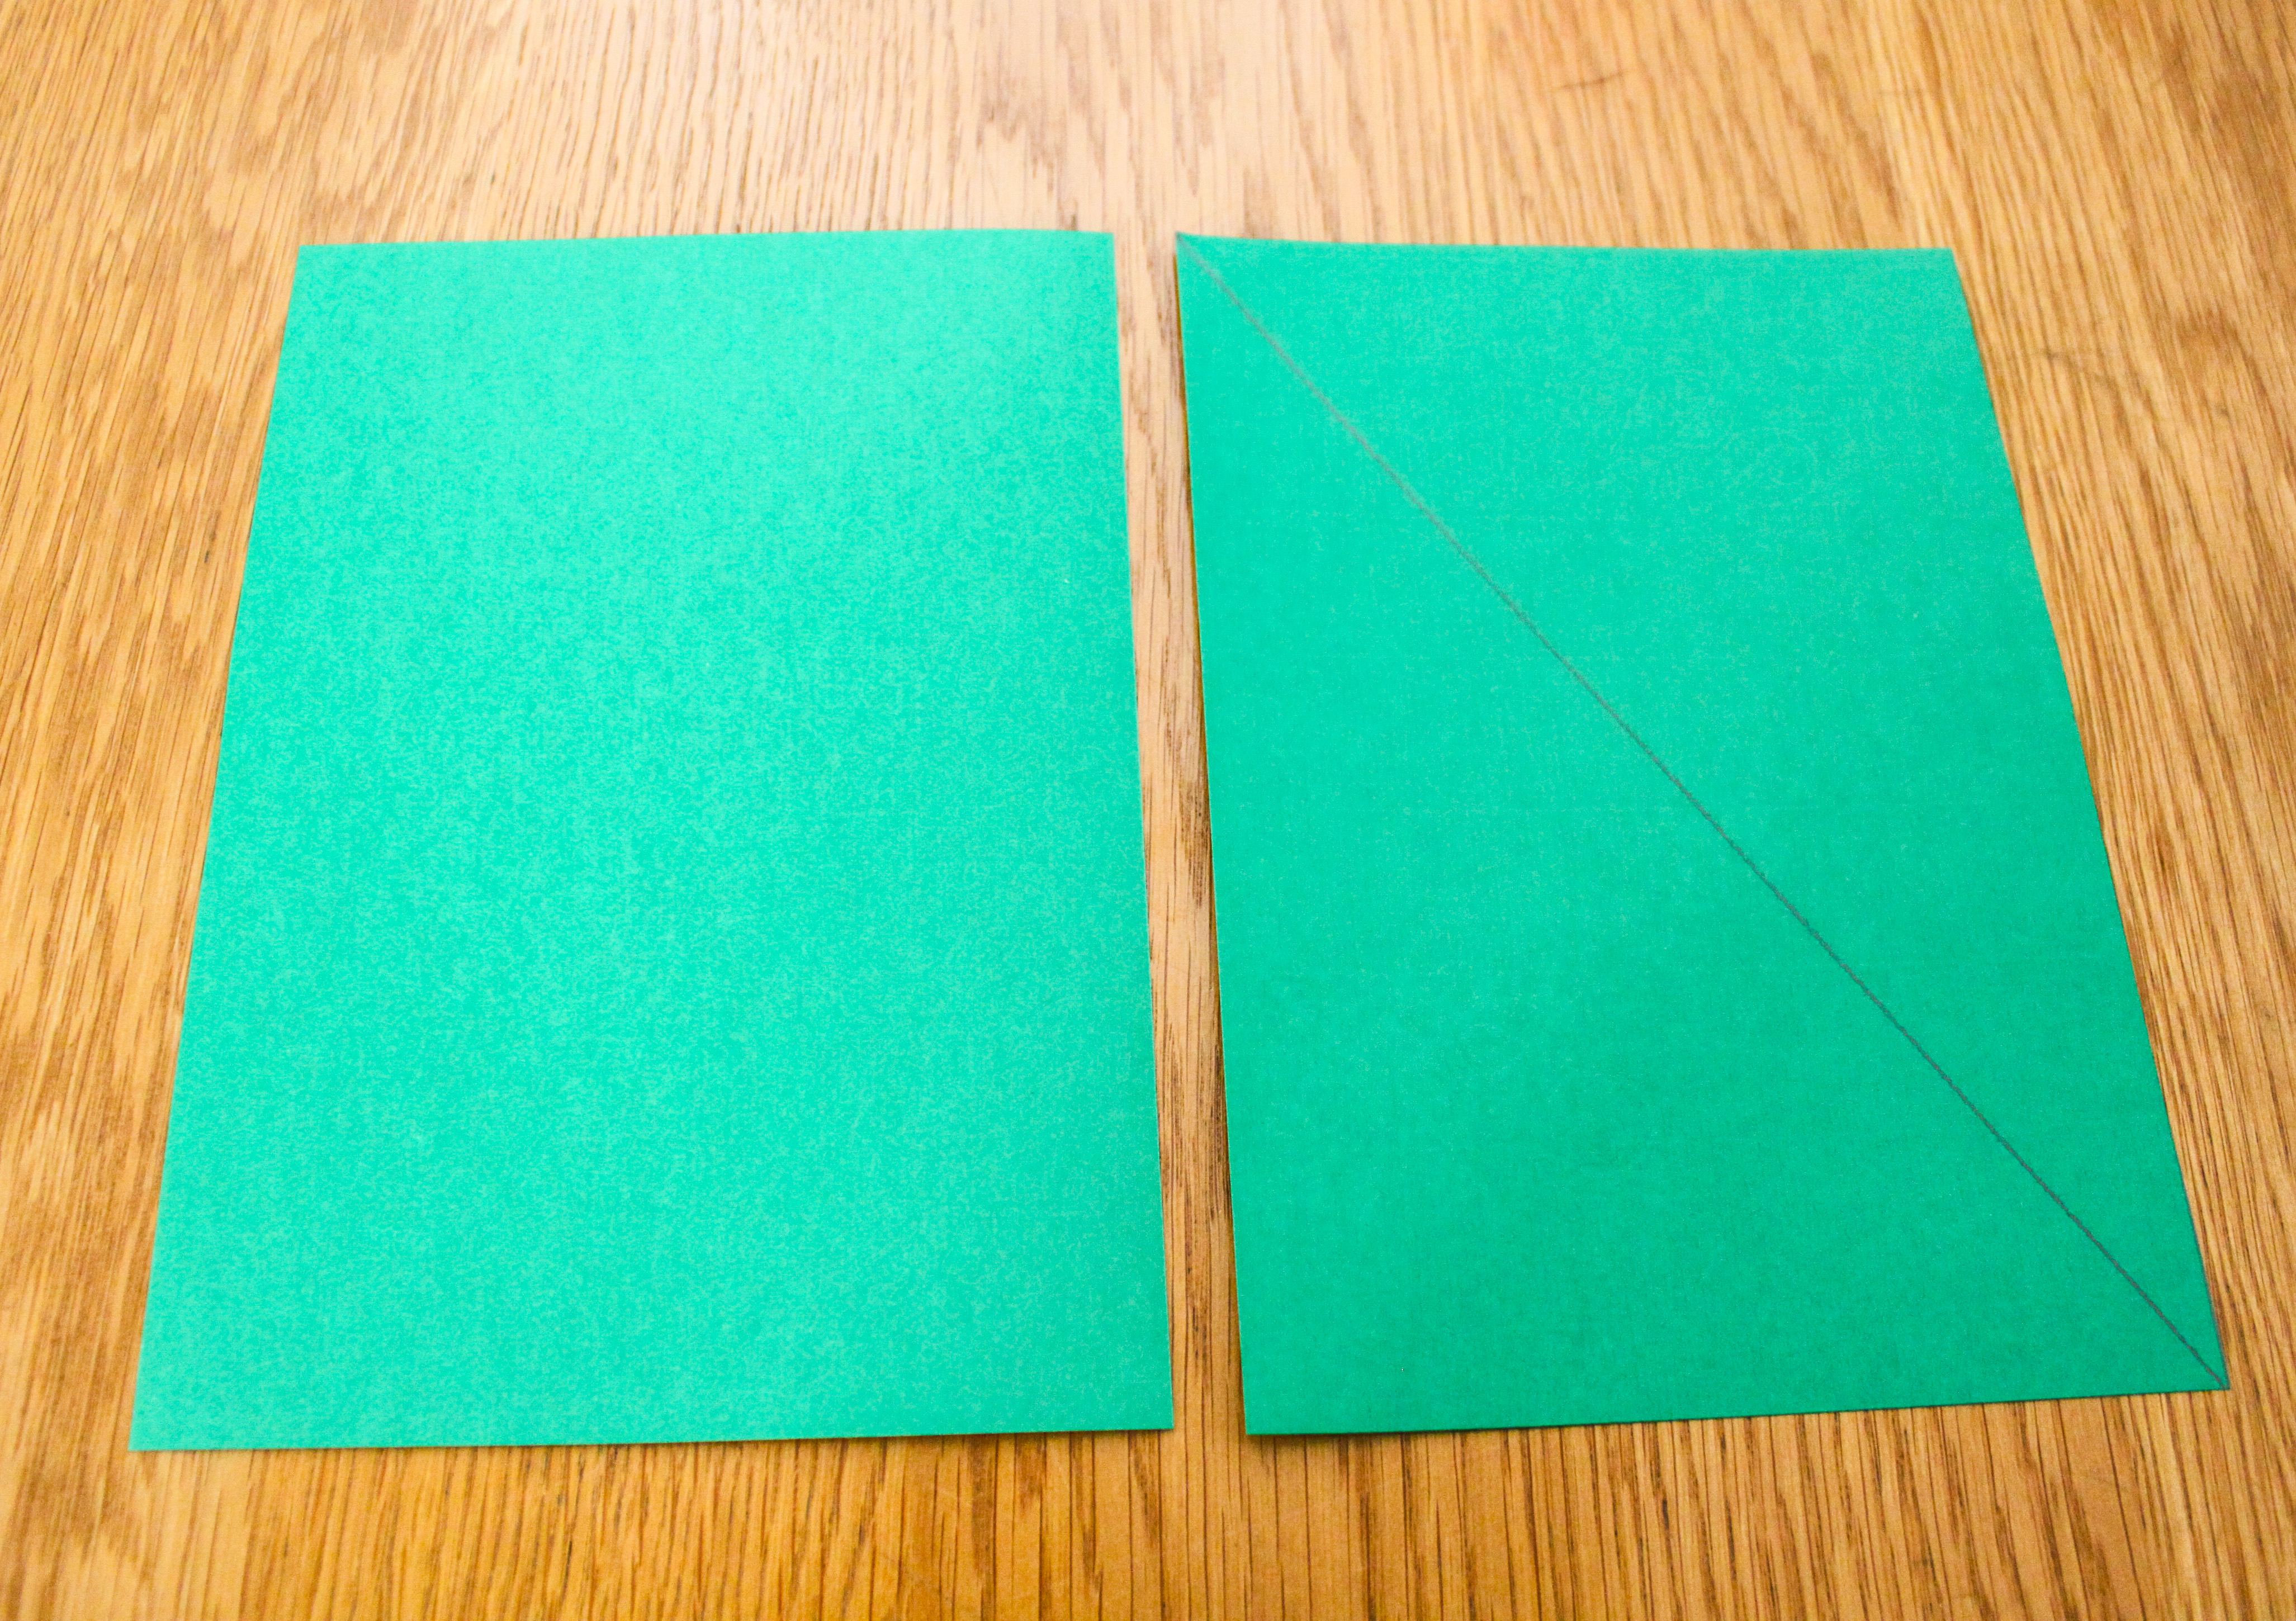
time to make the stems. Take your green papers and cut them in half. One sheet will make two stems.
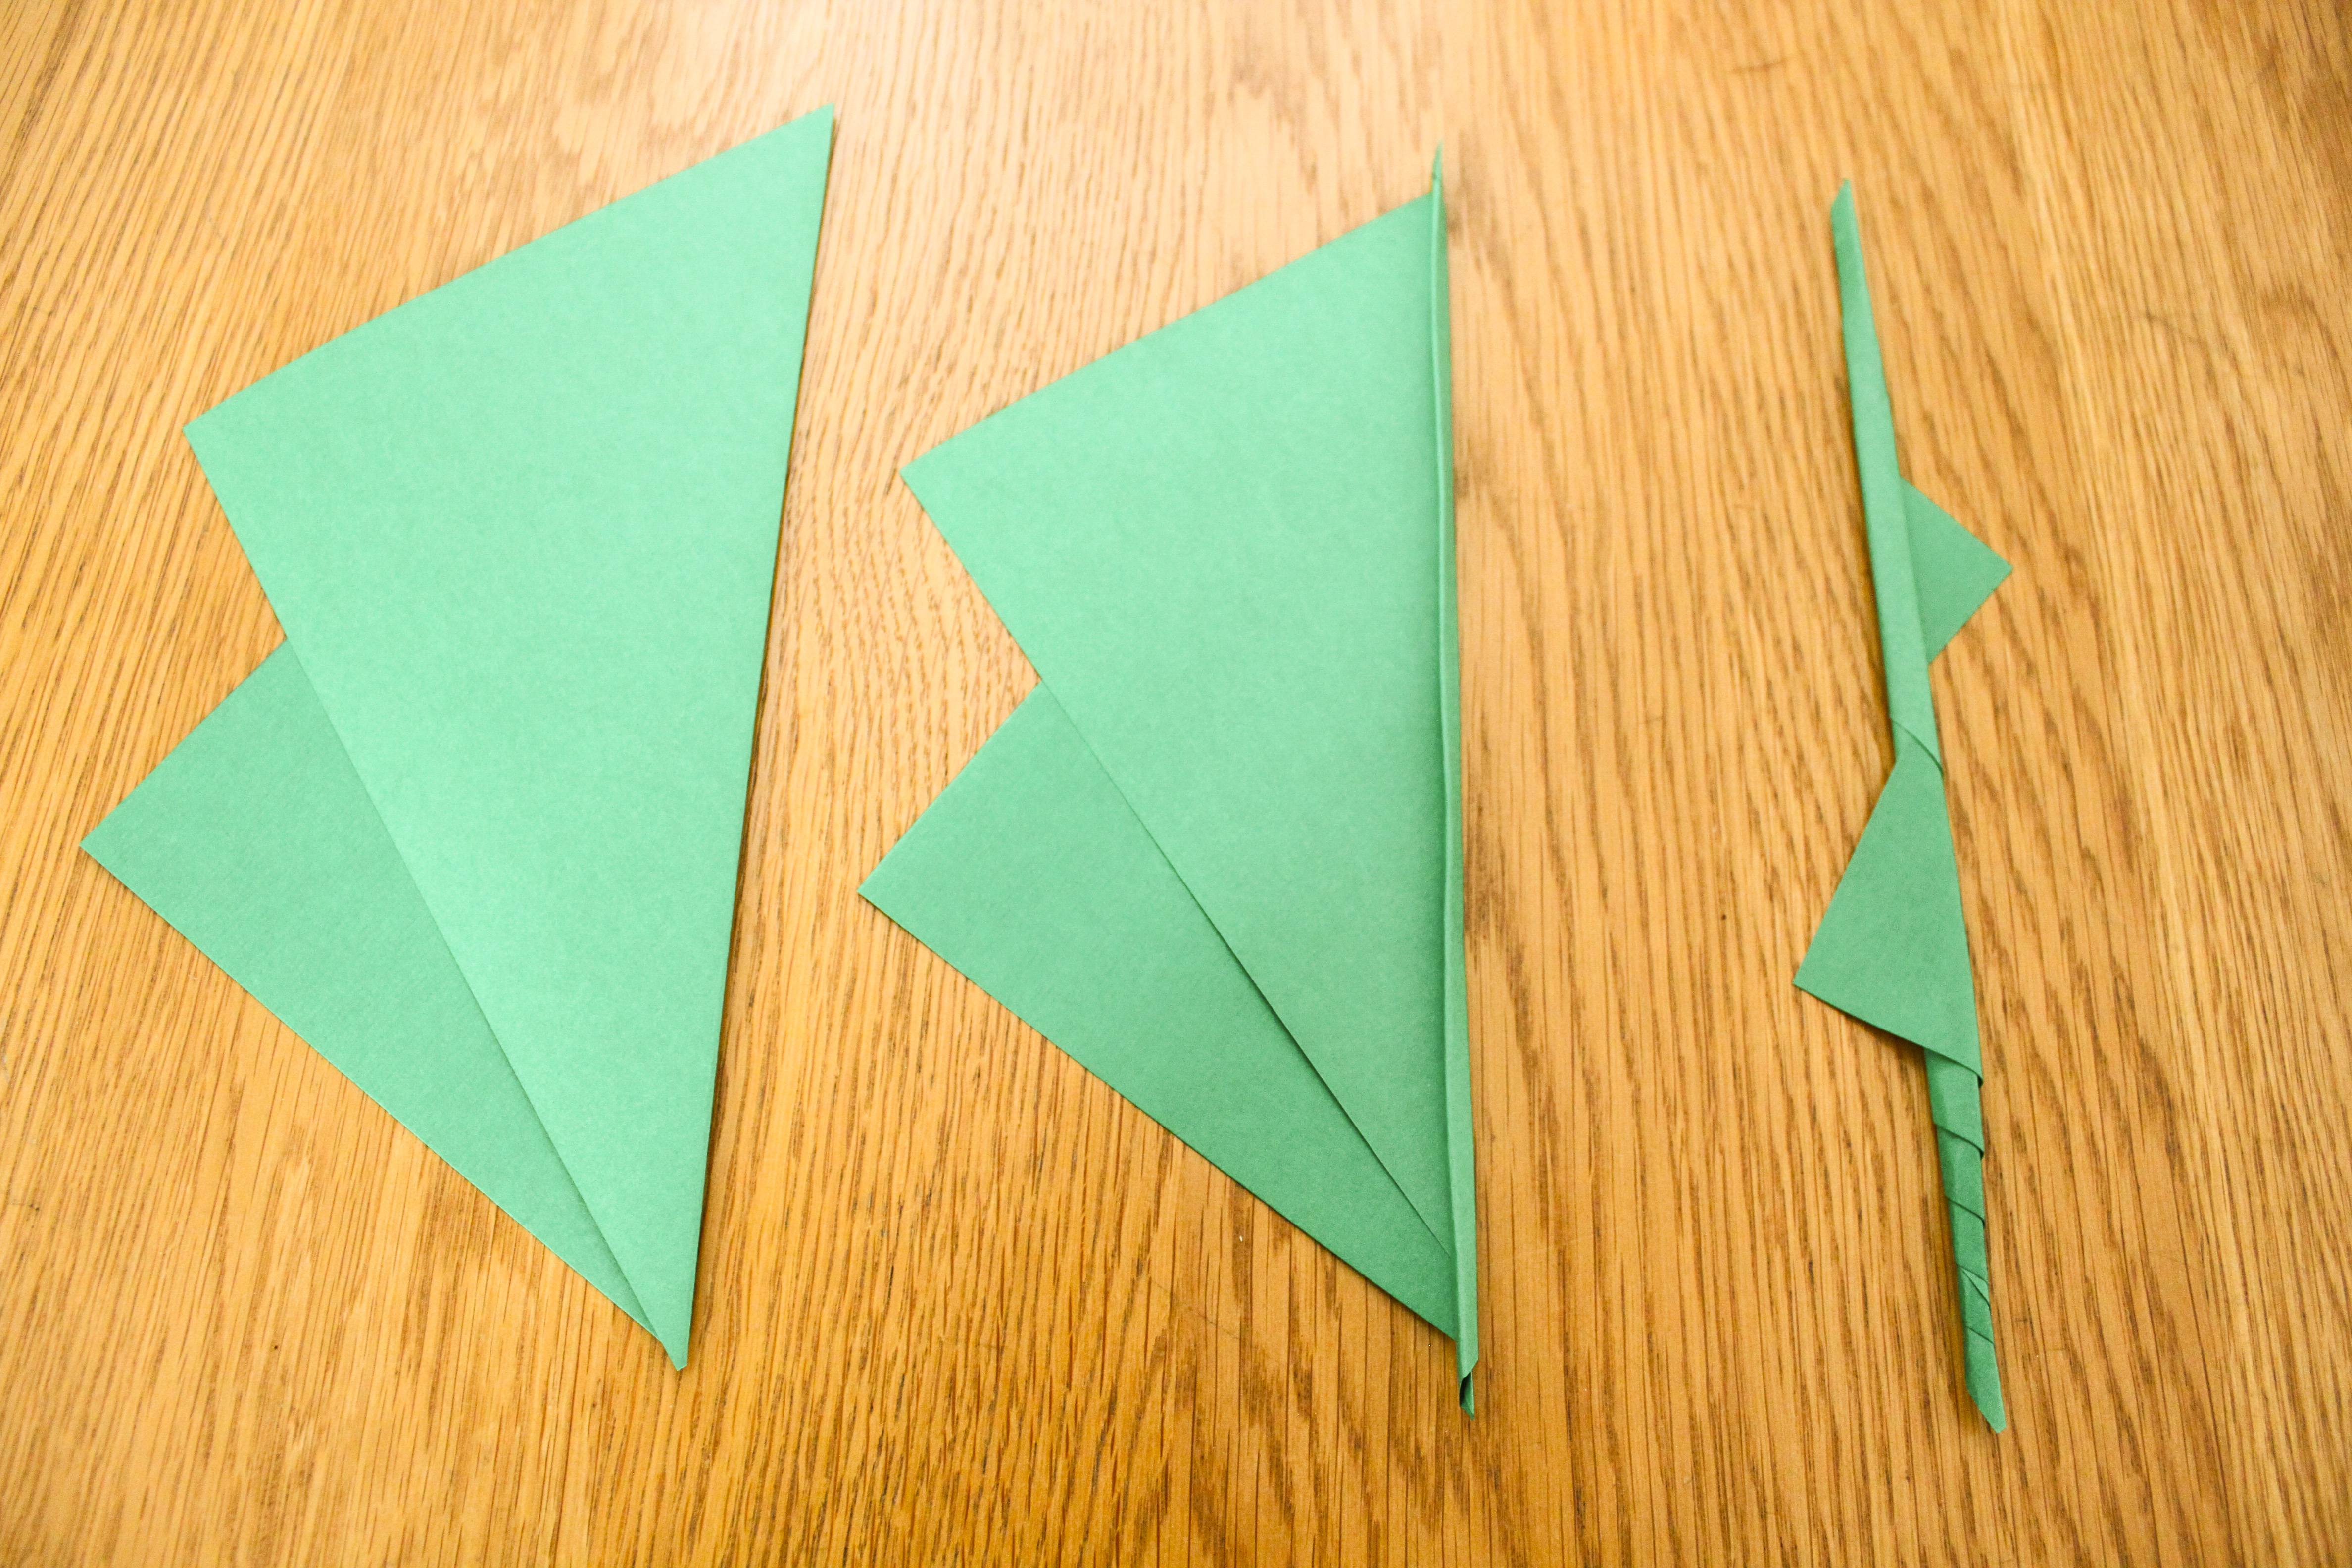
Step 6. Take a half-sheet and draw a diagonal line. Fold the paper along this line and start rolling it up tightly until you get to the 'leaves'.
Step 7. Fold the leaves to the opposite sides of the stem until you are happy with the shape, then glue the stem together. Leave it under something heavy to dry completely. Now make as many stems as there are rose heads.
 Step 8.
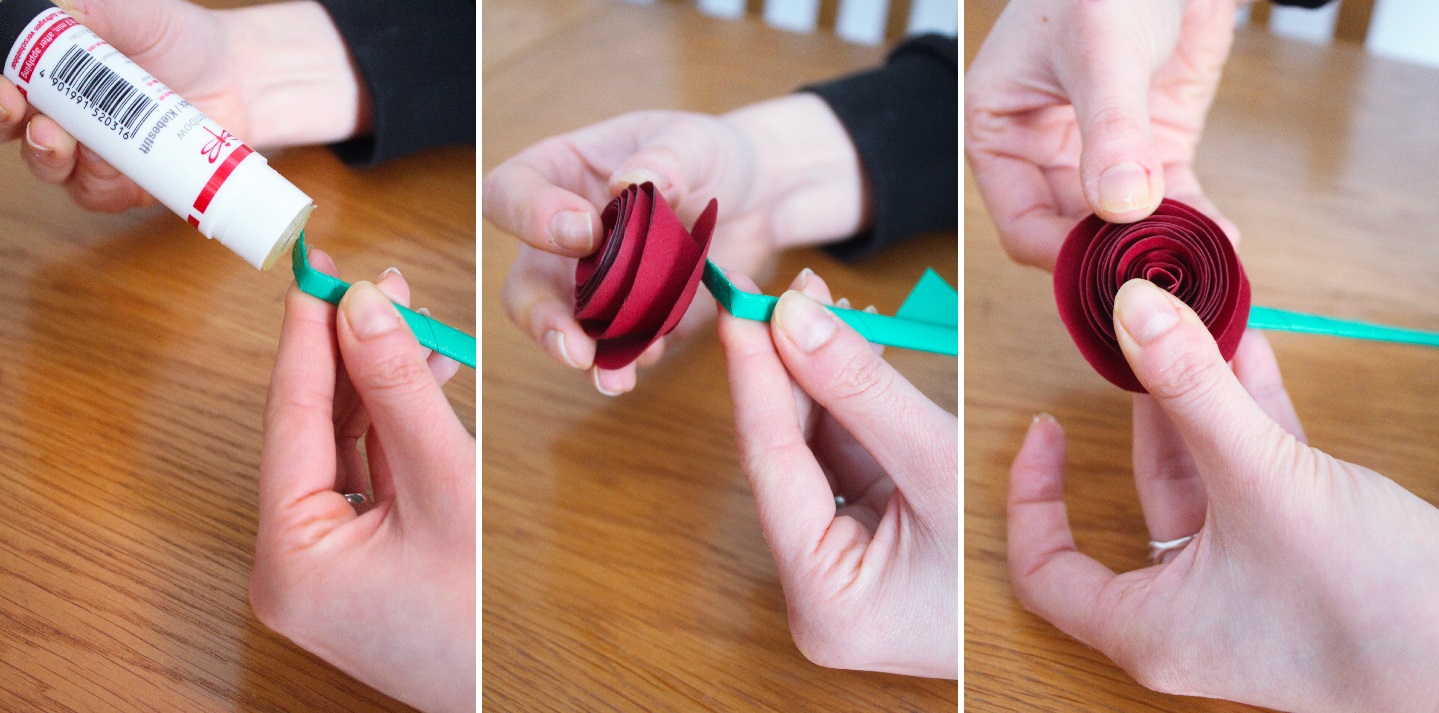
 Take a stem, fold one end slightly and apply glue on it. Then take a flower head and press it firmly onto the stem. Repeat this with all your roses and leave them to dry.
 Step 9.
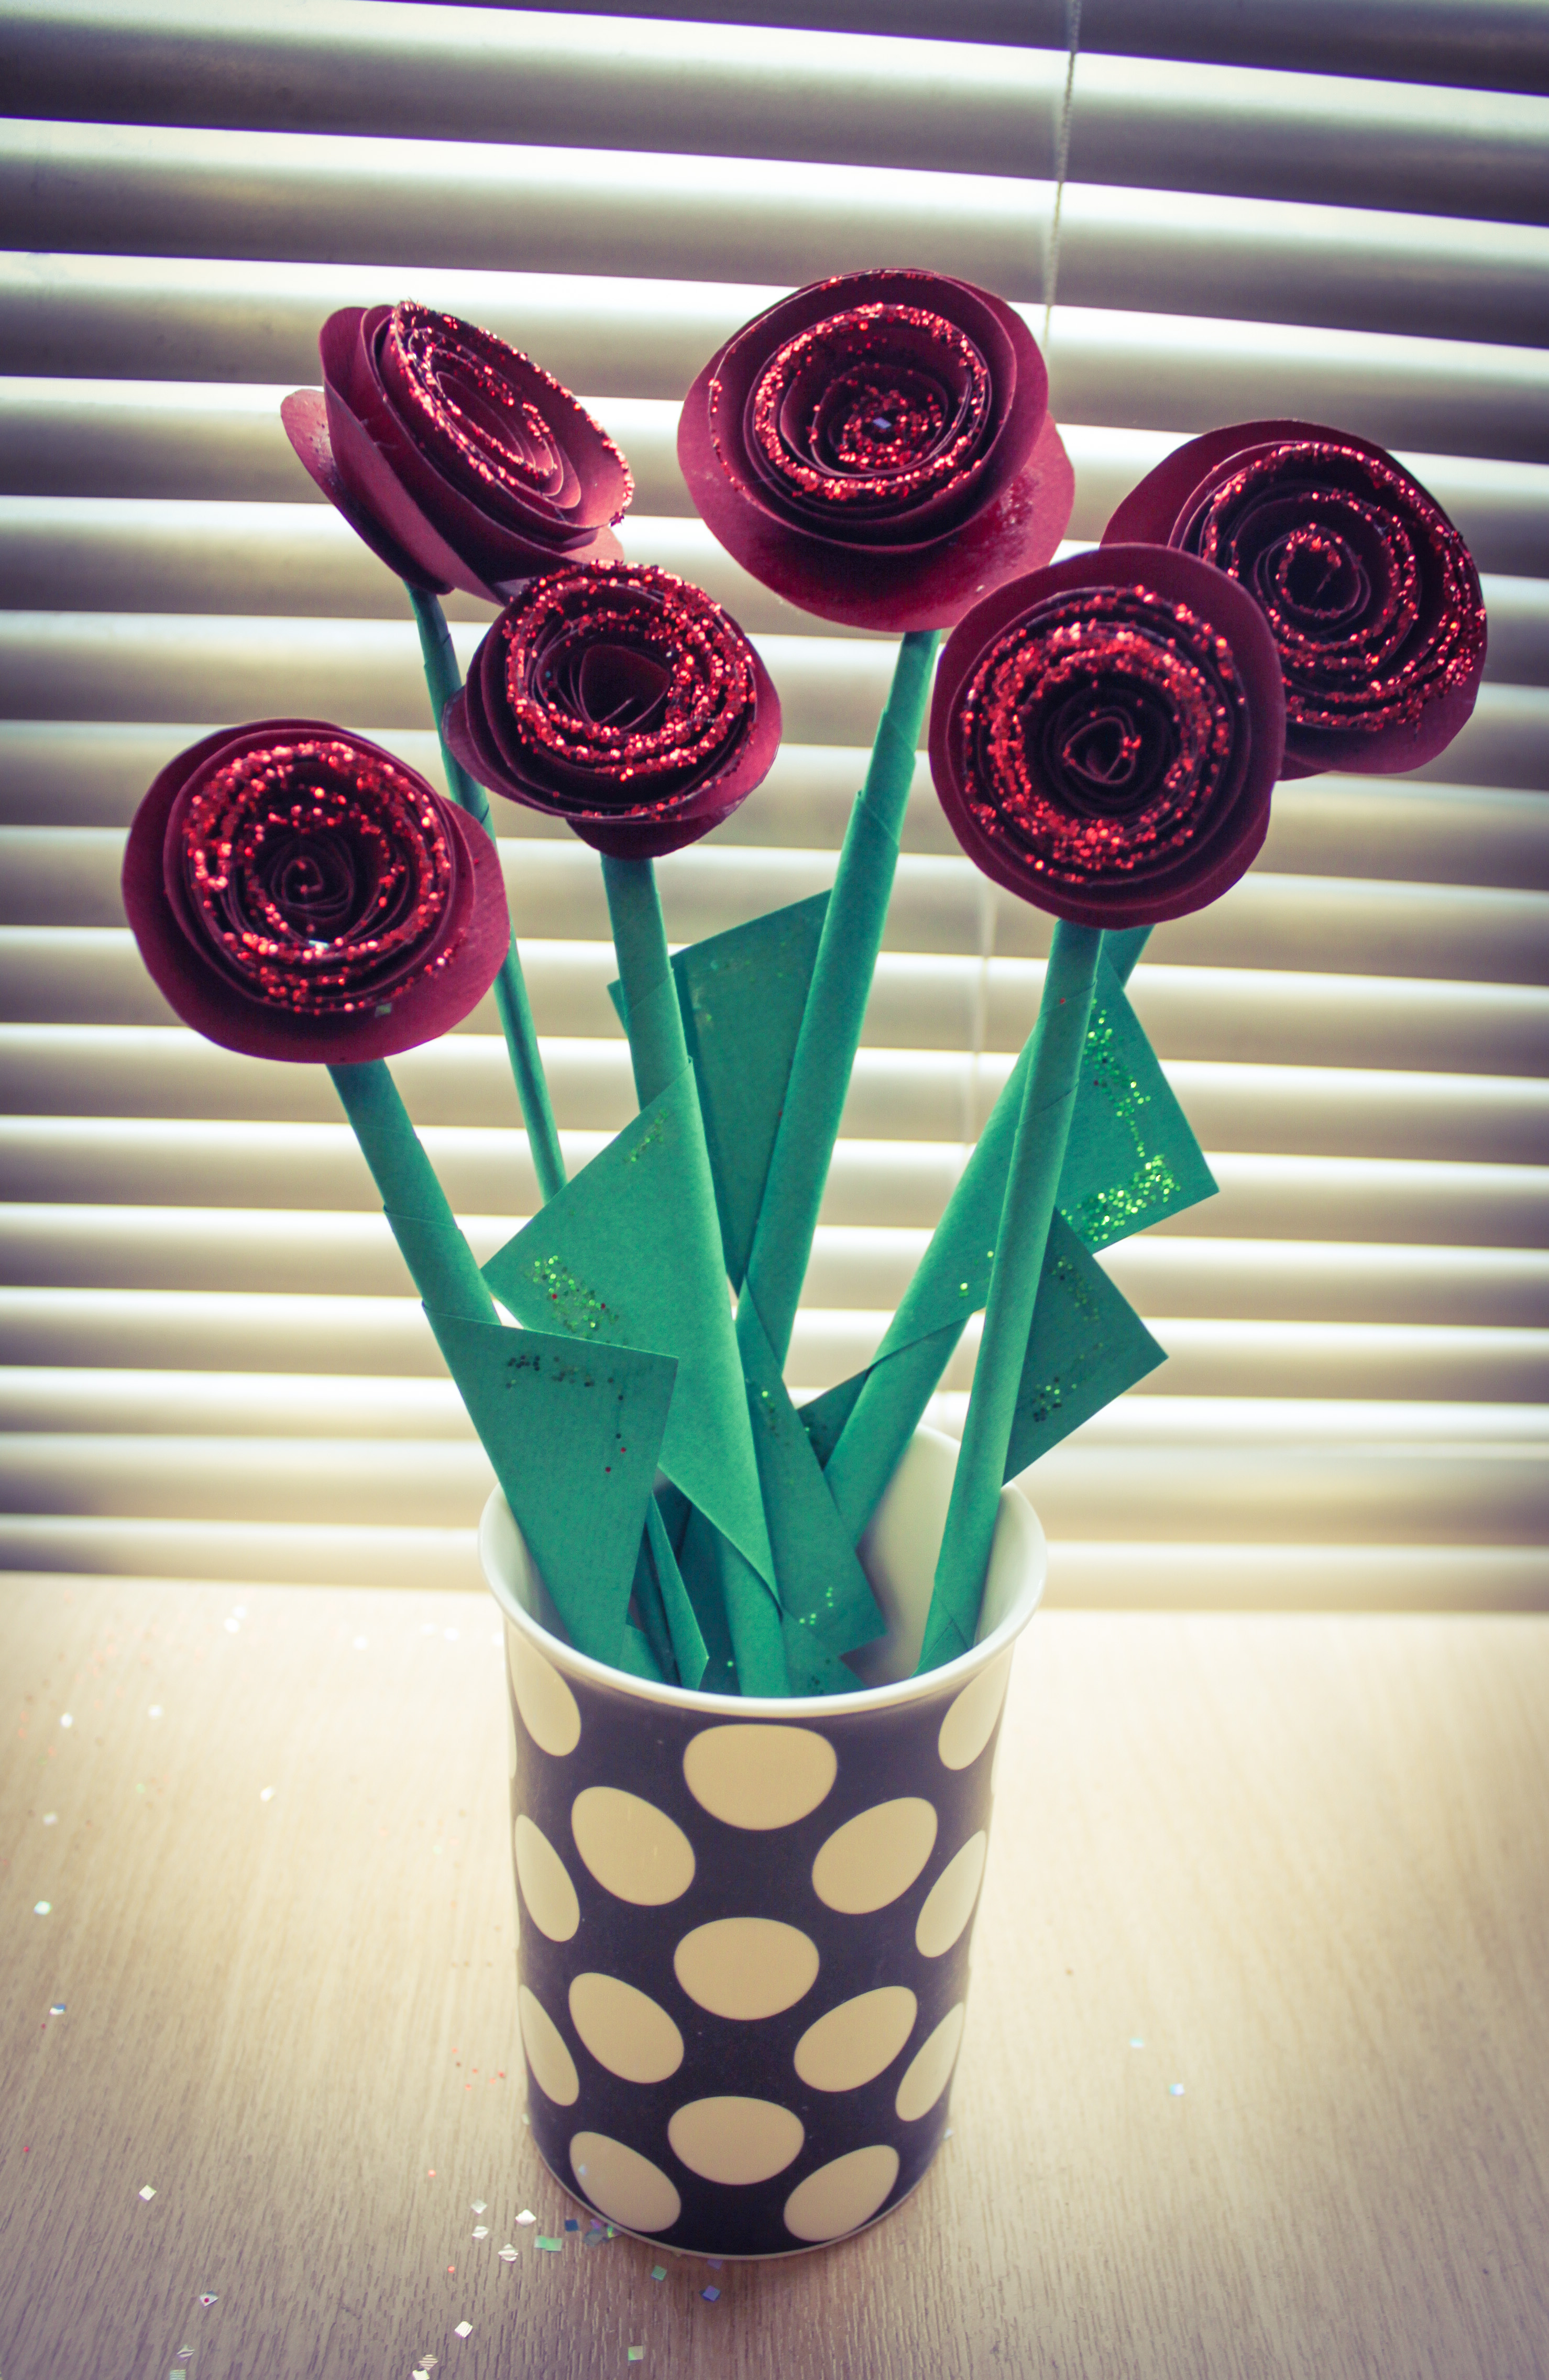
 Decorate with glitter, tie the roses together with a colourful string or arrange them neatly in a vase and you are done!
All products mentioned in this blog post can be purchased in our Hove shop or mail ordered by calling us on 01273 260260 ext. 1. Products codes are in brackets.
Lawrence Art Supplies wishes everyone a Very Happy Mother's Day!


